さくらVPS:Nginx+unicorn+Rails+MySQL(その3)

前回からあいだが開いてしまった。
実は前回の起動スクリプトで一度はうまく動いたと思ったんだけど、再度起動しようとしたら起動してくれなかったのだ。同じようにやったはずなのにどうしてだかわからない。いや、むしろ起動した時のやり方のほうが間違っていて、起動スクリプトで起動したと勘違いしていたのかもしれない。今となってはわからない。

というわけでこの1周間ずっと web を漁り続けていたわけだ。で、↓このページがヒントになった。

 cf. CentOS6にApache + RVM + UnicornでGitlab4.2構築 – Mikimemo

このページに載っている GitLab の起動スクリプトでは、環境変数 GEM_HOME と GEM_PATH を export している。これを試してみたらうまくいった。具体的には次の2行を追加した。

export GEM_HOME=/usr/local/rvm/gems/ruby-2.0.0-p481:/usr/local/rvm/gems/ruby-2.0.0-p481@global
export GEM_PATH=/usr/local/rvm/gems/ruby-2.0.0-p481:/usr/local/rvm/gems/ruby-2.0.0-p481@global

やれやれ、1周間かかってやっと解決した。

さくらVPS:Nginx+unicorn+Rails+MySQL(その2)

つづき。

unicornのインストールと設定

インストールは gem コマンド一発。

[root@www2465uo Lathercraft]# gem install unicorn

設定ファイルを ${RAILS_ROOT}/config の中に作る。

worker_processes 2
working_directory "/var/www/Lathercraft"

listen "/var/run/unicorn/unicorn_lathercraft.sock"
pid "/var/run/unicorn/unicorn_lathercraft.pid"

preload_app true

他にもいろいろ書けるみたいだけど、これで最低限のよう。sock や pid のためのディレクトリを作る。

[root@www2465uo Lathercraft]# mkdir /var/run/unicorn
[root@www2465uo Lathercraft]# chmod 777 /var/run/unicorn

ファイル自体は勝手に作ってくれるらしい。

unicornの起動

[root@www2465uo Lathercraft]# unicorn_rails -c /var/www/Lathercraft/config/unicorn.rb -E production -D

Nginxの設定

/etc/nginx/conf.d/www.lathercraft.new.conf を次のようにした。

upstream unicorn-lathercraft {
    server unix:/var/run/unicorn/unicorn_lathercraft.sock;
}

server {
    # port
    listen 80;

    # server name
    server_name www.lathercraft.net;

    # document root
    root /var/www/Lathercraft;

    # index
    #index index.php index.html index.htm;

    # log files
    access_log /var/log/nginx/www.lathercraft.net/access.log main;
    error_log /var/log/nginx/www.lathercraft.net/error.log warn;

    location / {
        root /var/www/Lathercraft;

        proxy_set_header X-Real-IP $remote_addr;
        proxy_set_header X-Forwarded-For $proxy_add_x_forwarded_for;
        proxy_set_header Host $http_host;
        proxy_pass http://unicorn-lathercraft;
    }

}

これで Nginx を再起動。

[root@www2465uo www]# service nginx restart
nginx を停止中:                                            [  OK  ]
nginx を起動中:                                            [  OK  ]

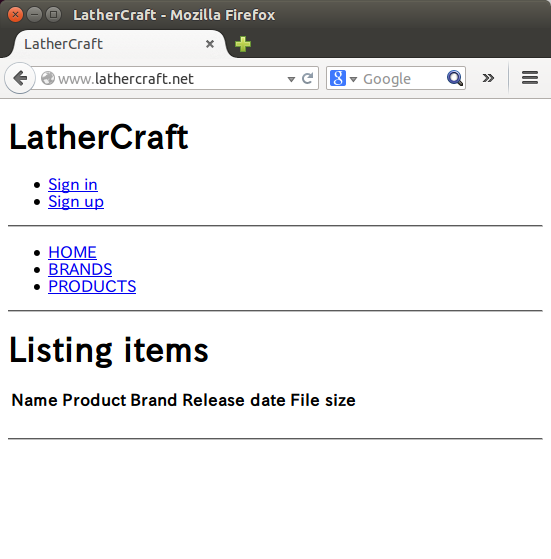
ブラウザからアクセスすると、アプリのホームページが表示された!

lathercraft-home-20140814

unicornの自動起動

さいごに、OS を起動した時に unicorn も自動起動するようにしておく。/etc/init.d/unicorn_lathercraft を次のようにした。

#!/bin/bash
#
# unicorn_lathercraft Startup script for unicorn.
#
# chkconfig: - 85 15
# description: lathercraft on unicorn start/stop script.
#

set -u
set -e

export PATH=/usr/local/rvm/rubies/ruby-2.0.0-p481/bin:/usr/local/rvm/gems/ruby-2.0.0-p481/bin:$PATH
APP_NAME=Lathercraft
APP_ROOT="/var/www/$APP_NAME"
CNF="$APP_ROOT/config/unicorn.rb"
PID="/var/run/unicorn/unicorn_lathercraft.pid"
ENV=production
UNICORN_OPTS="-c $CNF -E $ENV -D"
old_pid="$PID.oldbin"

cd $APP_ROOT || exit 1

sig () {
test -s "$PID" && kill -$1 `cat $PID`
}
oldsig () {
test -s $old_pid && kill -$1 `cat $old_pid`
}

case ${1-help} in
start)
sig 0 && echo >&2 "Already running" && exit 0
cd $APP_ROOT ; unicorn_rails $UNICORN_OPTS
;;
stop)
sig QUIT && exit 0
echo >&2 "Not running"
;;
force-stop)
sig TERM && exit 0
echo >&2 "Not running"
;;
restart|reload)
sig HUP && echo reloaded OK && exit 0
echo >&2 "Couldn't reload, starting instead"
unicorn_rails $UNICORN_OPTS
;;
upgrade)
sig USR2 && exit 0
echo >&2 "Couldn't upgrade, starting instead"
unicorn_rails $UNICORN_OPTS
;;
rotate)
sig USR1 && echo rotated logs OK && exit 0
echo >&2 "Couldn't rotate logs" && exit 1
;;
*)
echo >&2 "Usage: $0 <start|stop|restart|upgrade|rotate|force-stop>"
exit 1
;;
esac

</start|stop|restart|upgrade|rotate|force-stop>

[root@www2465uo Lathercraft]# vim /etc/init.d/unicorn_lathercraft
[root@www2465uo Lathercraft]# chmod +x /etc/init.d/unicorn_lathercraft
[root@www2465uo Lathercraft]# chkconfig unicorn_lathercraft on
[root@www2465uo Lathercraft]# chkconfig --list unicorn_lathercraft
unicorn_lathercraft	0:off	1:off	2:on	3:on	4:on	5:on	6:off

さくらVPS:Nginx+unicorn+Rails+MySQL(その1)

MySQL

MySQLは導入済み。接続用のUNIXソケットは /ver/lib/mysql/mysql.sock。

Railsアプリ

専用のユーザーを作る。

[takatoh@www2465uo www]$ sudo useradd lathercraft
[sudo] password for takatoh: 
[takatoh@www2465uo www]$ sudo passwd lathercraft
ユーザー lathercraft のパスワードを変更。
新しいパスワード:
新しいパスワードを再入力してください:
passwd: 全ての認証トークンが正しく更新できました。

GitHub からクローン。

[takatoh@www2465uo www]$ sudo git clone https://github.com/takatoh/Lathercraft.git
[sudo] password for takatoh: 
Initialized empty Git repository in /var/www/Lathercraft/.git/
remote: Counting objects: 1736, done.
remote: Compressing objects: 100% (12/12), done.
remote: Total 1736 (delta 2), reused 0 (delta 0)
Receiving objects: 100% (1736/1736), 178.63 KiB | 157 KiB/s, done.
Resolving deltas: 100% (1132/1132), done.
[takatoh@www2465uo www]$ sudo chown -R lathercraft:lathercraft Lathercraft
[takatoh@www2465uo www]$ cd Lathercraft
[takatoh@www2465uo Lathercraft]$ bundle install

Gemfile.lock に書き込もうとした時に権限がなかった、ていうエラーがでた。気持ちが悪いので、パーミッションをつけてもう一度やり直し。

[takatoh@www2465uo Lathercraft]$ sudo chmod 766 Gemfile.lock
[sudo] password for takatoh: 
[takatoh@www2465uo Lathercraft]$ bundle install

OK。

config/database.yml はこうなってる。

(前略)
production:
  adapter: mysql2
  encoding: utf8
  pool: 5
  database: lathercraft_production
  username: lathercraft
  password: <%= ENV['LATHERCRAFT_DATABASE_PASSWORD'] %>
  host: localhost

データベースを作る。

[takatoh@www2465uo Lathercraft]$ rake db:create -E production
rake aborted!
NameError: undefined local variable or method `production' for #

(See full trace by running task with --trace)
[takatoh@www2465uo Lathercraft]$ rake db:create RAILS_ENV=production
Access denied for user 'lathercraft'@'localhost' (using password: NO)Please provide the root password for your mysql installation
>

あれ、ユーザーは先に作っとかなきゃいけないのか?

[takatoh@www2465uo Lathercraft]$ mysql -u root -p
Enter password: 
Welcome to the MySQL monitor.  Commands end with ; or \g.
Your MySQL connection id is 27
Server version: 5.1.73 Source distribution

Copyright (c) 2000, 2013, Oracle and/or its affiliates. All rights reserved.

Oracle is a registered trademark of Oracle Corporation and/or its
affiliates. Other names may be trademarks of their respective
owners.

Type 'help;' or '\h' for help. Type '\c' to clear the current input statement.

mysql> CREATE USER lathercraft@localhost IDENTIFIED BY 'xxxxxxxx';
ERROR 1396 (HY000): Operation CREATE USER failed for 'lathercraft'@'localhost'
mysql> exit;
Bye
[takatoh@www2465uo Lathercraft]$ rake db:create RAILS_ENV=production

OK。
設定ファイルを編集。

[takatoh@www2465uo Lathercraft]$ sudo -s
[sudo] password for takatoh: 
[rooth@www2465uo Lathercraft]$ cp config/site_config.yml.example config/site_config.yml
[root@www2465uo Lathercraft]# vim config/site_config.yml
[root@www2465uo Lathercraft]# cp config/secrets.yml.example config/secretes.yml
[root@www2465uo Lathercraft]# vim config/secretes.yml

データベースのマイグレーション。

[root@www2465uo Lathercraft]# rake db:migrate RAILS_ENV=production
Could not find tzinfo-1.2.1 in any of the sources
Run `bundle install` to install missing gems.

tzinfo がないとな?

[root@www2465uo Lathercraft]# gem list

*** LOCAL GEMS ***

actionmailer (4.1.4)
actionpack (4.1.4)
actionview (4.1.4)
activemodel (4.1.4)
activerecord (4.1.4)
activesupport (4.1.4)
arel (5.0.1.20140414130214)
bigdecimal (1.2.0)
builder (3.2.2)
bundler (1.6.2)
bundler-unload (1.0.2)
coffee-rails (4.0.1)
coffee-script (2.3.0)
coffee-script-source (1.7.1)
erubis (2.7.0)
execjs (2.2.1)
executable-hooks (1.3.2)
gem-wrappers (1.2.4)
hike (1.2.3)
i18n (0.6.11)
io-console (0.4.2)
jbuilder (2.1.3)
jquery-rails (3.1.1)
json (1.8.1, 1.7.7)
mail (2.5.4)
mime-types (1.25.1)
minitest (5.4.0, 4.3.2)
multi_json (1.10.1)
mysql2 (0.3.16)
polyglot (0.3.5)
psych (2.0.0)
rack (1.5.2)
rack-test (0.6.2)
rails (4.1.4)
railties (4.1.4)
rake (10.3.2, 0.9.6)
rdoc (4.1.1, 4.0.0)
rubygems-bundler (1.4.4)
rvm (1.11.3.9)
sass (3.2.19)
sass-rails (4.0.3)
sdoc (0.4.1)
spring (1.1.3)
sprockets (2.12.1, 2.11.0)
sprockets-rails (2.1.3)
sqlite3 (1.3.9)
test-unit (2.0.0.0)
thor (0.19.1)
thread_safe (0.3.4)
tilt (1.4.1)
treetop (1.4.15)
turbolinks (2.2.2)
tzinfo (1.2.2)
uglifier (2.5.3)

入ってるじゃん。あ、1.2.1 じゃないとダメなのか?

[root@www2465uo Lathercraft]# gem install tzinfo -v '1.2.1'
Fetching: tzinfo-1.2.1.gem (100%)
Successfully installed tzinfo-1.2.1
Parsing documentation for tzinfo-1.2.1
Installing ri documentation for tzinfo-1.2.1
Done installing documentation for tzinfo after 4 seconds
1 gem installed

その後も mini_portile-0.6.0 とか nokogiri-1.6.3.1 とかが見つからないっていうエラーが出たけど、bundle install したら大丈夫のようだ。
じゃ、あらためて。

[root@www2465uo Lathercraft]# rake db:migrate RAILS_ENV=production
rake aborted!
Devise.secret_key was not set. Please add the following to your Devise initializer:

  config.secret_key = 'd3fd9f7eeef0d53467781729d97e738b88f3f1e3c854d3b8151ef5b32f388dca8620943c83303e76d098d553f058e222ee09df5040b86400c48b48c28da54183'

Please ensure you restarted your application after installing Devise or setting the key.
/usr/local/rvm/gems/ruby-2.0.0-p481/gems/devise-3.2.4/lib/devise/rails/routes.rb:481:in `raise_no_secret_key'
/usr/local/rvm/gems/ruby-2.0.0-p481/gems/devise-3.2.4/lib/devise/rails/routes.rb:206:in `devise_for'
/var/www/Lathercraft/config/routes.rb:20:in `block in '
/usr/local/rvm/gems/ruby-2.0.0-p481/gems/actionpack-4.1.4/lib/action_dispatch/routing/route_set.rb:337:in `instance_exec'
/usr/local/rvm/gems/ruby-2.0.0-p481/gems/actionpack-4.1.4/lib/action_dispatch/routing/route_set.rb:337:in `eval_block'
/usr/local/rvm/gems/ruby-2.0.0-p481/gems/actionpack-4.1.4/lib/action_dispatch/routing/route_set.rb:315:in `draw'
/var/www/Lathercraft/config/routes.rb:1:in `'
/usr/local/rvm/gems/ruby-2.0.0-p481/gems/activesupport-4.1.4/lib/active_support/dependencies.rb:241:in `load'
/usr/local/rvm/gems/ruby-2.0.0-p481/gems/activesupport-4.1.4/lib/active_support/dependencies.rb:241:in `block in load'
/usr/local/rvm/gems/ruby-2.0.0-p481/gems/activesupport-4.1.4/lib/active_support/dependencies.rb:232:in `load_dependency'
/usr/local/rvm/gems/ruby-2.0.0-p481/gems/activesupport-4.1.4/lib/active_support/dependencies.rb:241:in `load'
/usr/local/rvm/gems/ruby-2.0.0-p481/gems/railties-4.1.4/lib/rails/application/routes_reloader.rb:40:in `block in load_paths'
/usr/local/rvm/gems/ruby-2.0.0-p481/gems/railties-4.1.4/lib/rails/application/routes_reloader.rb:40:in `each'
/usr/local/rvm/gems/ruby-2.0.0-p481/gems/railties-4.1.4/lib/rails/application/routes_reloader.rb:40:in `load_paths'
/usr/local/rvm/gems/ruby-2.0.0-p481/gems/railties-4.1.4/lib/rails/application/routes_reloader.rb:16:in `reload!'
/usr/local/rvm/gems/ruby-2.0.0-p481/gems/railties-4.1.4/lib/rails/application/routes_reloader.rb:26:in `block in updater'
/usr/local/rvm/gems/ruby-2.0.0-p481/gems/activesupport-4.1.4/lib/active_support/file_update_checker.rb:75:in `call'
/usr/local/rvm/gems/ruby-2.0.0-p481/gems/activesupport-4.1.4/lib/active_support/file_update_checker.rb:75:in `execute'
/usr/local/rvm/gems/ruby-2.0.0-p481/gems/railties-4.1.4/lib/rails/application/routes_reloader.rb:27:in `updater'
/usr/local/rvm/gems/ruby-2.0.0-p481/gems/railties-4.1.4/lib/rails/application/routes_reloader.rb:7:in `execute_if_updated'
/usr/local/rvm/gems/ruby-2.0.0-p481/gems/railties-4.1.4/lib/rails/application/finisher.rb:71:in `block in '
/usr/local/rvm/gems/ruby-2.0.0-p481/gems/railties-4.1.4/lib/rails/initializable.rb:30:in `instance_exec'
/usr/local/rvm/gems/ruby-2.0.0-p481/gems/railties-4.1.4/lib/rails/initializable.rb:30:in `run'
/usr/local/rvm/gems/ruby-2.0.0-p481/gems/railties-4.1.4/lib/rails/initializable.rb:55:in `block in run_initializers'
/usr/local/rvm/gems/ruby-2.0.0-p481/gems/railties-4.1.4/lib/rails/initializable.rb:54:in `run_initializers'
/usr/local/rvm/gems/ruby-2.0.0-p481/gems/railties-4.1.4/lib/rails/application.rb:300:in `initialize!'
/var/www/Lathercraft/config/environment.rb:5:in `'
/usr/local/rvm/gems/ruby-2.0.0-p481/gems/activesupport-4.1.4/lib/active_support/dependencies.rb:247:in `require'
/usr/local/rvm/gems/ruby-2.0.0-p481/gems/activesupport-4.1.4/lib/active_support/dependencies.rb:247:in `block in require'
/usr/local/rvm/gems/ruby-2.0.0-p481/gems/activesupport-4.1.4/lib/active_support/dependencies.rb:232:in `load_dependency'
/usr/local/rvm/gems/ruby-2.0.0-p481/gems/activesupport-4.1.4/lib/active_support/dependencies.rb:247:in `require'
/usr/local/rvm/gems/ruby-2.0.0-p481/gems/railties-4.1.4/lib/rails/application.rb:276:in `require_environment!'
/usr/local/rvm/gems/ruby-2.0.0-p481/gems/railties-4.1.4/lib/rails/application.rb:379:in `block in run_tasks_blocks'
Tasks: TOP => db:migrate => environment
(See full trace by running task with --trace)

うおう!今度はシークレットキーか。出力されてる文字列を、config/initializers/devise.rb の該当箇所に貼り付ける。

[root@www2465uo Lathercraft]# vim config/initializers/devise.rb

今度こそどうだ。

[root@www2465uo Lathercraft]# rake db:migrate RAILS_ENV=production
== 20140708134805 CreateBrands: migrating =====================================
-- create_table(:brands)
   -> 0.1367s
-- add_index(:brands, :name, {:unique=>true})
   -> 0.1430s
-- add_index(:brands, :slug, {:unique=>true})
   -> 0.2081s
== 20140708134805 CreateBrands: migrated (0.4885s) ============================

== 20140708135345 CreateProducts: migrating ===================================
-- create_table(:products)
   -> 0.0521s
-- add_index(:products, [:brand_id, :slug], {:unique=>true})
   -> 0.0269s
== 20140708135345 CreateProducts: migrated (0.0794s) ==========================

== 20140708140110 CreateItems: migrating ======================================
-- create_table(:items)
   -> 0.0132s
-- add_index(:items, :md5, {:unique=>true})
   -> 0.0350s
== 20140708140110 CreateItems: migrated (0.0485s) =============================

== 20140708215016 DeviseCreateUsers: migrating ================================
-- create_table(:users)
   -> 0.0087s
-- add_index(:users, :email, {:unique=>true})
   -> 0.0153s
-- add_index(:users, :reset_password_token, {:unique=>true})
   -> 0.0266s
-- add_index(:users, :confirmation_token, {:unique=>true})
   -> 0.0146s
== 20140708215016 DeviseCreateUsers: migrated (0.0658s) =======================

== 20140719083223 CreateCategories: migrating =================================
-- create_table(:categories)
   -> 0.0059s
== 20140719083223 CreateCategories: migrated (0.0060s) ========================

== 20140719085230 AddCategoryIdToItem: migrating ==============================
-- add_column(:items, :category_id, :integer)
   -> 0.0115s
== 20140719085230 AddCategoryIdToItem: migrated (0.0116s) =====================

== 20140720065147 AddAdminToUsers: migrating ==================================
-- add_column(:users, :admin, :boolean, {:null=>false, :default=>false})
   -> 0.0157s
== 20140720065147 AddAdminToUsers: migrated (0.0158s) =========================

== 20140720134222 CreateStorages: migrating ===================================
-- create_table(:storages)
   -> 0.0070s
== 20140720134222 CreateStorages: migrated (0.0071s) ==========================

== 20140721073254 CreateDownloads: migrating ==================================
-- create_table(:downloads)
   -> 0.0060s
== 20140721073254 CreateDownloads: migrated (0.0060s) =========================

== 20140721080127 CreateStoredItems: migrating ================================
-- create_table(:stored_items)
   -> 0.0075s
== 20140721080127 CreateStoredItems: migrated (0.0076s) =======================

== 20140801123109 CreateRemovedItems: migrating ===============================
-- create_table(:removed_items)
   -> 0.0074s
== 20140801123109 CreateRemovedItems: migrated (0.0075s) ======================

== 20140801132346 AddBrandToRemovedItems: migrating ===========================
-- add_column(:removed_items, :brand, :string)
   -> 0.0109s
== 20140801132346 AddBrandToRemovedItems: migrated (0.0110s) ==================

== 20140802001131 AddNameToUsers: migrating ===================================
-- add_column(:users, :name, :string)
   -> 0.0770s
-- add_index(:users, :name, {:unique=>true})
   -> 0.0185s
== 20140802001131 AddNameToUsers: migrated (0.0958s) ==========================

== 20140802070045 CreateContacts: migrating ===================================
-- create_table(:contacts)
   -> 0.0095s
== 20140802070045 CreateContacts: migrated (0.0096s) ==========================

== 20140808134556 AddOnHoldToItems: migrating =================================
-- add_column(:items, :on_hold, :boolean)
   -> 0.0145s
== 20140808134556 AddOnHoldToItems: migrated (0.0147s) ========================

やった!
ついでに、production 環境用の secret_key_base を環境変数に設定して、アプリを起動してみる。

[root@www2465uo Lathercraft]# export SECRET_KEY_BASE=`rake secret`
[root@www2465uo Lathercraft]# rails server -e production
=> Booting WEBrick
=> Rails 4.1.4 application starting in production on http://0.0.0.0:3000
=> Run `rails server -h` for more startup options
=> Notice: server is listening on all interfaces (0.0.0.0). Consider using 127.0.0.1 (--binding option)
=> Ctrl-C to shutdown server
[2014-08-14 15:18:04] INFO  WEBrick 1.3.1
[2014-08-14 15:18:04] INFO  ruby 2.0.0 (2014-05-08) [x86_64-linux]
[2014-08-14 15:18:04] INFO  WEBrick::HTTPServer#start: pid=27822 port=3000

ブラウザからアクセスすると、ちゃんとページが表示された。

というところで、今回はここまで。
さくらVPS:rootユーザー用にRubyとRailsをインストール

rvmとRubyのインストール

前回は、作業用ユーザーの環境に rvm と Ruby をインストールしたけど、今回は root ユーザーの環境にインストールする。ま、このへんは基本的に前回と同じ作業なので、簡単に。rvm のインストールから。

[root@www2465uo takatoh]# curl -L https://get.rvm.io | bash -s stable
[root@www2465uo takatoh]# source /etc/profile.d/rvm.sh

rvm list known でインストール可能なバージョンが見られる。

[root@www2465uo takatoh]# rvm list known
# MRI Rubies
[ruby-]1.8.6[-p420]
[ruby-]1.8.7[-head] # security released on head
[ruby-]1.9.1[-p431]
[ruby-]1.9.2[-head] # security released on head
[ruby-]1.9.3[-p547]
[ruby-]2.0.0-p451
[ruby-]2.0.0[-p481]
[ruby-]2.1.1
[ruby-]2.1[.2]
[ruby-]2.1-head
ruby-head

# GoRuby
goruby

# Topaz
topaz

# TheCodeShop - MRI experimental patches
tcs

# jamesgolick - All around gangster
jamesgolick

# Minimalistic ruby implementation - ISO 30170:2012
mruby[-head]

# JRuby
jruby-1.6.8
jruby[-1.7.13]
jruby-head

# Rubinius
rbx-1.3.3
rbx-2.0.0
rbx-2.1.1
rbx[-2.2.10]
rbx-head

# Ruby Enterprise Edition
ree-1.8.6
ree[-1.8.7][-2012.02]

# Kiji
kiji

# MagLev
maglev[-head]
maglev-1.0.0

# Mac OS X Snow Leopard Or Newer
macruby-0.10
macruby-0.11
macruby[-0.12]
macruby-nightly
macruby-head

# Opal
opal

# IronRuby
ironruby[-1.1.3]
ironruby-head

Ruby 2.0.0 をインストール。

[root@www2465uo takatoh]# rvm install 2.0.0
[root@www2465uo takatoh]# ruby -v
ruby 2.0.0p481 (2014-05-08 revision 45883) [x86_64-linux]
[root@www2465uo takatoh]# which ruby
/usr/local/rvm/rubies/ruby-2.0.0-p481/bin/ruby

へえ、root ユーザーでインストールすると /usr/local 以下にインストールされるんだ。

Ruby on Railsのインストール

[root@www2465uo takatoh]# gem install rails

長々とメッセージが出ていっぱいインストールされる。

サンプルアプリの作成

とりあえず Rails でアプリを作ってみる。

[root@www2465uo takatoh]# rails new myapp -d mysql
      create  
      create  README.rdoc
      create  Rakefile
      create  config.ru
      create  .gitignore
      create  Gemfile
      create  app
      create  app/assets/javascripts/application.js
      create  app/assets/stylesheets/application.css
      create  app/controllers/application_controller.rb
      create  app/helpers/application_helper.rb
      create  app/views/layouts/application.html.erb
      create  app/assets/images/.keep
      create  app/mailers/.keep
      create  app/models/.keep
      create  app/controllers/concerns/.keep
      create  app/models/concerns/.keep
      create  bin
      create  bin/bundle
      create  bin/rails
      create  bin/rake
      create  config
      create  config/routes.rb
      create  config/application.rb
      create  config/environment.rb
      create  config/secrets.yml
      create  config/environments
      create  config/environments/development.rb
      create  config/environments/production.rb
      create  config/environments/test.rb
      create  config/initializers
      create  config/initializers/assets.rb
      create  config/initializers/backtrace_silencers.rb
      create  config/initializers/cookies_serializer.rb
      create  config/initializers/filter_parameter_logging.rb
      create  config/initializers/inflections.rb
      create  config/initializers/mime_types.rb
      create  config/initializers/session_store.rb
      create  config/initializers/wrap_parameters.rb
      create  config/locales
      create  config/locales/en.yml
      create  config/boot.rb
      create  config/database.yml
      create  db
      create  db/seeds.rb
      create  lib
      create  lib/tasks
      create  lib/tasks/.keep
      create  lib/assets
      create  lib/assets/.keep
      create  log
      create  log/.keep
      create  public
      create  public/404.html
      create  public/422.html
      create  public/500.html
      create  public/favicon.ico
      create  public/robots.txt
      create  test/fixtures
      create  test/fixtures/.keep
      create  test/controllers
      create  test/controllers/.keep
      create  test/mailers
      create  test/mailers/.keep
      create  test/models
      create  test/models/.keep
      create  test/helpers
      create  test/helpers/.keep
      create  test/integration
      create  test/integration/.keep
      create  test/test_helper.rb
      create  tmp/cache
      create  tmp/cache/assets
      create  vendor/assets/javascripts
      create  vendor/assets/javascripts/.keep
      create  vendor/assets/stylesheets
      create  vendor/assets/stylesheets/.keep
         run  bundle install
Don't run Bundler as root. Bundler can ask for sudo if it is needed, and
installing your bundle as root will break this application for all non-root
users on this machine.
Fetching gem metadata from https://rubygems.org/...........
Resolving dependencies...
Using rake 10.3.2
Using i18n 0.6.11
Using json 1.8.1
Using minitest 5.4.0
Using thread_safe 0.3.4
Using tzinfo 1.2.2
Using activesupport 4.1.4
Using builder 3.2.2
Using erubis 2.7.0
Using actionview 4.1.4
Using rack 1.5.2
Using rack-test 0.6.2
Using actionpack 4.1.4
Using mime-types 1.25.1
Using polyglot 0.3.5
Using treetop 1.4.15
Using mail 2.5.4
Using actionmailer 4.1.4
Using activemodel 4.1.4
Using arel 5.0.1.20140414130214
Using activerecord 4.1.4
Using bundler 1.6.2
Using coffee-script-source 1.7.1
Using execjs 2.2.1
Using coffee-script 2.3.0
Using thor 0.19.1
Using railties 4.1.4
Using coffee-rails 4.0.1
Using hike 1.2.3
Using multi_json 1.10.1
Using jbuilder 2.1.3
Using jquery-rails 3.1.1

Gem::Ext::BuildError: ERROR: Failed to build gem native extension.

    /usr/local/rvm/rubies/ruby-2.0.0-p481/bin/ruby extconf.rb 
checking for ruby/thread.h... yes
checking for rb_thread_call_without_gvl() in ruby/thread.h... yes
checking for rb_thread_blocking_region()... yes
checking for rb_wait_for_single_fd()... yes
checking for rb_hash_dup()... yes
checking for rb_intern3()... yes
-----
Using mysql_config at /usr/bin/mysql_config
-----
checking for mysql.h... no
checking for mysql/mysql.h... no
-----
mysql.h is missing.  please check your installation of mysql and try again.
-----
*** extconf.rb failed ***
Could not create Makefile due to some reason, probably lack of necessary
libraries and/or headers.  Check the mkmf.log file for more details.  You may
need configuration options.

Provided configuration options:
	--with-opt-dir
	--without-opt-dir
	--with-opt-include
	--without-opt-include=${opt-dir}/include
	--with-opt-lib
	--without-opt-lib=${opt-dir}/lib
	--with-make-prog
	--without-make-prog
	--srcdir=.
	--curdir
	--ruby=/usr/local/rvm/rubies/ruby-2.0.0-p481/bin/ruby
	--with-mysql-dir
	--without-mysql-dir
	--with-mysql-include
	--without-mysql-include=${mysql-dir}/include
	--with-mysql-lib
	--without-mysql-lib=${mysql-dir}/
	--with-mysql-config
	--without-mysql-config

extconf failed, exit code 1

Gem files will remain installed in /usr/local/rvm/gems/ruby-2.0.0-p481/gems/mysql2-0.3.16 for inspection.
Results logged to /usr/local/rvm/gems/ruby-2.0.0-p481/extensions/x86_64-linux/2.0.0/mysql2-0.3.16/gem_make.out
An error occurred while installing mysql2 (0.3.16), and Bundler cannot continue.
Make sure that `gem install mysql2 -v '0.3.16'` succeeds before bundling.
         run  bundle exec spring binstub --all
/usr/local/rvm/gems/ruby-2.0.0-p481@global/gems/bundler-1.6.2/lib/bundler/resolver.rb:352:in `resolve': Could not find gem 'mysql2 (>= 0) ruby' in the gems available on this machine. (Bundler::GemNotFound)
	from /usr/local/rvm/gems/ruby-2.0.0-p481@global/gems/bundler-1.6.2/lib/bundler/resolver.rb:165:in `start'
	from /usr/local/rvm/gems/ruby-2.0.0-p481@global/gems/bundler-1.6.2/lib/bundler/resolver.rb:129:in `resolve'
	from /usr/local/rvm/gems/ruby-2.0.0-p481@global/gems/bundler-1.6.2/lib/bundler/definition.rb:203:in `resolve'
	from /usr/local/rvm/gems/ruby-2.0.0-p481@global/gems/bundler-1.6.2/lib/bundler/definition.rb:133:in `specs'
	from /usr/local/rvm/gems/ruby-2.0.0-p481@global/gems/bundler-1.6.2/lib/bundler/definition.rb:178:in `specs_for'
	from /usr/local/rvm/gems/ruby-2.0.0-p481@global/gems/bundler-1.6.2/lib/bundler/definition.rb:167:in `requested_specs'
	from /usr/local/rvm/gems/ruby-2.0.0-p481@global/gems/bundler-1.6.2/lib/bundler/environment.rb:18:in `requested_specs'
	from /usr/local/rvm/gems/ruby-2.0.0-p481@global/gems/bundler-1.6.2/lib/bundler/runtime.rb:13:in `setup'
	from /usr/local/rvm/gems/ruby-2.0.0-p481@global/gems/bundler-1.6.2/lib/bundler.rb:120:in `setup'
	from /usr/local/rvm/gems/ruby-2.0.0-p481@global/gems/bundler-1.6.2/lib/bundler/setup.rb:17:in `'
	from /usr/local/rvm/rubies/ruby-2.0.0-p481/lib/ruby/site_ruby/2.0.0/rubygems/core_ext/kernel_require.rb:55:in `require'
	from /usr/local/rvm/rubies/ruby-2.0.0-p481/lib/ruby/site_ruby/2.0.0/rubygems/core_ext/kernel_require.rb:55:in `require'

おや、何かエラーが出た。mysql2 の gem がインストールできてないみたいだ。じゃ、直接インストールしてみるか。

[root@www2465uo takatoh]# gem install mysql2 -v '0.3.16'
Building native extensions.  This could take a while...
ERROR:  Error installing mysql2:
	ERROR: Failed to build gem native extension.

    /usr/local/rvm/rubies/ruby-2.0.0-p481/bin/ruby extconf.rb
checking for ruby/thread.h... yes
checking for rb_thread_call_without_gvl() in ruby/thread.h... yes
checking for rb_thread_blocking_region()... yes
checking for rb_wait_for_single_fd()... yes
checking for rb_hash_dup()... yes
checking for rb_intern3()... yes
-----
Using mysql_config at /usr/bin/mysql_config
-----
checking for mysql.h... no
checking for mysql/mysql.h... no
-----
mysql.h is missing.  please check your installation of mysql and try again.
-----
*** extconf.rb failed ***
Could not create Makefile due to some reason, probably lack of necessary
libraries and/or headers.  Check the mkmf.log file for more details.  You may
need configuration options.

Provided configuration options:
	--with-opt-dir
	--without-opt-dir
	--with-opt-include
	--without-opt-include=${opt-dir}/include
	--with-opt-lib
	--without-opt-lib=${opt-dir}/lib
	--with-make-prog
	--without-make-prog
	--srcdir=.
	--curdir
	--ruby=/usr/local/rvm/rubies/ruby-2.0.0-p481/bin/ruby
	--with-mysql-dir
	--without-mysql-dir
	--with-mysql-include
	--without-mysql-include=${mysql-dir}/include
	--with-mysql-lib
	--without-mysql-lib=${mysql-dir}/
	--with-mysql-config
	--without-mysql-config

extconf failed, exit code 1

Gem files will remain installed in /usr/local/rvm/gems/ruby-2.0.0-p481/gems/mysql2-0.3.16 for inspection.
Results logged to /usr/local/rvm/gems/ruby-2.0.0-p481/extensions/x86_64-linux/2.0.0/mysql2-0.3.16/gem_make.out

ダメのようだね。mysql.h が見つからない、といっているらしい。

[root@www2465uo takatoh]# yum install mysql-devel
Loaded plugins: fastestmirror, security
Loading mirror speeds from cached hostfile
 * base: ftp.tsukuba.wide.ad.jp
 * epel: ftp.riken.jp
 * extras: ftp.tsukuba.wide.ad.jp
 * updates: ftp.tsukuba.wide.ad.jp
Setting up Install Process
Resolving Dependencies
--> Running transaction check
---> Package mysql-devel.x86_64 0:5.1.73-3.el6_5 will be installed
--> Finished Dependency Resolution

Dependencies Resolved

================================================================================
 Package            Arch          Version                  Repository      Size
================================================================================
Installing:
 mysql-devel        x86_64        5.1.73-3.el6_5           updates        129 k

Transaction Summary
================================================================================
Install       1 Package(s)

Total download size: 129 k
Installed size: 388 k
Is this ok [y/N]: y
Downloading Packages:
mysql-devel-5.1.73-3.el6_5.x86_64.rpm                    | 129 kB     00:00     
Running rpm_check_debug
Running Transaction Test
Transaction Test Succeeded
Running Transaction
  Installing : mysql-devel-5.1.73-3.el6_5.x86_64                            1/1 
  Verifying  : mysql-devel-5.1.73-3.el6_5.x86_64                            1/1 

Installed:
  mysql-devel.x86_64 0:5.1.73-3.el6_5                                           

Complete!

今度はどうだ。

[root@www2465uo takatoh]# cd myapp
[root@www2465uo myapp]# bundle install
Don't run Bundler as root. Bundler can ask for sudo if it is needed, and
installing your bundle as root will break this application for all non-root
users on this machine.
Fetching gem metadata from https://rubygems.org/...........
Resolving dependencies...
Using rake 10.3.2
Using i18n 0.6.11
Using json 1.8.1
Using minitest 5.4.0
Using thread_safe 0.3.4
Using tzinfo 1.2.2
Using activesupport 4.1.4
Using builder 3.2.2
Using erubis 2.7.0
Using actionview 4.1.4
Using rack 1.5.2
Using rack-test 0.6.2
Using actionpack 4.1.4
Using mime-types 1.25.1
Using polyglot 0.3.5
Using treetop 1.4.15
Using mail 2.5.4
Using actionmailer 4.1.4
Using activemodel 4.1.4
Using arel 5.0.1.20140414130214
Using activerecord 4.1.4
Using bundler 1.6.2
Using coffee-script-source 1.7.1
Using execjs 2.2.1
Using coffee-script 2.3.0
Using thor 0.19.1
Using railties 4.1.4
Using coffee-rails 4.0.1
Using hike 1.2.3
Using multi_json 1.10.1
Using jbuilder 2.1.3
Using jquery-rails 3.1.1
Installing mysql2 0.3.16
Using tilt 1.4.1
Using sprockets 2.11.0
Using sprockets-rails 2.1.3
Using rails 4.1.4
Using rdoc 4.1.1
Using sass 3.2.19
Using sass-rails 4.0.3
Using sdoc 0.4.1
Using spring 1.1.3
Using turbolinks 2.2.2
Using uglifier 2.5.3
Your bundle is complete!
Use `bundle show [gemname]` to see where a bundled gem is installed.

OK みたい。
じゃ、アプリを起動してみよう。おっと、その前に 3000 番ポートを開けておかなきゃ。/etc/sysconfig/iptables を編集して次の行を挿入。

-A RH-Firewall-1-INPUT -p tcp --dport 3000 -j ACCEPT

で、iptables を再起動。

[root@www2465uo myapp]# service iptables restart
iptables: チェインをポリシー ACCEPT へ設定中filter         [  OK  ]
iptables: ファイアウォールルールを消去中:                  [  OK  ]
iptables: モジュールを取り外し中:                          [  OK  ]
iptables: ファイアウォールルールを適用中:                  [  OK  ]

よし、アプリを起動してブラウザからアクセスしてみる。

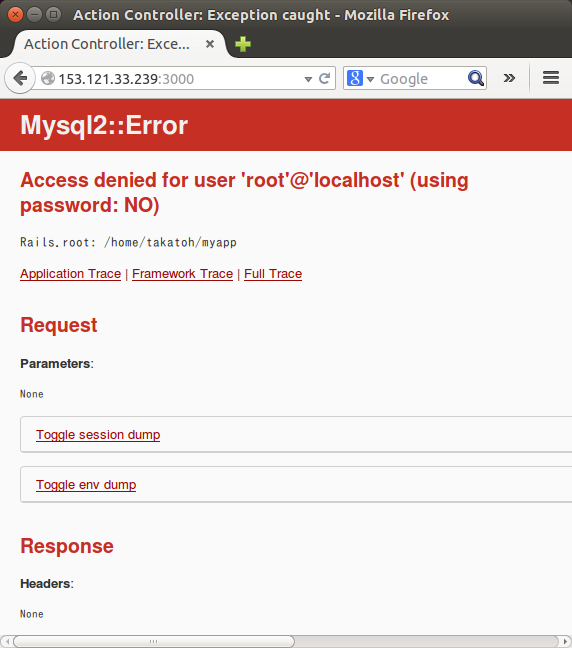
rails-mysql2-error

あー、MySQL の方を設定してないからか。

MySQLにデータベースを作る

myapp というデータベースを作って、myapp@localhost からアクセスできるようにする。

[root@www2465uo myapp]# mysql -u root -p
Enter password: 
Welcome to the MySQL monitor.  Commands end with ; or \g.
Your MySQL connection id is 441
Server version: 5.1.73 Source distribution

Copyright (c) 2000, 2013, Oracle and/or its affiliates. All rights reserved.

Oracle is a registered trademark of Oracle Corporation and/or its
affiliates. Other names may be trademarks of their respective
owners.

Type 'help;' or '\h' for help. Type '\c' to clear the current input statement.

mysql> CREATE USER myapp@localhost IDENTIFIED BY 'myapp';
Query OK, 0 rows affected (0.00 sec)

mysql> CREATE DATABASE myapp_development;
Query OK, 1 row affected (0.00 sec)

mysql> GRANT ALL ON myapp_development.* TO myapp;
Query OK, 0 rows affected (0.00 sec)

mysql> EXIT;
Bye

Railsのデータベースに関する設定

config/database.yml を編集。

# MySQL. Versions 5.0+ are recommended.
#
# Install the MYSQL driver
# gem install mysql2
#
# Ensure the MySQL gem is defined in your Gemfile
# gem 'mysql2'
#
# And be sure to use new-style password hashing:
# http://dev.mysql.com/doc/refman/5.0/en/old-client.html
#
default: &default
adapter: mysql2
encoding: utf8
pool: 5
username: myapp
password: myapp
socket: /var/lib/mysql/mysql.sock

development:
<<: *default database: myapp_development 
(後略)

Railsの起動と確認

[root@www2465uo myapp]# rake db:setup
myapp_development already exists
Mysql2::Error: Access denied for user 'myapp'@'localhost' to database 'myapp_test': CREATE DATABASE `myapp_test` DEFAULT CHARACTER SET `utf8` COLLATE `utf8_unicode_ci`
/usr/local/rvm/gems/ruby-2.0.0-p481/gems/activerecord-4.1.4/lib/active_record/connection_adapters/abstract_mysql_adapter.rb:303:in `query'
/usr/local/rvm/gems/ruby-2.0.0-p481/gems/activerecord-4.1.4/lib/active_record/connection_adapters/abstract_mysql_adapter.rb:303:in `block in execute'
/usr/local/rvm/gems/ruby-2.0.0-p481/gems/activerecord-4.1.4/lib/active_record/connection_adapters/abstract_adapter.rb:373:in `block in log'
/usr/local/rvm/gems/ruby-2.0.0-p481/gems/activesupport-4.1.4/lib/active_support/notifications/instrumenter.rb:20:in `instrument'
/usr/local/rvm/gems/ruby-2.0.0-p481/gems/activerecord-4.1.4/lib/active_record/connection_adapters/abstract_adapter.rb:367:in `log'
/usr/local/rvm/gems/ruby-2.0.0-p481/gems/activerecord-4.1.4/lib/active_record/connection_adapters/abstract_mysql_adapter.rb:303:in `execute'
/usr/local/rvm/gems/ruby-2.0.0-p481/gems/activerecord-4.1.4/lib/active_record/connection_adapters/mysql2_adapter.rb:228:in `execute'
/usr/local/rvm/gems/ruby-2.0.0-p481/gems/activerecord-4.1.4/lib/active_record/connection_adapters/abstract_mysql_adapter.rb:371:in `create_database'
/usr/local/rvm/gems/ruby-2.0.0-p481/gems/activerecord-4.1.4/lib/active_record/tasks/mysql_database_tasks.rb:16:in `create'
/usr/local/rvm/gems/ruby-2.0.0-p481/gems/activerecord-4.1.4/lib/active_record/tasks/database_tasks.rb:88:in `create'
/usr/local/rvm/gems/ruby-2.0.0-p481/gems/activerecord-4.1.4/lib/active_record/tasks/database_tasks.rb:102:in `block in create_current'
/usr/local/rvm/gems/ruby-2.0.0-p481/gems/activerecord-4.1.4/lib/active_record/tasks/database_tasks.rb:209:in `block in each_current_configuration'
/usr/local/rvm/gems/ruby-2.0.0-p481/gems/activerecord-4.1.4/lib/active_record/tasks/database_tasks.rb:208:in `each'
/usr/local/rvm/gems/ruby-2.0.0-p481/gems/activerecord-4.1.4/lib/active_record/tasks/database_tasks.rb:208:in `each_current_configuration'
/usr/local/rvm/gems/ruby-2.0.0-p481/gems/activerecord-4.1.4/lib/active_record/tasks/database_tasks.rb:101:in `create_current'
/usr/local/rvm/gems/ruby-2.0.0-p481/gems/activerecord-4.1.4/lib/active_record/railties/databases.rake:17:in `block (2 levels) in '
/usr/local/rvm/gems/ruby-2.0.0-p481/gems/rake-10.3.2/lib/rake/task.rb:240:in `call'
/usr/local/rvm/gems/ruby-2.0.0-p481/gems/rake-10.3.2/lib/rake/task.rb:240:in `block in execute'
/usr/local/rvm/gems/ruby-2.0.0-p481/gems/rake-10.3.2/lib/rake/task.rb:235:in `each'
/usr/local/rvm/gems/ruby-2.0.0-p481/gems/rake-10.3.2/lib/rake/task.rb:235:in `execute'
/usr/local/rvm/gems/ruby-2.0.0-p481/gems/rake-10.3.2/lib/rake/task.rb:179:in `block in invoke_with_call_chain'
/usr/local/rvm/rubies/ruby-2.0.0-p481/lib/ruby/2.0.0/monitor.rb:211:in `mon_synchronize'
/usr/local/rvm/gems/ruby-2.0.0-p481/gems/rake-10.3.2/lib/rake/task.rb:172:in `invoke_with_call_chain'
/usr/local/rvm/gems/ruby-2.0.0-p481/gems/rake-10.3.2/lib/rake/task.rb:201:in `block in invoke_prerequisites'
/usr/local/rvm/gems/ruby-2.0.0-p481/gems/rake-10.3.2/lib/rake/task.rb:199:in `each'
/usr/local/rvm/gems/ruby-2.0.0-p481/gems/rake-10.3.2/lib/rake/task.rb:199:in `invoke_prerequisites'
/usr/local/rvm/gems/ruby-2.0.0-p481/gems/rake-10.3.2/lib/rake/task.rb:178:in `block in invoke_with_call_chain'
/usr/local/rvm/rubies/ruby-2.0.0-p481/lib/ruby/2.0.0/monitor.rb:211:in `mon_synchronize'
/usr/local/rvm/gems/ruby-2.0.0-p481/gems/rake-10.3.2/lib/rake/task.rb:172:in `invoke_with_call_chain'
/usr/local/rvm/gems/ruby-2.0.0-p481/gems/rake-10.3.2/lib/rake/task.rb:165:in `invoke'
/usr/local/rvm/gems/ruby-2.0.0-p481/gems/rake-10.3.2/lib/rake/application.rb:150:in `invoke_task'
/usr/local/rvm/gems/ruby-2.0.0-p481/gems/rake-10.3.2/lib/rake/application.rb:106:in `block (2 levels) in top_level'
/usr/local/rvm/gems/ruby-2.0.0-p481/gems/rake-10.3.2/lib/rake/application.rb:106:in `each'
/usr/local/rvm/gems/ruby-2.0.0-p481/gems/rake-10.3.2/lib/rake/application.rb:106:in `block in top_level'
/usr/local/rvm/gems/ruby-2.0.0-p481/gems/rake-10.3.2/lib/rake/application.rb:115:in `run_with_threads'
/usr/local/rvm/gems/ruby-2.0.0-p481/gems/rake-10.3.2/lib/rake/application.rb:100:in `top_level'
/usr/local/rvm/gems/ruby-2.0.0-p481/gems/rake-10.3.2/lib/rake/application.rb:78:in `block in run'
/usr/local/rvm/gems/ruby-2.0.0-p481/gems/rake-10.3.2/lib/rake/application.rb:176:in `standard_exception_handling'
/usr/local/rvm/gems/ruby-2.0.0-p481/gems/rake-10.3.2/lib/rake/application.rb:75:in `run'
/usr/local/rvm/gems/ruby-2.0.0-p481/gems/rake-10.3.2/bin/rake:33:in `'
/usr/local/rvm/gems/ruby-2.0.0-p481/bin/rake:23:in `load'
/usr/local/rvm/gems/ruby-2.0.0-p481/bin/rake:23:in `
‘ Couldn’t create database for {“adapter”=>”mysql2”, “encoding”=>”utf8”, “pool”=>5, “username”=>”myapp”, “password”=>”myapp”, “socket”=>”/var/lib/mysql/mysql.sock”, “database”=>”myapp_test”} /home/takatoh/myapp/db/schema.rb doesn’t exist yet. Run `rake db:migrate` to create it, then try again. If you do not intend to use a database, you should instead alter /home/takatoh/myapp/config/application.rb to limit the frameworks that will be loaded.

なんかいろいろメッセージが出てるけど、見ないことにする。
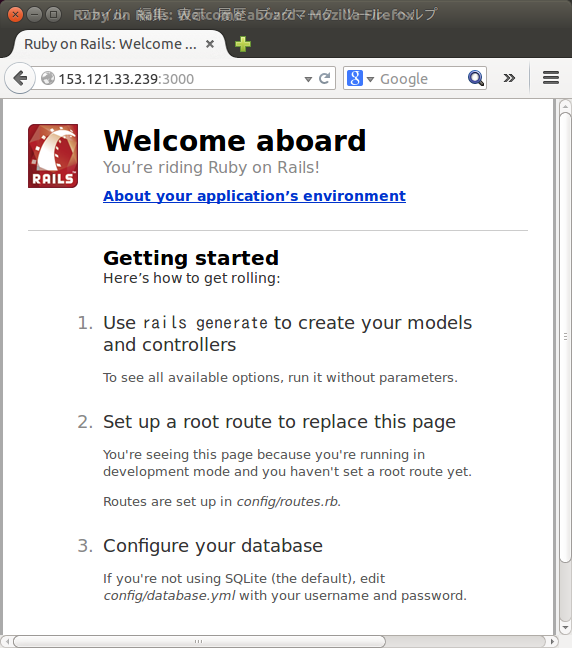
で、ブラウザからアクセスすると:

rails-welcome-aloard

今度はOK。

さくらVPSにRuby(rvm)をインストールした

yum コマンドでもインストールできるんだけど、それだと Ruby 1.8.7 だったので、rvm で Ruby 1.9.3 をインストールした。

[takatoh@www2465uo ~]$ curl -L https://get.rvm.io | bash -s stable
  % Total    % Received % Xferd  Average Speed   Time    Time     Time  Current
                                 Dload  Upload   Total   Spent    Left  Speed
100 20758  100 20758    0     0  22601      0 --:--:-- --:--:-- --:--:-- 22601
Downloading https://github.com/wayneeseguin/rvm/archive/stable.tar.gz

Installing RVM to /home/takatoh/.rvm/
    Adding rvm PATH line to /home/takatoh/.profile /home/takatoh/.bashrc /home/takatoh/.zshrc.
    Adding rvm loading line to /home/takatoh/.bash_profile /home/takatoh/.zlogin.
Installation of RVM in /home/takatoh/.rvm/ is almost complete:

  * To start using RVM you need to run `source /home/takatoh/.rvm/scripts/rvm`
    in all your open shell windows, in rare cases you need to reopen all shell windows.

# takatoh,
#
#   Thank you for using RVM!
#   We sincerely hope that RVM helps to make your life easier and more enjoyable!!!
#
# ~Wayne, Michal & team.

In case of problems: http://rvm.io/help and https://twitter.com/rvm_io

  * WARNING: You have '~/.profile' file, you might want to load it,
    to do that add the following line to '/home/takatoh/.bash_profile':

      source ~/.profile

[takatoh@www2465uo ~]$ source /home/takatoh/.rvm/scripts/rvm
[takatoh@www2465uo ~]$ rvm -v
rvm 1.25.28 (stable) by Wayne E. Seguin , Michal Papis  [https://rvm.io/]
[takatoh@www2465uo ~]$ rvm install 1.9.3
Searching for binary rubies, this might take some time.
Found remote file https://rvm.io/binaries/centos/6/x86_64/ruby-1.9.3-p547.tar.bz2
Checking requirements for centos.
Installing requirements for centos.
Updating system.
Installing required packages: libyaml-devel, libffi-devel, readline-devel, zlib-devel, openssl-devel..takatoh password required for 'yum install -y libyaml-devel libffi-devel readline-devel zlib-devel openssl-devel': 
............
Requirements installation successful.
ruby-1.9.3-p547 - #configure
ruby-1.9.3-p547 - #download
  % Total    % Received % Xferd  Average Speed   Time    Time     Time  Current
                                 Dload  Upload   Total   Spent    Left  Speed
100 10.2M  100 10.2M    0     0   218k      0  0:00:48  0:00:48 --:--:--  229k
ruby-1.9.3-p547 - #validate archive
ruby-1.9.3-p547 - #extract
ruby-1.9.3-p547 - #validate binary
ruby-1.9.3-p547 - #setup
ruby-1.9.3-p547 - #gemset created /home/takatoh/.rvm/gems/ruby-1.9.3-p547@global
ruby-1.9.3-p547 - #importing gemset /home/takatoh/.rvm/gemsets/global.gems....................................
ruby-1.9.3-p547 - #generating global wrappers........
ruby-1.9.3-p547 - #gemset created /home/takatoh/.rvm/gems/ruby-1.9.3-p547
ruby-1.9.3-p547 - #importing gemsetfile /home/takatoh/.rvm/gemsets/default.gems evaluated to empty gem list
ruby-1.9.3-p547 - #generating default wrappers........
[takatoh@www2465uo ~]$ ruby -v
ruby 1.9.3p547 (2014-05-14 revision 45962) [x86_64-linux]

Rails+Deviseでユーザー名でサインインできるようにする

タイトルのように成功したのでメモ。

まずは users テーブルに name 列を追加。

takatoh@nightschool $ rails g migration add_name_to_users name

できたマイグレーションファイルを編集。name 列にインデックスをつけてユニークにする。

add_index :users, :name, unique: true

でもってマイグレート。

takatoh@nightschool $ rake db:migrate

これでデータベースの準備は完了。

次に Devise の設定。config/initializers/devise.rb の32行目をアンコメントして :email を :name に変更。

config.authentication_keys = [ :name ]

これで、Devise はユーザー認証にメールアドレスじゃなくユーザー名を使うようになる。

Devise がユーザー名を受け付けるように configure_pergitted_parameters をオーバーライド。これは app/controllers/application_controller.rb で行う。

def configure_permitted_parameters
  devise_parameter_sanitizer.for(:sign_up) {|u| u.permit(:name, :email, :password, :password_confirmation, :admin)}
  devise_parameter_sanitizer.for(:sign_in) {|u| u.permit(:name, :password)}
  devise_parameter_sanitizer.for(:account_update) {|u| u.permit(:name, :email, :password, :password_confirmation, :admin)}
end

あとはビューの変更だ。app/views/users/registrations/new.html.erb にユーザー名の欄を追加し、app/views/users/sessions/new.html.erb には email の欄の代わりにユーザー名の欄を作る。前者はサインアップ、後者はサインインの時に使われるテンプレート。

# 行を追加
<div><%= f.label :name %><%= f.text_field :name, autofocus: true %></div>
# :email から :name に変更
<div><%= f.label :name %><%= f.text_field :name, autofocus: true %></div>

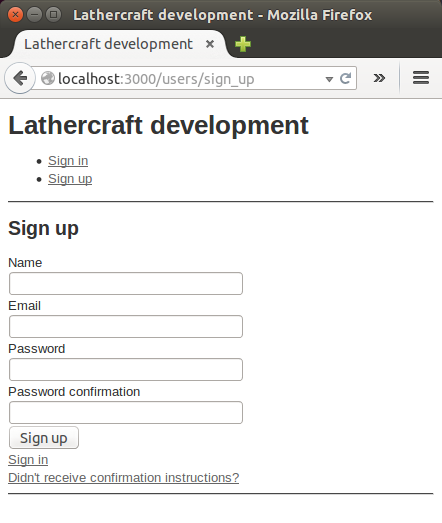
これでひと通り終了。試してみよう。

sign-up-with-name

うまくいった!

Sinatraアプリをunicornで動かす

まずは専用のユーザーを作る。

takatoh@nightschool $ sudo adduser sombrero
ユーザー `sombrero' を追加しています...
新しいグループ `sombrero' (1001) を追加しています...
新しいユーザー `sombrero' (1001) をグループ `sombrero' に追加しています...
ホームディレクトリ `/home/sombrero' を作成しています...
`/etc/skel' からファイルをコピーしています...
新しい UNIX パスワードを入力してください: 
新しい UNIX パスワードを再入力してください: 
passwd: パスワードは正しく更新されました
sombrero のユーザ情報を変更中
新しい値を入力してください。標準設定値を使うならリターンを押してください
	フルネーム []: sombrero
	部屋番号 []: 
	職場電話番号 []: 
	自宅電話番号 []: 
	その他 []: 
以上で正しいですか? [Y/n] Y

新しいユーザー sombrero に sudo する権限をつける。

takatoh@nightschool $ sudo gpasswd -a sombrero sudo
[sudo] password for takatoh: 
ユーザ sombrero をグループ sudo に追加

ユーザー sombrero でログインしなおして、Ruby と Git のバージョンを確認。

sombrero@nightschool:~$ ruby -v
ruby 1.9.3p484 (2013-11-22 revision 43786) [x86_64-linux]
sombrero@nightschool:~$ git --version
git version 1.9.1

GitHub から Sombrero を clone。

sombrero@nightschool:~$ git clone [email protected]:takatoh/sombrero.git
Cloning into 'sombrero'...
Warning: Permanently added the RSA host key for IP address '192.30.252.128' to the list of known hosts.
remote: Reusing existing pack: 903, done.
remote: Total 903 (delta 0), reused 0 (delta 0)
Receiving objects: 100% (903/903), 282.66 KiB | 131.00 KiB/s, done.
Resolving deltas: 100% (577/577), done.
Checking connectivity... done.

必要なライブラリをインストール。

sombrero@nightschool:~$ cd sombrero
sombrero@nightschool:~/sombrero$ sudo bundle install
[sudo] password for sombrero: 
Don't run Bundler as root. Bundler can ask for sudo if it is needed, and
installing your bundle as root will break this application for all non-root
users on this machine.
Fetching gem metadata from https://rubygems.org/..........
Fetching additional metadata from https://rubygems.org/..
Resolving dependencies...
Installing tilt 1.4.1
Installing haml 4.0.5
Using httpclient 2.4.0
Installing rack 1.5.2
Installing rack-protection 1.5.3
Installing sass 3.3.9
Installing sequel 4.12.0
Installing sinatra 1.4.5
Installing sqlite3 1.3.9
Using bundler 1.6.3
Your bundle is complete!
Use `bundle show [gemname]` to see where a bundled gem is installed.
Post-install message from haml:

HEADS UP! Haml 4.0 has many improvements, but also has changes that may break
your application:

* Support for Ruby 1.8.6 dropped
* Support for Rails 2 dropped
* Sass filter now always outputs <style> tags
* Data attributes are now hyphenated, not underscored
* html2haml utility moved to the html2haml gem
* Textile and Maruku filters moved to the haml-contrib gem

For more info see:

http://rubydoc.info/github/haml/haml/file/CHANGELOG.md

もともと運用していたディレクトリからアプリの設定ファイルをコピー。

sombrero@nightschool:~/sombrero$ cp /home/takatoh/w/sombrero/config.yaml .

データベースのマイグレーションを実行。

sombrero@nightschool:~/sombrero$ rake db:migrate
プログラム 'rake' はまだインストールされていません。 次のように入力することでインストールできます:

rake が入ってなかった。インストール。

sombrero@nightschool:~/sombrero$ sudo gem install rake
Fetching: rake-10.3.2.gem (100%)
Successfully installed rake-10.3.2
1 gem installed
Installing ri documentation for rake-10.3.2...
Installing RDoc documentation for rake-10.3.2...

もともとの運用元から、データベースファイルをコピー(上書き)。

sombrero@nightschool:~/sombrero$ sudo cp /home/takatoh/w/sombrero/db/sombrero.db db

ここでいったん、アプリが正常に起動するか確認。

sombrero@nightschool:~/sombrero$ rackup app.ru --port 9000

OK。

Unicorn のインストール。

sombrero@nightschool:~/sombrero$ sudo gem install unicorn
[sudo] password for sombrero: 
Fetching: kgio-2.9.2.gem (100%)
Building native extensions.  This could take a while...
Fetching: raindrops-0.13.0.gem (100%)
Building native extensions.  This could take a while...
Fetching: unicorn-4.8.3.gem (100%)
Building native extensions.  This could take a while...
Successfully installed kgio-2.9.2
Successfully installed raindrops-0.13.0
Successfully installed unicorn-4.8.3
3 gems installed
Installing ri documentation for kgio-2.9.2...
Installing ri documentation for raindrops-0.13.0...
Installing ri documentation for unicorn-4.8.3...
Installing RDoc documentation for kgio-2.9.2...
Installing RDoc documentation for raindrops-0.13.0...
Installing RDoc documentation for unicorn-4.8.3...

いろいろググった結果を見ると Unicorn の前に nginx をたてるのが普通のようだけど、今回は Unicorn のみで行く。公式サイト(?)によれば、アプリのルートディレクトリで unicorn と打てば起動するらしい。

sombrero@nightschool:~/sombrero$ unicorn
/var/lib/gems/1.9.1/gems/unicorn-4.8.3/lib/unicorn/configurator.rb:659:in parse_rackup_file': rackup file (config.ru) not readable (ArgumentError)
	from /var/lib/gems/1.9.1/gems/unicorn-4.8.3/lib/unicorn/configurator.rb:77:in reload'
	from /var/lib/gems/1.9.1/gems/unicorn-4.8.3/lib/unicorn/configurator.rb:68:in initialize'
	from /var/lib/gems/1.9.1/gems/unicorn-4.8.3/lib/unicorn/http_server.rb:100:in new'
	from /var/lib/gems/1.9.1/gems/unicorn-4.8.3/lib/unicorn/http_server.rb:100:in initialize'
	from /var/lib/gems/1.9.1/gems/unicorn-4.8.3/bin/unicorn:126:in new'
	from /var/lib/gems/1.9.1/gems/unicorn-4.8.3/bin/unicorn:126:in new'
	from /usr/local/bin/unicorn:23:in load'
	from /usr/local/bin/unicorn:23:in main'

あれ、ダメだ。あ、rackup のファイルが config.ru じゃなきゃだめなのか。引数に与えてみるか。

sombrero@nightschool:~/sombrero$ unicorn app.ru
I, [2014-07-26T09:26:00.893170 #19156]  INFO -- : listening on addr=0.0.0.0:8080 fd=7
I, [2014-07-26T09:26:00.893297 #19156]  INFO -- : worker=0 spawning...
I, [2014-07-26T09:26:00.893751 #19156]  INFO -- : master process ready
I, [2014-07-26T09:26:00.894064 #19158]  INFO -- : worker=0 spawned pid=19158
I, [2014-07-26T09:26:00.894233 #19158]  INFO -- : Refreshing Gem list
I, [2014-07-26T09:26:01.337048 #19158]  INFO -- : worker=0 ready

今度は無事起動。ポート8080で待機している。今までどおり 9000番ポートで動かすには –port 9000 をオプションとしてつけてやればいいようだ。

Unicorn の設定ファイル unicorn.conf を書く。

listen "9000"
worker_processes 1
pid "./unicorn.pid"
stderr_path "./unicorn.log"
stdout_path "./unicorn.log"

どうも rackup するファイルは設定できないみたいだ。でも、unicorn コマンドの引数に与えてやれば、これで起動してみると、ちゃんと起動しているのが確認できた。

sombrero@nightschool:~/sombrero$ unicorn app.ru -c unicorn.conf

さて、今度はPCを起動したら自動で起動するようにする。それには /etc/init.d 配下に起動用のスクリプトを置く。

#!/bin/sh

PATH=/sbin:/usr/local/bin:/usr/bin
SOMBRERO_ROOT=/home/sombrero/sombrero

case "$1" in
start)
    cd ${SOMBRERO_ROOT}
    unicorn app.ru -c unicorn.conf -D
    ;;
stop)
    PID=`cat ${SOMBRERO_ROOT}/unicorn.pid`
    kill -QUIT ${PID}
    ;;
*)
    echo "Usage: sombrero {start|stop}" &gt;&amp;2
    exit 1
    ;;
esac

exit 0

unicorn についてる -D オプションはデーモン化するためのもの。
で、これをデーモン(サービス)として起動するには、OS のランレベルに応じた /etc/rc?.d フォルダの中に ‘S’ で始まるファイル名でソフトリンクを作ってやればいいらしい。もっとも、この部分は sysv-rc-conf というツールを使うのが通例のようだ。
それじゃ、まずランレベルの確認。

sombrero@nightschool:~$ runlevel
N 2

N が以前のランレベルで、2が現在のランレベルを示しているらしい。以前のランレベルってなんだかわからないけど今回はパス。とにかく現在のランレベルが 2 だということがわかった。
つぎ、sysv-rc-conf のインストール。

sombrero@nightschool:~$ sudo apt-get install sysv-rc-conf

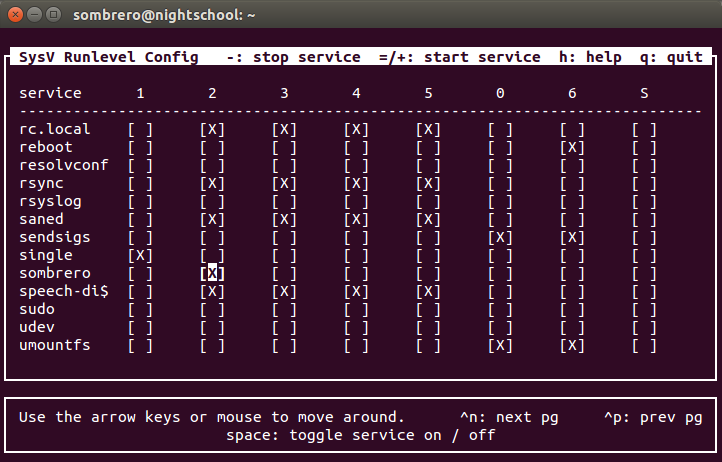
で、この sysv-rc-conf を sudo つきで起動すると下のような画面になる。

sysv-rc-conf

よくわからないけど、sombrero の行の 2 のカラムのところに X 印をつけて保存して終了。
/etc/rc2.d フォルダを確認してみると、S20sombrero という名前でファイル(ソフトリンク)ができているのが確認できる。

sombrero@nightschool:~$ ls -l /etc/rc2.d
合計 4
-rw-r--r-- 1 root root 677  3月 13 10:42 README
lrwxrwxrwx 1 root root  20  7月  5 14:26 S20kerneloops -> ../init.d/kerneloops
lrwxrwxrwx 1 root root  15  7月  5 14:26 S20rsync -> ../init.d/rsync
lrwxrwxrwx 1 root root  18  7月 26 11:58 S20sombrero -> ../init.d/sombrero
lrwxrwxrwx 1 root root  27  7月  5 14:26 S20speech-dispatcher -> ../init.d/speech-dispatcher
lrwxrwxrwx 1 root root  15  7月  5 14:26 S50saned -> ../init.d/saned
lrwxrwxrwx 1 root root  19  7月  5 14:26 S70dns-clean -> ../init.d/dns-clean
lrwxrwxrwx 1 root root  18  7月  5 14:26 S70pppd-dns -> ../init.d/pppd-dns
lrwxrwxrwx 1 root root  21  7月  5 14:26 S99grub-common -> ../init.d/grub-common
lrwxrwxrwx 1 root root  18  7月  5 14:26 S99ondemand -> ../init.d/ondemand
lrwxrwxrwx 1 root root  18  7月  5 14:26 S99rc.local -> ../init.d/rc.local

さあ、これで OK のはずだ。果たして PC を再起動してみると、自動的に起動しているのが確認できた。

今日はここまで。

Ubuntuの端末でRuby 2.1.1を使えるようにした

何を今更、というようなタイトルだけど、どういうことかというと、今までランチャーから新しい端末(コンソール)を起動しただけでは rvm でインストールした Ruby 2.1.1 を使えていなかったのだ。なぜなら、rvm を有効にする設定が .bash_profaile に書かれているのに対して、新しい端末を開いてもこのファイルを読み込まないらしい、からだった。
だから、今までどうしていたかというと、端末を開いたあとに、source .bash_profile とか bash --login とかやってたわけだ。さすがにこれはめんどくさい(実際には端末を開きっぱなしなのでそれほどでもない)。そこで、重い腰を上げて解決することにした。

いろいろ調べてみると、新しい端末を開くと、.bashrc は読み込んでくれるらしい。ということは、.bash_profile に書いてある該当箇所を .bashrc に書き写せばいいはず。.bash_profile の該当箇所はこれ。

[[ -s "$HOME/.rvm/scripts/rvm" ]] && source "$HOME/.rvm/scripts/rvm" # Load RVM into a shell session *as a function*

ところが、これをこのまま .bashrc に書き写しても動かない。どうしてかというと、Ubuntu の sh は bash じゃなくて dash というシェルだから。

takatoh@nightschool $ which sh
/bin/sh
takatoh@nightschool $ ls -al /bin/sh
lrwxrwxrwx 1 root root 4  7月  5 14:26 /bin/sh -> dash

どうも dash では [[ … ]] という書式をサポートしていないらしい。というわけで、.bashrc の他の記述を参考に次のように書き換えた。

if [ -s "$HOME/.rvm/scripts/rvm" ]; then
    source "$HOME/.rvm/scripts/rvm" # Load RVM into a shell session *as a function*
fi

これで、新しい端末で最初から Ruby 2.1.1 が使えるようになった。

takatoh@nightschool $ ruby -v
ruby 2.1.1p76 (2014-02-24 revision 45161) [x86_64-linux]

RailsとDeviseで管理者ユーザーを作ることに成功した

昼過ぎから半日いろいろとやって、やっと成功したので忘れないうちに手順をメモ。

users テーブルに admin 列を作る

まずは管理者マークをつけるために users テーブルに admin 列を作る。この列が true のユーザーが管理者(admin)てわけ。いろいろググってみると専用のテーブルを作っている例もあるけど、ここはお手軽な方法でいくことにした。

takatoh@nightschool $ rails generate migration add_admin_to_useres admin:boolean

できたマイグレーションファイルを編集。null: falsedefault: false を追記。

class AddAdminToUsers < ActiveRecord::Migration
  def change
    add_column :users, :admin, :boolean, null: false, default: false
  end
end

でもってマイグレーション実行。

takatoh@nightschool $ rake db:migrate

config/initializers/devise.rbを編集

次の行がコメントアウトされているのをやめて、false を true に変更。

config.scoped_views = true

Deviseのviewをコピーして編集

takatoh@nightschool $ rails generate devise:views users

上のコマンドで Devise の標準の view がアプリの中にコピーされる。できたファイルのうち、サインアップに使う app/views/users/registrations/new.html.erb を編集して admin 用のチェックボックスを追加。

<h2>Sign up</h2>
  <%= form_for(resource, as: resource_name, url: registration_path(resource_name)) do |f| %>
  <%= devise_error_messages! %>
  <div>
    <%= f.label :email %>
    <%= f.email_field :email, autofocus: true %>
  </div>
  <div>
    <%= f.label :password %>
    <%= f.password_field :password, autocomplete: "off" %>
  </div>
  <div>
    <%= f.label :password_confirmation %>
    <%= f.password_field :password_confirmation, autocomplete: "off" %>
  </div>
  <% if @noadmin %>
  <div>
    <%= f.label :admin %>
    <%= f.check_box :admin, { }, true, false %>
  </div>
  <% end %>
  <div>
    <%= f.submit "Sign up" %>
  </div>
  <% end %>

<%= render "users/shared/links" %>

controllerの修正

最後は controller の修正。2つ修正がある。ひとつは app/controllers/application_controller.rb。

class ApplicationController < ActionController::Base
  # Prevent CSRF attacks by raising an exception.
  # For APIs, you may want to use :null_session instead.
  protect_from_forgery with: :exception
  before_filter :configure_permitted_parameters, if: :devise_controller?

  private

  def after_sign_in_path_for(resource)
    "/dashboard/"
  end

  def check_signed_in
    unless signed_in?
     redirect_to '/'
    end
  end

  protected

  def configure_permitted_parameters
    devise_parameter_sanitizer.for(:sign_up) << :admin
    devise_parameter_sanitizer.for(:account_update) << :admin
  end
end

もうひとつは app/controllers/users/regitrations_controller.rb。

class Users::RegistrationsController < Devise::RegistrationsController
  def new
    @user = User.new
    @noadmin = User.where('admin = ?', true).empty?
  end
end 

これで終了。

確認

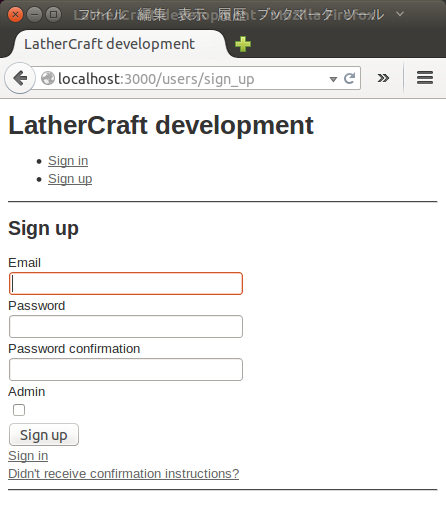
1st-user-sign-up

初めてのユーザーがサインアップしようとしているところ。Admin のチェックボックスが表示されている。ここをチェックしてサインアップすれば管理者になる。

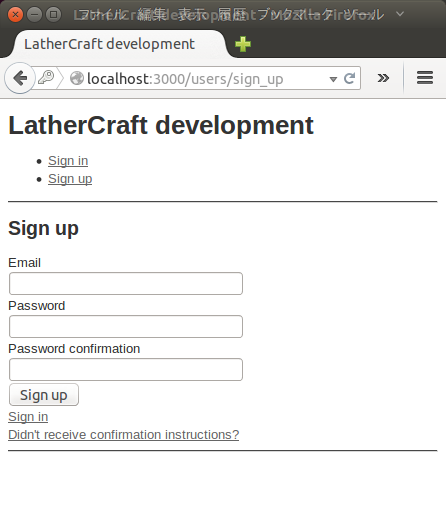
2nd-user-sign-up

で、これが2人目のユーザーがサインアップしようとしているところ。Adminのチェックボックスは表示されていない。

参考にしたページ

 cf. 【Rails4】deviseとactive_adminで一般ユーザーと管理者ユーザーを作成 – avosalmonのブログ
 cf. Rails の認証プラグイン Devise での Strong Parameters について – EasyRamble
 cf. DeviseでViewをカスタマイズする – Qiita

deviseでユーザー名とパスワードでの認証がうまくいかなかった件

まずは今朝の最後に貼った画面を再掲する。

sign-in-with-name-and-email

見ての通り、サインアップするのにユーザー名、メールアドレス、パスワードの3つが必要だ。これでは面倒なので、ユーザー名とパスワードだけでサインインできるようにしたいと思った。

で、グーグルさんでいろいろ調べてみるとわりと簡単そうだったんだけど、結果から言うとうかくいかなかった。なんでだかわからない。
config/initializers/devise.rb の編集もしたし、ApplicationController に before_filter (configure_permitted_parameters)も書いてみた。けどうまくいかなかった。なんか色々やってるうちにわからなくなってしまった。
さらに、サインアップのときに登録したはずのユーザー名がデータベースに保存されていないことが発覚。ということはつまり、今朝の時点でもうまくいっていなかったってことだ。

結局、メールアドレスとパスワードで認証するところまで巻き戻して、devise をこれ以上いじるのはやめにして、他を進めることにした。devise は、また何か新しい情報を見つけたら試してみよう。