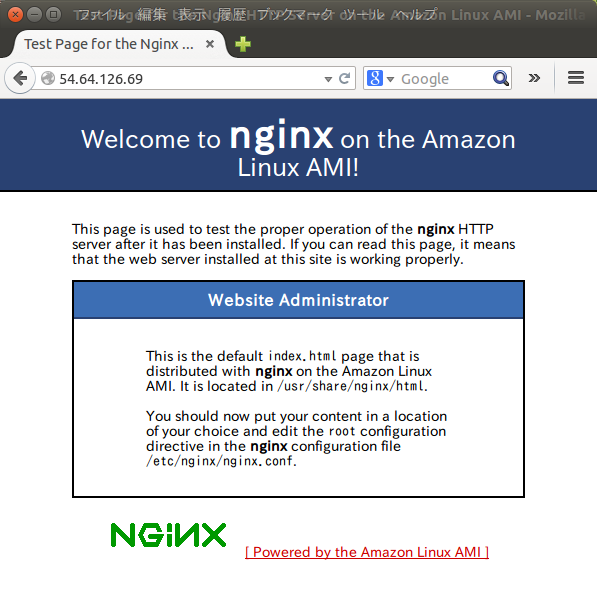
今回は Nginx をインストールして web ページを確認するまで。
インストールはとっても簡単、yum コマンドでインストールするだけ。
[ec2-user@ip-172-31-3-244 ~]$ sudo yum install nginx
起動。
[ec2-user@ip-172-31-3-244 ~]$ sudo /etc/init.d/nginx start nginx を起動中: [ OK ]
ブラウザで確認すると、ちゃんと動いている。
takatoh's blog – Learning programming languages.
S3のバケットをファイルシステムとしてマウントするには、s3fs-fuse というツールを使う。今回使ったヴァージョンは最新の 1.77。
まずは依存するツールをインストールする。
[ec2-user@ip-172-31-3-244 ~]$ sudo yum install gcc [ec2-user@ip-172-31-3-244 ~]$ sudo yum install libstdc++-devel [ec2-user@ip-172-31-3-244 ~]$ sudo yum install gcc-c++ [ec2-user@ip-172-31-3-244 ~]$ sudo yum install fuse [ec2-user@ip-172-31-3-244 ~]$ sudo yum install fuse-devel [ec2-user@ip-172-31-3-244 ~]$ sudo yum install curl-devel [ec2-user@ip-172-31-3-244 ~]$ sudo yum install libxml2-devel [ec2-user@ip-172-31-3-244 ~]$ sudo yum install openssl-devel [ec2-user@ip-172-31-3-244 ~]$ sudo yum install mailcap [ec2-user@ip-172-31-3-244 ~]$ sudo yum install automake
[ec2-user@ip-172-31-3-244 ~]$ wget https://github.com/s3fs-fuse/s3fs-fuse/archive/v1.77.tar.gz -O s3fs-fuse-v1.77.tar.gz [ec2-user@ip-172-31-3-244 ~]$ tar xvzf s3fs-fuse-v1.77.tar.gz [ec2-user@ip-172-31-3-244 ~]$ cd s3fs-fuse-1.77 [ec2-user@ip-172-31-3-244 s3fs-fuse-1.77]$ ./autogen.sh [ec2-user@ip-172-31-3-244 s3fs-fuse-1.77]$ ./configure --prefix=/usr [ec2-user@ip-172-31-3-244 s3fs-fuse-1.77]$ make [ec2-user@ip-172-31-3-244 s3fs-fuse-1.77]$ sudo make install
S3に接続するには認証の必要がある。つまり Access Key ID と Secret Access Key が必要だってこと。方法は4つあるようだけど、今回は /etc/passwd-s3fs ファイルを作る方法にした。
[ec2-user@ip-172-31-3-244 s3fs-fuse-1.77]$ sudo vim /etc/passwd-s3fs [ec2-user@ip-172-31-3-244 s3fs-fuse-1.77]$ sudo chmod 640 /etc/passwd-s3fs
[ec2-user@ip-172-31-3-244 ~]$ sudo s3fs lathercraft-storage2 /mnt/lcstorage -o rw,allow_other,default_acl=private
さあ、うまくいってるかな?
[ec2-user@ip-172-31-3-244 ~]$ echo Hello > /mnt/lcstorage/hello.txt [ec2-user@ip-172-31-3-244 ~]$ ls /mnt/lcstorage hello.txt [ec2-user@ip-172-31-3-244 ~]$ df -kh ファイルシス サイズ 使用 残り 使用% マウント位置 /dev/xvda1 7.8G 1.3G 6.5G 16% / devtmpfs 990M 56K 990M 1% /dev tmpfs 1003M 0 1003M 0% /dev/shm s3fs 256T 0 256T 0% /mnt/lcstorage
OK、うまくいった。
cf. Amazon EC2からS3をファイルシステムとしてマウントする – mooapp
cf. s3fs を使って EC2 に S3 の Bucket をマウントする – Qiita
cf. Installation Notes – s3fs-fuse/s3fs-fuse
インスタンスを再起動した時に自動でマウントするには、/etc/fstab ファイルに次の行を追加する。
s3fs#lathercraft-storage2 /mnt/lcstorage fuse rw,allow_other,default_acl=private 0 0
Amazon Web Service のホームから EC2 をクリックすると、EC2 のホーム画面になる。Launch Instance を選んで、スタート。
まずは、OS を選ぶところから。ここは素直に、Amazon Linux AMI 2014.03.2 (HVM) にしておいた。
次にインスタンスタイプを選ぶ画面になる。インスタンスタイプはちょっとだけ欲張って t2.small にする。右下の Next: Configure Instance Details をクリック。
ここはデフォルトのまま、Next: Add Storage をクリック。
ここもデフォルトのまま。
Name に lathercraft-storage2 を指定して、Next: Configure Security Group。
Assign a security group はデフォルトの Create a new security group。Security group name は launch-wizard-3 となっていたのでそのまま。3 になってるのは、前にもちょっとだけ試したことがあるからかな。
HTTP のサーバとして使う予定なので Add Rule から HTTP を選んで追加した。
最終確認画面。このまま Launch をクリック。すると、Select an existing key pair or create a new key pair というダイアログが出たので、Create a new key pair をえらんで、amazon2 という名前をつける。でもって Download key pair をクリックすると鍵がダウンロードできる。これは SSH でインスタンスに接続するときに使う。ダウンロードした鍵は amazon2.pem というファイル名になっている。
それから、あらためて Launch Instance をクリック。
これでインスタンスの起動は完了。View Instaces をクリックして、EC2 のホーム画面に戻ると、新しいインスタンスが running 状態になっているのが確認できた。
上でダウンロードした鍵 amazon2.pem ファイルを .ssh ディレクトリに移動してパーミッションを変更。
takatoh@nightschool $ mv Downloads/amazon2.pem .ssh takatoh@nightschool $ chmod 400 .ssh/amazon2.pem takatoh@nightschool $ ls -l .ssh | grep amazon2 -r-------- 1 takatoh takatoh 1692 9月 6 08:26 amazon2.pem
さあ、インスタンスに接続してみよう。インスタンスの IPアドレスは、インスタンスリストの Public IP の欄で確認できる。ユーザーは ec2-user だ。
takatoh@nightschool $ ssh -i .ssh/amazon2.pem [email protected] Last login: Fri Sep 5 23:44:47 2014 from fntsitm001026.sitm.fnt.ngn.ppp.infoweb.ne.jp __| __|_ ) _| ( / Amazon Linux AMI ___|\___|___| https://aws.amazon.com/amazon-linux-ami/2014.03-release-notes/ 9 package(s) needed for security, out of 28 available Run "sudo yum update" to apply all updates.
Nginx のプロキシが動いてくれない問題が解決した。
↓このページが参考になった。
cf. nginx連載3回目: nginxの設定、その1 – インフラエンジニアway
結論から言うと、アクセスログのフォーマットに定義していない名前を使っていたことだった。この行。
access_log /var/log/nginx/storage1.lathercraft.net/access.log main;
access_log ディレクティブには、ログファイル名のほかにログのフォーマットを名前で指定できる。ここでは main というのがそれだ。だけど、この間書いた(書いたというかネットからもらってきた)設定ファイルでは main という名前のログフォーマットが定義されていなかった。だからテストも通らなかったわけだ。
ログフォーマットは例えばこんなふうに定義できる。
log_format main '$remote_addr - $remote_user [$time_local] "$request" ' '$status $body_bytes_sent "$http_referer" ' '"$http_user_agent" "$http_x_forwarded_for"';
これで main という名前のフォーマットが使えるようになる。
ところで、Nginx にはあらかじめ combined という名前のログフォーマットが組み込まれているそうだ。
log_format combined '$remote_addr - $remote_user [$time_local] ' '"$request" $status $body_bytes_sent ' '"$http_referer" "$http_user_agent"';
せっかくなので、こっちを使うことにした。結局、最初に示した行はこう変わった。
access_log /var/log/nginx/storage1.lathercraft.net/access.log combined;
これでめでたく動くようになった。
前回からあいだが開いてしまった。
実は前回の起動スクリプトで一度はうまく動いたと思ったんだけど、再度起動しようとしたら起動してくれなかったのだ。同じようにやったはずなのにどうしてだかわからない。いや、むしろ起動した時のやり方のほうが間違っていて、起動スクリプトで起動したと勘違いしていたのかもしれない。今となってはわからない。
というわけでこの1周間ずっと web を漁り続けていたわけだ。で、↓このページがヒントになった。
cf. CentOS6にApache + RVM + UnicornでGitlab4.2構築 – Mikimemo
このページに載っている GitLab の起動スクリプトでは、環境変数 GEM_HOME と GEM_PATH を export している。これを試してみたらうまくいった。具体的には次の2行を追加した。
export GEM_HOME=/usr/local/rvm/gems/ruby-2.0.0-p481:/usr/local/rvm/gems/ruby-2.0.0-p481@global export GEM_PATH=/usr/local/rvm/gems/ruby-2.0.0-p481:/usr/local/rvm/gems/ruby-2.0.0-p481@global
やれやれ、1周間かかってやっと解決した。
つづき。
インストールは gem コマンド一発。
[root@www2465uo Lathercraft]# gem install unicorn
設定ファイルを ${RAILS_ROOT}/config の中に作る。
worker_processes 2 working_directory "/var/www/Lathercraft" listen "/var/run/unicorn/unicorn_lathercraft.sock" pid "/var/run/unicorn/unicorn_lathercraft.pid" preload_app true
他にもいろいろ書けるみたいだけど、これで最低限のよう。sock や pid のためのディレクトリを作る。
[root@www2465uo Lathercraft]# mkdir /var/run/unicorn [root@www2465uo Lathercraft]# chmod 777 /var/run/unicorn
ファイル自体は勝手に作ってくれるらしい。
[root@www2465uo Lathercraft]# unicorn_rails -c /var/www/Lathercraft/config/unicorn.rb -E production -D
/etc/nginx/conf.d/www.lathercraft.new.conf を次のようにした。
upstream unicorn-lathercraft { server unix:/var/run/unicorn/unicorn_lathercraft.sock; } server { # port listen 80; # server name server_name www.lathercraft.net; # document root root /var/www/Lathercraft; # index #index index.php index.html index.htm; # log files access_log /var/log/nginx/www.lathercraft.net/access.log main; error_log /var/log/nginx/www.lathercraft.net/error.log warn; location / { root /var/www/Lathercraft; proxy_set_header X-Real-IP $remote_addr; proxy_set_header X-Forwarded-For $proxy_add_x_forwarded_for; proxy_set_header Host $http_host; proxy_pass http://unicorn-lathercraft; } }
これで Nginx を再起動。
[root@www2465uo www]# service nginx restart nginx を停止中: [ OK ] nginx を起動中: [ OK ]
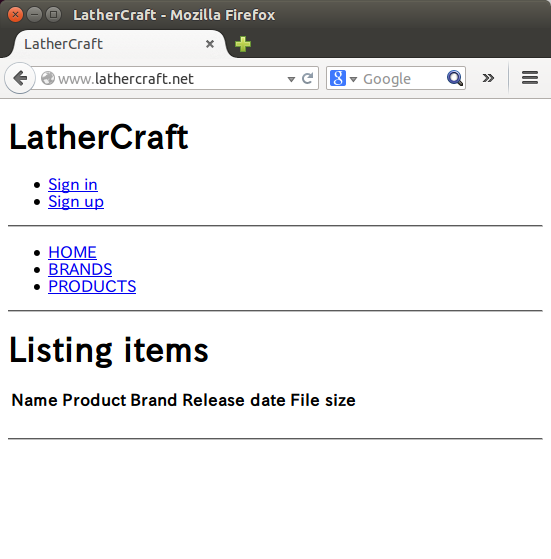
ブラウザからアクセスすると、アプリのホームページが表示された!
さいごに、OS を起動した時に unicorn も自動起動するようにしておく。/etc/init.d/unicorn_lathercraft を次のようにした。
#!/bin/bash # # unicorn_lathercraft Startup script for unicorn. # # chkconfig: - 85 15 # description: lathercraft on unicorn start/stop script. # set -u set -e export PATH=/usr/local/rvm/rubies/ruby-2.0.0-p481/bin:/usr/local/rvm/gems/ruby-2.0.0-p481/bin:$PATH APP_NAME=Lathercraft APP_ROOT="/var/www/$APP_NAME" CNF="$APP_ROOT/config/unicorn.rb" PID="/var/run/unicorn/unicorn_lathercraft.pid" ENV=production UNICORN_OPTS="-c $CNF -E $ENV -D" old_pid="$PID.oldbin" cd $APP_ROOT || exit 1 sig () { test -s "$PID" && kill -$1 `cat $PID` } oldsig () { test -s $old_pid && kill -$1 `cat $old_pid` } case ${1-help} in start) sig 0 && echo >&2 "Already running" && exit 0 cd $APP_ROOT ; unicorn_rails $UNICORN_OPTS ;; stop) sig QUIT && exit 0 echo >&2 "Not running" ;; force-stop) sig TERM && exit 0 echo >&2 "Not running" ;; restart|reload) sig HUP && echo reloaded OK && exit 0 echo >&2 "Couldn't reload, starting instead" unicorn_rails $UNICORN_OPTS ;; upgrade) sig USR2 && exit 0 echo >&2 "Couldn't upgrade, starting instead" unicorn_rails $UNICORN_OPTS ;; rotate) sig USR1 && echo rotated logs OK && exit 0 echo >&2 "Couldn't rotate logs" && exit 1 ;; *) echo >&2 "Usage: $0 <start|stop|restart|upgrade|rotate|force-stop>" exit 1 ;; esac
</start|stop|restart|upgrade|rotate|force-stop>
[root@www2465uo Lathercraft]# vim /etc/init.d/unicorn_lathercraft [root@www2465uo Lathercraft]# chmod +x /etc/init.d/unicorn_lathercraft [root@www2465uo Lathercraft]# chkconfig unicorn_lathercraft on [root@www2465uo Lathercraft]# chkconfig --list unicorn_lathercraft unicorn_lathercraft 0:off 1:off 2:on 3:on 4:on 5:on 6:off
MySQLは導入済み。接続用のUNIXソケットは /ver/lib/mysql/mysql.sock。
専用のユーザーを作る。
[takatoh@www2465uo www]$ sudo useradd lathercraft [sudo] password for takatoh: [takatoh@www2465uo www]$ sudo passwd lathercraft ユーザー lathercraft のパスワードを変更。 新しいパスワード: 新しいパスワードを再入力してください: passwd: 全ての認証トークンが正しく更新できました。
GitHub からクローン。
[takatoh@www2465uo www]$ sudo git clone https://github.com/takatoh/Lathercraft.git [sudo] password for takatoh: Initialized empty Git repository in /var/www/Lathercraft/.git/ remote: Counting objects: 1736, done. remote: Compressing objects: 100% (12/12), done. remote: Total 1736 (delta 2), reused 0 (delta 0) Receiving objects: 100% (1736/1736), 178.63 KiB | 157 KiB/s, done. Resolving deltas: 100% (1132/1132), done.
[takatoh@www2465uo www]$ sudo chown -R lathercraft:lathercraft Lathercraft [takatoh@www2465uo www]$ cd Lathercraft [takatoh@www2465uo Lathercraft]$ bundle install
Gemfile.lock に書き込もうとした時に権限がなかった、ていうエラーがでた。気持ちが悪いので、パーミッションをつけてもう一度やり直し。
[takatoh@www2465uo Lathercraft]$ sudo chmod 766 Gemfile.lock [sudo] password for takatoh: [takatoh@www2465uo Lathercraft]$ bundle install
OK。
config/database.yml はこうなってる。
(前略) production: adapter: mysql2 encoding: utf8 pool: 5 database: lathercraft_production username: lathercraft password: <%= ENV['LATHERCRAFT_DATABASE_PASSWORD'] %> host: localhost
データベースを作る。
[takatoh@www2465uo Lathercraft]$ rake db:create -E production rake aborted! NameError: undefined local variable or method `production' for # (See full trace by running task with --trace) [takatoh@www2465uo Lathercraft]$ rake db:create RAILS_ENV=production Access denied for user 'lathercraft'@'localhost' (using password: NO)Please provide the root password for your mysql installation >
あれ、ユーザーは先に作っとかなきゃいけないのか?
[takatoh@www2465uo Lathercraft]$ mysql -u root -p Enter password: Welcome to the MySQL monitor. Commands end with ; or \g. Your MySQL connection id is 27 Server version: 5.1.73 Source distribution Copyright (c) 2000, 2013, Oracle and/or its affiliates. All rights reserved. Oracle is a registered trademark of Oracle Corporation and/or its affiliates. Other names may be trademarks of their respective owners. Type 'help;' or '\h' for help. Type '\c' to clear the current input statement. mysql> CREATE USER lathercraft@localhost IDENTIFIED BY 'xxxxxxxx'; ERROR 1396 (HY000): Operation CREATE USER failed for 'lathercraft'@'localhost' mysql> exit; Bye
[takatoh@www2465uo Lathercraft]$ rake db:create RAILS_ENV=production
OK。
設定ファイルを編集。
[takatoh@www2465uo Lathercraft]$ sudo -s [sudo] password for takatoh: [rooth@www2465uo Lathercraft]$ cp config/site_config.yml.example config/site_config.yml [root@www2465uo Lathercraft]# vim config/site_config.yml [root@www2465uo Lathercraft]# cp config/secrets.yml.example config/secretes.yml [root@www2465uo Lathercraft]# vim config/secretes.yml
データベースのマイグレーション。
[root@www2465uo Lathercraft]# rake db:migrate RAILS_ENV=production Could not find tzinfo-1.2.1 in any of the sources Run `bundle install` to install missing gems.
tzinfo がないとな?
[root@www2465uo Lathercraft]# gem list *** LOCAL GEMS *** actionmailer (4.1.4) actionpack (4.1.4) actionview (4.1.4) activemodel (4.1.4) activerecord (4.1.4) activesupport (4.1.4) arel (5.0.1.20140414130214) bigdecimal (1.2.0) builder (3.2.2) bundler (1.6.2) bundler-unload (1.0.2) coffee-rails (4.0.1) coffee-script (2.3.0) coffee-script-source (1.7.1) erubis (2.7.0) execjs (2.2.1) executable-hooks (1.3.2) gem-wrappers (1.2.4) hike (1.2.3) i18n (0.6.11) io-console (0.4.2) jbuilder (2.1.3) jquery-rails (3.1.1) json (1.8.1, 1.7.7) mail (2.5.4) mime-types (1.25.1) minitest (5.4.0, 4.3.2) multi_json (1.10.1) mysql2 (0.3.16) polyglot (0.3.5) psych (2.0.0) rack (1.5.2) rack-test (0.6.2) rails (4.1.4) railties (4.1.4) rake (10.3.2, 0.9.6) rdoc (4.1.1, 4.0.0) rubygems-bundler (1.4.4) rvm (1.11.3.9) sass (3.2.19) sass-rails (4.0.3) sdoc (0.4.1) spring (1.1.3) sprockets (2.12.1, 2.11.0) sprockets-rails (2.1.3) sqlite3 (1.3.9) test-unit (2.0.0.0) thor (0.19.1) thread_safe (0.3.4) tilt (1.4.1) treetop (1.4.15) turbolinks (2.2.2) tzinfo (1.2.2) uglifier (2.5.3)
入ってるじゃん。あ、1.2.1 じゃないとダメなのか?
[root@www2465uo Lathercraft]# gem install tzinfo -v '1.2.1' Fetching: tzinfo-1.2.1.gem (100%) Successfully installed tzinfo-1.2.1 Parsing documentation for tzinfo-1.2.1 Installing ri documentation for tzinfo-1.2.1 Done installing documentation for tzinfo after 4 seconds 1 gem installed
その後も mini_portile-0.6.0 とか nokogiri-1.6.3.1 とかが見つからないっていうエラーが出たけど、bundle install
したら大丈夫のようだ。
じゃ、あらためて。
[root@www2465uo Lathercraft]# rake db:migrate RAILS_ENV=production rake aborted! Devise.secret_key was not set. Please add the following to your Devise initializer: config.secret_key = 'd3fd9f7eeef0d53467781729d97e738b88f3f1e3c854d3b8151ef5b32f388dca8620943c83303e76d098d553f058e222ee09df5040b86400c48b48c28da54183' Please ensure you restarted your application after installing Devise or setting the key. /usr/local/rvm/gems/ruby-2.0.0-p481/gems/devise-3.2.4/lib/devise/rails/routes.rb:481:in `raise_no_secret_key' /usr/local/rvm/gems/ruby-2.0.0-p481/gems/devise-3.2.4/lib/devise/rails/routes.rb:206:in `devise_for' /var/www/Lathercraft/config/routes.rb:20:in `block in ' /usr/local/rvm/gems/ruby-2.0.0-p481/gems/actionpack-4.1.4/lib/action_dispatch/routing/route_set.rb:337:in `instance_exec' /usr/local/rvm/gems/ruby-2.0.0-p481/gems/actionpack-4.1.4/lib/action_dispatch/routing/route_set.rb:337:in `eval_block' /usr/local/rvm/gems/ruby-2.0.0-p481/gems/actionpack-4.1.4/lib/action_dispatch/routing/route_set.rb:315:in `draw' /var/www/Lathercraft/config/routes.rb:1:in `' /usr/local/rvm/gems/ruby-2.0.0-p481/gems/activesupport-4.1.4/lib/active_support/dependencies.rb:241:in `load' /usr/local/rvm/gems/ruby-2.0.0-p481/gems/activesupport-4.1.4/lib/active_support/dependencies.rb:241:in `block in load' /usr/local/rvm/gems/ruby-2.0.0-p481/gems/activesupport-4.1.4/lib/active_support/dependencies.rb:232:in `load_dependency' /usr/local/rvm/gems/ruby-2.0.0-p481/gems/activesupport-4.1.4/lib/active_support/dependencies.rb:241:in `load' /usr/local/rvm/gems/ruby-2.0.0-p481/gems/railties-4.1.4/lib/rails/application/routes_reloader.rb:40:in `block in load_paths' /usr/local/rvm/gems/ruby-2.0.0-p481/gems/railties-4.1.4/lib/rails/application/routes_reloader.rb:40:in `each' /usr/local/rvm/gems/ruby-2.0.0-p481/gems/railties-4.1.4/lib/rails/application/routes_reloader.rb:40:in `load_paths' /usr/local/rvm/gems/ruby-2.0.0-p481/gems/railties-4.1.4/lib/rails/application/routes_reloader.rb:16:in `reload!' /usr/local/rvm/gems/ruby-2.0.0-p481/gems/railties-4.1.4/lib/rails/application/routes_reloader.rb:26:in `block in updater' /usr/local/rvm/gems/ruby-2.0.0-p481/gems/activesupport-4.1.4/lib/active_support/file_update_checker.rb:75:in `call' /usr/local/rvm/gems/ruby-2.0.0-p481/gems/activesupport-4.1.4/lib/active_support/file_update_checker.rb:75:in `execute' /usr/local/rvm/gems/ruby-2.0.0-p481/gems/railties-4.1.4/lib/rails/application/routes_reloader.rb:27:in `updater' /usr/local/rvm/gems/ruby-2.0.0-p481/gems/railties-4.1.4/lib/rails/application/routes_reloader.rb:7:in `execute_if_updated' /usr/local/rvm/gems/ruby-2.0.0-p481/gems/railties-4.1.4/lib/rails/application/finisher.rb:71:in `block in ' /usr/local/rvm/gems/ruby-2.0.0-p481/gems/railties-4.1.4/lib/rails/initializable.rb:30:in `instance_exec' /usr/local/rvm/gems/ruby-2.0.0-p481/gems/railties-4.1.4/lib/rails/initializable.rb:30:in `run' /usr/local/rvm/gems/ruby-2.0.0-p481/gems/railties-4.1.4/lib/rails/initializable.rb:55:in `block in run_initializers' /usr/local/rvm/gems/ruby-2.0.0-p481/gems/railties-4.1.4/lib/rails/initializable.rb:54:in `run_initializers' /usr/local/rvm/gems/ruby-2.0.0-p481/gems/railties-4.1.4/lib/rails/application.rb:300:in `initialize!' /var/www/Lathercraft/config/environment.rb:5:in `' /usr/local/rvm/gems/ruby-2.0.0-p481/gems/activesupport-4.1.4/lib/active_support/dependencies.rb:247:in `require' /usr/local/rvm/gems/ruby-2.0.0-p481/gems/activesupport-4.1.4/lib/active_support/dependencies.rb:247:in `block in require' /usr/local/rvm/gems/ruby-2.0.0-p481/gems/activesupport-4.1.4/lib/active_support/dependencies.rb:232:in `load_dependency' /usr/local/rvm/gems/ruby-2.0.0-p481/gems/activesupport-4.1.4/lib/active_support/dependencies.rb:247:in `require' /usr/local/rvm/gems/ruby-2.0.0-p481/gems/railties-4.1.4/lib/rails/application.rb:276:in `require_environment!' /usr/local/rvm/gems/ruby-2.0.0-p481/gems/railties-4.1.4/lib/rails/application.rb:379:in `block in run_tasks_blocks' Tasks: TOP => db:migrate => environment (See full trace by running task with --trace)
うおう!今度はシークレットキーか。出力されてる文字列を、config/initializers/devise.rb の該当箇所に貼り付ける。
[root@www2465uo Lathercraft]# vim config/initializers/devise.rb
今度こそどうだ。
[root@www2465uo Lathercraft]# rake db:migrate RAILS_ENV=production == 20140708134805 CreateBrands: migrating ===================================== -- create_table(:brands) -> 0.1367s -- add_index(:brands, :name, {:unique=>true}) -> 0.1430s -- add_index(:brands, :slug, {:unique=>true}) -> 0.2081s == 20140708134805 CreateBrands: migrated (0.4885s) ============================ == 20140708135345 CreateProducts: migrating =================================== -- create_table(:products) -> 0.0521s -- add_index(:products, [:brand_id, :slug], {:unique=>true}) -> 0.0269s == 20140708135345 CreateProducts: migrated (0.0794s) ========================== == 20140708140110 CreateItems: migrating ====================================== -- create_table(:items) -> 0.0132s -- add_index(:items, :md5, {:unique=>true}) -> 0.0350s == 20140708140110 CreateItems: migrated (0.0485s) ============================= == 20140708215016 DeviseCreateUsers: migrating ================================ -- create_table(:users) -> 0.0087s -- add_index(:users, :email, {:unique=>true}) -> 0.0153s -- add_index(:users, :reset_password_token, {:unique=>true}) -> 0.0266s -- add_index(:users, :confirmation_token, {:unique=>true}) -> 0.0146s == 20140708215016 DeviseCreateUsers: migrated (0.0658s) ======================= == 20140719083223 CreateCategories: migrating ================================= -- create_table(:categories) -> 0.0059s == 20140719083223 CreateCategories: migrated (0.0060s) ======================== == 20140719085230 AddCategoryIdToItem: migrating ============================== -- add_column(:items, :category_id, :integer) -> 0.0115s == 20140719085230 AddCategoryIdToItem: migrated (0.0116s) ===================== == 20140720065147 AddAdminToUsers: migrating ================================== -- add_column(:users, :admin, :boolean, {:null=>false, :default=>false}) -> 0.0157s == 20140720065147 AddAdminToUsers: migrated (0.0158s) ========================= == 20140720134222 CreateStorages: migrating =================================== -- create_table(:storages) -> 0.0070s == 20140720134222 CreateStorages: migrated (0.0071s) ========================== == 20140721073254 CreateDownloads: migrating ================================== -- create_table(:downloads) -> 0.0060s == 20140721073254 CreateDownloads: migrated (0.0060s) ========================= == 20140721080127 CreateStoredItems: migrating ================================ -- create_table(:stored_items) -> 0.0075s == 20140721080127 CreateStoredItems: migrated (0.0076s) ======================= == 20140801123109 CreateRemovedItems: migrating =============================== -- create_table(:removed_items) -> 0.0074s == 20140801123109 CreateRemovedItems: migrated (0.0075s) ====================== == 20140801132346 AddBrandToRemovedItems: migrating =========================== -- add_column(:removed_items, :brand, :string) -> 0.0109s == 20140801132346 AddBrandToRemovedItems: migrated (0.0110s) ================== == 20140802001131 AddNameToUsers: migrating =================================== -- add_column(:users, :name, :string) -> 0.0770s -- add_index(:users, :name, {:unique=>true}) -> 0.0185s == 20140802001131 AddNameToUsers: migrated (0.0958s) ========================== == 20140802070045 CreateContacts: migrating =================================== -- create_table(:contacts) -> 0.0095s == 20140802070045 CreateContacts: migrated (0.0096s) ========================== == 20140808134556 AddOnHoldToItems: migrating ================================= -- add_column(:items, :on_hold, :boolean) -> 0.0145s == 20140808134556 AddOnHoldToItems: migrated (0.0147s) ========================
やった!
ついでに、production 環境用の secret_key_base を環境変数に設定して、アプリを起動してみる。
[root@www2465uo Lathercraft]# export SECRET_KEY_BASE=`rake secret` [root@www2465uo Lathercraft]# rails server -e production => Booting WEBrick => Rails 4.1.4 application starting in production on http://0.0.0.0:3000 => Run `rails server -h` for more startup options => Notice: server is listening on all interfaces (0.0.0.0). Consider using 127.0.0.1 (--binding option) => Ctrl-C to shutdown server [2014-08-14 15:18:04] INFO WEBrick 1.3.1 [2014-08-14 15:18:04] INFO ruby 2.0.0 (2014-05-08) [x86_64-linux] [2014-08-14 15:18:04] INFO WEBrick::HTTPServer#start: pid=27822 port=3000
ブラウザからアクセスすると、ちゃんとページが表示された。
というところで、今回はここまで。
前回は、作業用ユーザーの環境に rvm と Ruby をインストールしたけど、今回は root ユーザーの環境にインストールする。ま、このへんは基本的に前回と同じ作業なので、簡単に。rvm のインストールから。
[root@www2465uo takatoh]# curl -L https://get.rvm.io | bash -s stable
[root@www2465uo takatoh]# source /etc/profile.d/rvm.sh
rvm list known
でインストール可能なバージョンが見られる。
[root@www2465uo takatoh]# rvm list known # MRI Rubies [ruby-]1.8.6[-p420] [ruby-]1.8.7[-head] # security released on head [ruby-]1.9.1[-p431] [ruby-]1.9.2[-head] # security released on head [ruby-]1.9.3[-p547] [ruby-]2.0.0-p451 [ruby-]2.0.0[-p481] [ruby-]2.1.1 [ruby-]2.1[.2] [ruby-]2.1-head ruby-head # GoRuby goruby # Topaz topaz # TheCodeShop - MRI experimental patches tcs # jamesgolick - All around gangster jamesgolick # Minimalistic ruby implementation - ISO 30170:2012 mruby[-head] # JRuby jruby-1.6.8 jruby[-1.7.13] jruby-head # Rubinius rbx-1.3.3 rbx-2.0.0 rbx-2.1.1 rbx[-2.2.10] rbx-head # Ruby Enterprise Edition ree-1.8.6 ree[-1.8.7][-2012.02] # Kiji kiji # MagLev maglev[-head] maglev-1.0.0 # Mac OS X Snow Leopard Or Newer macruby-0.10 macruby-0.11 macruby[-0.12] macruby-nightly macruby-head # Opal opal # IronRuby ironruby[-1.1.3] ironruby-head
Ruby 2.0.0 をインストール。
[root@www2465uo takatoh]# rvm install 2.0.0
[root@www2465uo takatoh]# ruby -v ruby 2.0.0p481 (2014-05-08 revision 45883) [x86_64-linux] [root@www2465uo takatoh]# which ruby /usr/local/rvm/rubies/ruby-2.0.0-p481/bin/ruby
へえ、root ユーザーでインストールすると /usr/local 以下にインストールされるんだ。
[root@www2465uo takatoh]# gem install rails
長々とメッセージが出ていっぱいインストールされる。
とりあえず Rails でアプリを作ってみる。
[root@www2465uo takatoh]# rails new myapp -d mysql create create README.rdoc create Rakefile create config.ru create .gitignore create Gemfile create app create app/assets/javascripts/application.js create app/assets/stylesheets/application.css create app/controllers/application_controller.rb create app/helpers/application_helper.rb create app/views/layouts/application.html.erb create app/assets/images/.keep create app/mailers/.keep create app/models/.keep create app/controllers/concerns/.keep create app/models/concerns/.keep create bin create bin/bundle create bin/rails create bin/rake create config create config/routes.rb create config/application.rb create config/environment.rb create config/secrets.yml create config/environments create config/environments/development.rb create config/environments/production.rb create config/environments/test.rb create config/initializers create config/initializers/assets.rb create config/initializers/backtrace_silencers.rb create config/initializers/cookies_serializer.rb create config/initializers/filter_parameter_logging.rb create config/initializers/inflections.rb create config/initializers/mime_types.rb create config/initializers/session_store.rb create config/initializers/wrap_parameters.rb create config/locales create config/locales/en.yml create config/boot.rb create config/database.yml create db create db/seeds.rb create lib create lib/tasks create lib/tasks/.keep create lib/assets create lib/assets/.keep create log create log/.keep create public create public/404.html create public/422.html create public/500.html create public/favicon.ico create public/robots.txt create test/fixtures create test/fixtures/.keep create test/controllers create test/controllers/.keep create test/mailers create test/mailers/.keep create test/models create test/models/.keep create test/helpers create test/helpers/.keep create test/integration create test/integration/.keep create test/test_helper.rb create tmp/cache create tmp/cache/assets create vendor/assets/javascripts create vendor/assets/javascripts/.keep create vendor/assets/stylesheets create vendor/assets/stylesheets/.keep run bundle install Don't run Bundler as root. Bundler can ask for sudo if it is needed, and installing your bundle as root will break this application for all non-root users on this machine. Fetching gem metadata from https://rubygems.org/........... Resolving dependencies... Using rake 10.3.2 Using i18n 0.6.11 Using json 1.8.1 Using minitest 5.4.0 Using thread_safe 0.3.4 Using tzinfo 1.2.2 Using activesupport 4.1.4 Using builder 3.2.2 Using erubis 2.7.0 Using actionview 4.1.4 Using rack 1.5.2 Using rack-test 0.6.2 Using actionpack 4.1.4 Using mime-types 1.25.1 Using polyglot 0.3.5 Using treetop 1.4.15 Using mail 2.5.4 Using actionmailer 4.1.4 Using activemodel 4.1.4 Using arel 5.0.1.20140414130214 Using activerecord 4.1.4 Using bundler 1.6.2 Using coffee-script-source 1.7.1 Using execjs 2.2.1 Using coffee-script 2.3.0 Using thor 0.19.1 Using railties 4.1.4 Using coffee-rails 4.0.1 Using hike 1.2.3 Using multi_json 1.10.1 Using jbuilder 2.1.3 Using jquery-rails 3.1.1 Gem::Ext::BuildError: ERROR: Failed to build gem native extension. /usr/local/rvm/rubies/ruby-2.0.0-p481/bin/ruby extconf.rb checking for ruby/thread.h... yes checking for rb_thread_call_without_gvl() in ruby/thread.h... yes checking for rb_thread_blocking_region()... yes checking for rb_wait_for_single_fd()... yes checking for rb_hash_dup()... yes checking for rb_intern3()... yes ----- Using mysql_config at /usr/bin/mysql_config ----- checking for mysql.h... no checking for mysql/mysql.h... no ----- mysql.h is missing. please check your installation of mysql and try again. ----- *** extconf.rb failed *** Could not create Makefile due to some reason, probably lack of necessary libraries and/or headers. Check the mkmf.log file for more details. You may need configuration options. Provided configuration options: --with-opt-dir --without-opt-dir --with-opt-include --without-opt-include=${opt-dir}/include --with-opt-lib --without-opt-lib=${opt-dir}/lib --with-make-prog --without-make-prog --srcdir=. --curdir --ruby=/usr/local/rvm/rubies/ruby-2.0.0-p481/bin/ruby --with-mysql-dir --without-mysql-dir --with-mysql-include --without-mysql-include=${mysql-dir}/include --with-mysql-lib --without-mysql-lib=${mysql-dir}/ --with-mysql-config --without-mysql-config extconf failed, exit code 1 Gem files will remain installed in /usr/local/rvm/gems/ruby-2.0.0-p481/gems/mysql2-0.3.16 for inspection. Results logged to /usr/local/rvm/gems/ruby-2.0.0-p481/extensions/x86_64-linux/2.0.0/mysql2-0.3.16/gem_make.out An error occurred while installing mysql2 (0.3.16), and Bundler cannot continue. Make sure that `gem install mysql2 -v '0.3.16'` succeeds before bundling. run bundle exec spring binstub --all /usr/local/rvm/gems/ruby-2.0.0-p481@global/gems/bundler-1.6.2/lib/bundler/resolver.rb:352:in `resolve': Could not find gem 'mysql2 (>= 0) ruby' in the gems available on this machine. (Bundler::GemNotFound) from /usr/local/rvm/gems/ruby-2.0.0-p481@global/gems/bundler-1.6.2/lib/bundler/resolver.rb:165:in `start' from /usr/local/rvm/gems/ruby-2.0.0-p481@global/gems/bundler-1.6.2/lib/bundler/resolver.rb:129:in `resolve' from /usr/local/rvm/gems/ruby-2.0.0-p481@global/gems/bundler-1.6.2/lib/bundler/definition.rb:203:in `resolve' from /usr/local/rvm/gems/ruby-2.0.0-p481@global/gems/bundler-1.6.2/lib/bundler/definition.rb:133:in `specs' from /usr/local/rvm/gems/ruby-2.0.0-p481@global/gems/bundler-1.6.2/lib/bundler/definition.rb:178:in `specs_for' from /usr/local/rvm/gems/ruby-2.0.0-p481@global/gems/bundler-1.6.2/lib/bundler/definition.rb:167:in `requested_specs' from /usr/local/rvm/gems/ruby-2.0.0-p481@global/gems/bundler-1.6.2/lib/bundler/environment.rb:18:in `requested_specs' from /usr/local/rvm/gems/ruby-2.0.0-p481@global/gems/bundler-1.6.2/lib/bundler/runtime.rb:13:in `setup' from /usr/local/rvm/gems/ruby-2.0.0-p481@global/gems/bundler-1.6.2/lib/bundler.rb:120:in `setup' from /usr/local/rvm/gems/ruby-2.0.0-p481@global/gems/bundler-1.6.2/lib/bundler/setup.rb:17:in `' from /usr/local/rvm/rubies/ruby-2.0.0-p481/lib/ruby/site_ruby/2.0.0/rubygems/core_ext/kernel_require.rb:55:in `require' from /usr/local/rvm/rubies/ruby-2.0.0-p481/lib/ruby/site_ruby/2.0.0/rubygems/core_ext/kernel_require.rb:55:in `require'
おや、何かエラーが出た。mysql2 の gem がインストールできてないみたいだ。じゃ、直接インストールしてみるか。
[root@www2465uo takatoh]# gem install mysql2 -v '0.3.16' Building native extensions. This could take a while... ERROR: Error installing mysql2: ERROR: Failed to build gem native extension. /usr/local/rvm/rubies/ruby-2.0.0-p481/bin/ruby extconf.rb checking for ruby/thread.h... yes checking for rb_thread_call_without_gvl() in ruby/thread.h... yes checking for rb_thread_blocking_region()... yes checking for rb_wait_for_single_fd()... yes checking for rb_hash_dup()... yes checking for rb_intern3()... yes ----- Using mysql_config at /usr/bin/mysql_config ----- checking for mysql.h... no checking for mysql/mysql.h... no ----- mysql.h is missing. please check your installation of mysql and try again. ----- *** extconf.rb failed *** Could not create Makefile due to some reason, probably lack of necessary libraries and/or headers. Check the mkmf.log file for more details. You may need configuration options. Provided configuration options: --with-opt-dir --without-opt-dir --with-opt-include --without-opt-include=${opt-dir}/include --with-opt-lib --without-opt-lib=${opt-dir}/lib --with-make-prog --without-make-prog --srcdir=. --curdir --ruby=/usr/local/rvm/rubies/ruby-2.0.0-p481/bin/ruby --with-mysql-dir --without-mysql-dir --with-mysql-include --without-mysql-include=${mysql-dir}/include --with-mysql-lib --without-mysql-lib=${mysql-dir}/ --with-mysql-config --without-mysql-config extconf failed, exit code 1 Gem files will remain installed in /usr/local/rvm/gems/ruby-2.0.0-p481/gems/mysql2-0.3.16 for inspection. Results logged to /usr/local/rvm/gems/ruby-2.0.0-p481/extensions/x86_64-linux/2.0.0/mysql2-0.3.16/gem_make.out
ダメのようだね。mysql.h が見つからない、といっているらしい。
[root@www2465uo takatoh]# yum install mysql-devel Loaded plugins: fastestmirror, security Loading mirror speeds from cached hostfile * base: ftp.tsukuba.wide.ad.jp * epel: ftp.riken.jp * extras: ftp.tsukuba.wide.ad.jp * updates: ftp.tsukuba.wide.ad.jp Setting up Install Process Resolving Dependencies --> Running transaction check ---> Package mysql-devel.x86_64 0:5.1.73-3.el6_5 will be installed --> Finished Dependency Resolution Dependencies Resolved ================================================================================ Package Arch Version Repository Size ================================================================================ Installing: mysql-devel x86_64 5.1.73-3.el6_5 updates 129 k Transaction Summary ================================================================================ Install 1 Package(s) Total download size: 129 k Installed size: 388 k Is this ok [y/N]: y Downloading Packages: mysql-devel-5.1.73-3.el6_5.x86_64.rpm | 129 kB 00:00 Running rpm_check_debug Running Transaction Test Transaction Test Succeeded Running Transaction Installing : mysql-devel-5.1.73-3.el6_5.x86_64 1/1 Verifying : mysql-devel-5.1.73-3.el6_5.x86_64 1/1 Installed: mysql-devel.x86_64 0:5.1.73-3.el6_5 Complete!
今度はどうだ。
[root@www2465uo takatoh]# cd myapp [root@www2465uo myapp]# bundle install Don't run Bundler as root. Bundler can ask for sudo if it is needed, and installing your bundle as root will break this application for all non-root users on this machine. Fetching gem metadata from https://rubygems.org/........... Resolving dependencies... Using rake 10.3.2 Using i18n 0.6.11 Using json 1.8.1 Using minitest 5.4.0 Using thread_safe 0.3.4 Using tzinfo 1.2.2 Using activesupport 4.1.4 Using builder 3.2.2 Using erubis 2.7.0 Using actionview 4.1.4 Using rack 1.5.2 Using rack-test 0.6.2 Using actionpack 4.1.4 Using mime-types 1.25.1 Using polyglot 0.3.5 Using treetop 1.4.15 Using mail 2.5.4 Using actionmailer 4.1.4 Using activemodel 4.1.4 Using arel 5.0.1.20140414130214 Using activerecord 4.1.4 Using bundler 1.6.2 Using coffee-script-source 1.7.1 Using execjs 2.2.1 Using coffee-script 2.3.0 Using thor 0.19.1 Using railties 4.1.4 Using coffee-rails 4.0.1 Using hike 1.2.3 Using multi_json 1.10.1 Using jbuilder 2.1.3 Using jquery-rails 3.1.1 Installing mysql2 0.3.16 Using tilt 1.4.1 Using sprockets 2.11.0 Using sprockets-rails 2.1.3 Using rails 4.1.4 Using rdoc 4.1.1 Using sass 3.2.19 Using sass-rails 4.0.3 Using sdoc 0.4.1 Using spring 1.1.3 Using turbolinks 2.2.2 Using uglifier 2.5.3 Your bundle is complete! Use `bundle show [gemname]` to see where a bundled gem is installed.
OK みたい。
じゃ、アプリを起動してみよう。おっと、その前に 3000 番ポートを開けておかなきゃ。/etc/sysconfig/iptables を編集して次の行を挿入。
-A RH-Firewall-1-INPUT -p tcp --dport 3000 -j ACCEPT
で、iptables を再起動。
[root@www2465uo myapp]# service iptables restart iptables: チェインをポリシー ACCEPT へ設定中filter [ OK ] iptables: ファイアウォールルールを消去中: [ OK ] iptables: モジュールを取り外し中: [ OK ] iptables: ファイアウォールルールを適用中: [ OK ]
よし、アプリを起動してブラウザからアクセスしてみる。
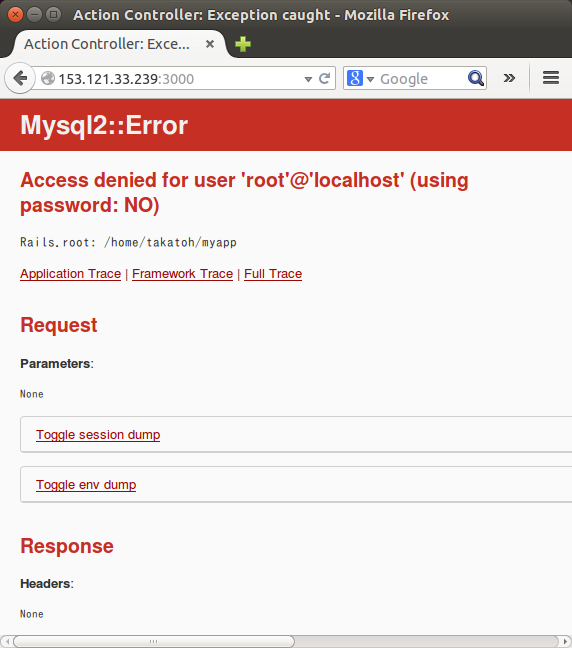
あー、MySQL の方を設定してないからか。
myapp というデータベースを作って、myapp@localhost からアクセスできるようにする。
[root@www2465uo myapp]# mysql -u root -p Enter password: Welcome to the MySQL monitor. Commands end with ; or \g. Your MySQL connection id is 441 Server version: 5.1.73 Source distribution Copyright (c) 2000, 2013, Oracle and/or its affiliates. All rights reserved. Oracle is a registered trademark of Oracle Corporation and/or its affiliates. Other names may be trademarks of their respective owners. Type 'help;' or '\h' for help. Type '\c' to clear the current input statement. mysql> CREATE USER myapp@localhost IDENTIFIED BY 'myapp'; Query OK, 0 rows affected (0.00 sec) mysql> CREATE DATABASE myapp_development; Query OK, 1 row affected (0.00 sec) mysql> GRANT ALL ON myapp_development.* TO myapp; Query OK, 0 rows affected (0.00 sec) mysql> EXIT; Bye
config/database.yml を編集。
# MySQL. Versions 5.0+ are recommended. # # Install the MYSQL driver # gem install mysql2 # # Ensure the MySQL gem is defined in your Gemfile # gem 'mysql2' # # And be sure to use new-style password hashing: # http://dev.mysql.com/doc/refman/5.0/en/old-client.html # default: &default adapter: mysql2 encoding: utf8 pool: 5 username: myapp password: myapp socket: /var/lib/mysql/mysql.sock development: <<: *default database: myapp_development (後略)
[root@www2465uo myapp]# rake db:setup myapp_development already exists Mysql2::Error: Access denied for user 'myapp'@'localhost' to database 'myapp_test': CREATE DATABASE `myapp_test` DEFAULT CHARACTER SET `utf8` COLLATE `utf8_unicode_ci` /usr/local/rvm/gems/ruby-2.0.0-p481/gems/activerecord-4.1.4/lib/active_record/connection_adapters/abstract_mysql_adapter.rb:303:in `query' /usr/local/rvm/gems/ruby-2.0.0-p481/gems/activerecord-4.1.4/lib/active_record/connection_adapters/abstract_mysql_adapter.rb:303:in `block in execute' /usr/local/rvm/gems/ruby-2.0.0-p481/gems/activerecord-4.1.4/lib/active_record/connection_adapters/abstract_adapter.rb:373:in `block in log' /usr/local/rvm/gems/ruby-2.0.0-p481/gems/activesupport-4.1.4/lib/active_support/notifications/instrumenter.rb:20:in `instrument' /usr/local/rvm/gems/ruby-2.0.0-p481/gems/activerecord-4.1.4/lib/active_record/connection_adapters/abstract_adapter.rb:367:in `log' /usr/local/rvm/gems/ruby-2.0.0-p481/gems/activerecord-4.1.4/lib/active_record/connection_adapters/abstract_mysql_adapter.rb:303:in `execute' /usr/local/rvm/gems/ruby-2.0.0-p481/gems/activerecord-4.1.4/lib/active_record/connection_adapters/mysql2_adapter.rb:228:in `execute' /usr/local/rvm/gems/ruby-2.0.0-p481/gems/activerecord-4.1.4/lib/active_record/connection_adapters/abstract_mysql_adapter.rb:371:in `create_database' /usr/local/rvm/gems/ruby-2.0.0-p481/gems/activerecord-4.1.4/lib/active_record/tasks/mysql_database_tasks.rb:16:in `create' /usr/local/rvm/gems/ruby-2.0.0-p481/gems/activerecord-4.1.4/lib/active_record/tasks/database_tasks.rb:88:in `create' /usr/local/rvm/gems/ruby-2.0.0-p481/gems/activerecord-4.1.4/lib/active_record/tasks/database_tasks.rb:102:in `block in create_current' /usr/local/rvm/gems/ruby-2.0.0-p481/gems/activerecord-4.1.4/lib/active_record/tasks/database_tasks.rb:209:in `block in each_current_configuration' /usr/local/rvm/gems/ruby-2.0.0-p481/gems/activerecord-4.1.4/lib/active_record/tasks/database_tasks.rb:208:in `each' /usr/local/rvm/gems/ruby-2.0.0-p481/gems/activerecord-4.1.4/lib/active_record/tasks/database_tasks.rb:208:in `each_current_configuration' /usr/local/rvm/gems/ruby-2.0.0-p481/gems/activerecord-4.1.4/lib/active_record/tasks/database_tasks.rb:101:in `create_current' /usr/local/rvm/gems/ruby-2.0.0-p481/gems/activerecord-4.1.4/lib/active_record/railties/databases.rake:17:in `block (2 levels) in ' /usr/local/rvm/gems/ruby-2.0.0-p481/gems/rake-10.3.2/lib/rake/task.rb:240:in `call' /usr/local/rvm/gems/ruby-2.0.0-p481/gems/rake-10.3.2/lib/rake/task.rb:240:in `block in execute' /usr/local/rvm/gems/ruby-2.0.0-p481/gems/rake-10.3.2/lib/rake/task.rb:235:in `each' /usr/local/rvm/gems/ruby-2.0.0-p481/gems/rake-10.3.2/lib/rake/task.rb:235:in `execute' /usr/local/rvm/gems/ruby-2.0.0-p481/gems/rake-10.3.2/lib/rake/task.rb:179:in `block in invoke_with_call_chain' /usr/local/rvm/rubies/ruby-2.0.0-p481/lib/ruby/2.0.0/monitor.rb:211:in `mon_synchronize' /usr/local/rvm/gems/ruby-2.0.0-p481/gems/rake-10.3.2/lib/rake/task.rb:172:in `invoke_with_call_chain' /usr/local/rvm/gems/ruby-2.0.0-p481/gems/rake-10.3.2/lib/rake/task.rb:201:in `block in invoke_prerequisites' /usr/local/rvm/gems/ruby-2.0.0-p481/gems/rake-10.3.2/lib/rake/task.rb:199:in `each' /usr/local/rvm/gems/ruby-2.0.0-p481/gems/rake-10.3.2/lib/rake/task.rb:199:in `invoke_prerequisites' /usr/local/rvm/gems/ruby-2.0.0-p481/gems/rake-10.3.2/lib/rake/task.rb:178:in `block in invoke_with_call_chain' /usr/local/rvm/rubies/ruby-2.0.0-p481/lib/ruby/2.0.0/monitor.rb:211:in `mon_synchronize' /usr/local/rvm/gems/ruby-2.0.0-p481/gems/rake-10.3.2/lib/rake/task.rb:172:in `invoke_with_call_chain' /usr/local/rvm/gems/ruby-2.0.0-p481/gems/rake-10.3.2/lib/rake/task.rb:201:in `block in invoke_prerequisites' /usr/local/rvm/gems/ruby-2.0.0-p481/gems/rake-10.3.2/lib/rake/task.rb:199:in `each' /usr/local/rvm/gems/ruby-2.0.0-p481/gems/rake-10.3.2/lib/rake/task.rb:199:in `invoke_prerequisites' /usr/local/rvm/gems/ruby-2.0.0-p481/gems/rake-10.3.2/lib/rake/task.rb:178:in `block in invoke_with_call_chain' /usr/local/rvm/rubies/ruby-2.0.0-p481/lib/ruby/2.0.0/monitor.rb:211:in `mon_synchronize' /usr/local/rvm/gems/ruby-2.0.0-p481/gems/rake-10.3.2/lib/rake/task.rb:172:in `invoke_with_call_chain' /usr/local/rvm/gems/ruby-2.0.0-p481/gems/rake-10.3.2/lib/rake/task.rb:165:in `invoke' /usr/local/rvm/gems/ruby-2.0.0-p481/gems/rake-10.3.2/lib/rake/application.rb:150:in `invoke_task' /usr/local/rvm/gems/ruby-2.0.0-p481/gems/rake-10.3.2/lib/rake/application.rb:106:in `block (2 levels) in top_level' /usr/local/rvm/gems/ruby-2.0.0-p481/gems/rake-10.3.2/lib/rake/application.rb:106:in `each' /usr/local/rvm/gems/ruby-2.0.0-p481/gems/rake-10.3.2/lib/rake/application.rb:106:in `block in top_level' /usr/local/rvm/gems/ruby-2.0.0-p481/gems/rake-10.3.2/lib/rake/application.rb:115:in `run_with_threads' /usr/local/rvm/gems/ruby-2.0.0-p481/gems/rake-10.3.2/lib/rake/application.rb:100:in `top_level' /usr/local/rvm/gems/ruby-2.0.0-p481/gems/rake-10.3.2/lib/rake/application.rb:78:in `block in run' /usr/local/rvm/gems/ruby-2.0.0-p481/gems/rake-10.3.2/lib/rake/application.rb:176:in `standard_exception_handling' /usr/local/rvm/gems/ruby-2.0.0-p481/gems/rake-10.3.2/lib/rake/application.rb:75:in `run' /usr/local/rvm/gems/ruby-2.0.0-p481/gems/rake-10.3.2/bin/rake:33:in `' /usr/local/rvm/gems/ruby-2.0.0-p481/bin/rake:23:in `load' /usr/local/rvm/gems/ruby-2.0.0-p481/bin/rake:23:in `
なんかいろいろメッセージが出てるけど、見ないことにする。
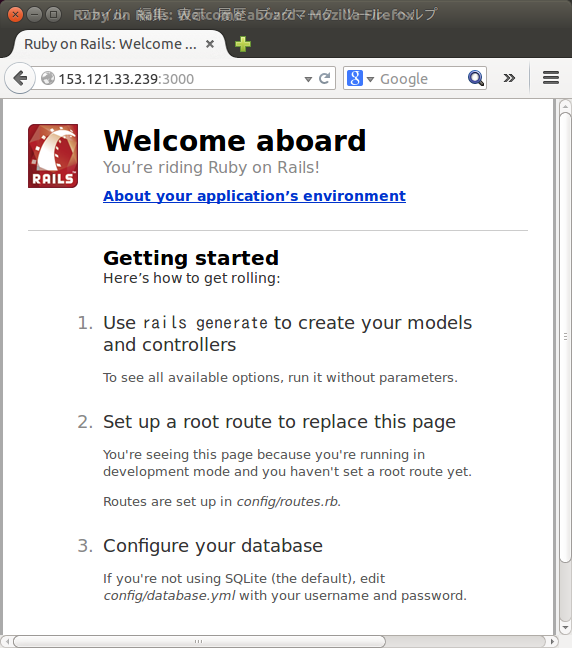
で、ブラウザからアクセスすると:
今度はOK。
yum コマンドでもインストールできるんだけど、それだと Ruby 1.8.7 だったので、rvm で Ruby 1.9.3 をインストールした。
[takatoh@www2465uo ~]$ curl -L https://get.rvm.io | bash -s stable % Total % Received % Xferd Average Speed Time Time Time Current Dload Upload Total Spent Left Speed 100 20758 100 20758 0 0 22601 0 --:--:-- --:--:-- --:--:-- 22601 Downloading https://github.com/wayneeseguin/rvm/archive/stable.tar.gz Installing RVM to /home/takatoh/.rvm/ Adding rvm PATH line to /home/takatoh/.profile /home/takatoh/.bashrc /home/takatoh/.zshrc. Adding rvm loading line to /home/takatoh/.bash_profile /home/takatoh/.zlogin. Installation of RVM in /home/takatoh/.rvm/ is almost complete: * To start using RVM you need to run `source /home/takatoh/.rvm/scripts/rvm` in all your open shell windows, in rare cases you need to reopen all shell windows. # takatoh, # # Thank you for using RVM! # We sincerely hope that RVM helps to make your life easier and more enjoyable!!! # # ~Wayne, Michal & team. In case of problems: http://rvm.io/help and https://twitter.com/rvm_io * WARNING: You have '~/.profile' file, you might want to load it, to do that add the following line to '/home/takatoh/.bash_profile': source ~/.profile [takatoh@www2465uo ~]$ source /home/takatoh/.rvm/scripts/rvm [takatoh@www2465uo ~]$ rvm -v rvm 1.25.28 (stable) by Wayne E. Seguin, Michal Papis [https://rvm.io/] [takatoh@www2465uo ~]$ rvm install 1.9.3 Searching for binary rubies, this might take some time. Found remote file https://rvm.io/binaries/centos/6/x86_64/ruby-1.9.3-p547.tar.bz2 Checking requirements for centos. Installing requirements for centos. Updating system. Installing required packages: libyaml-devel, libffi-devel, readline-devel, zlib-devel, openssl-devel..takatoh password required for 'yum install -y libyaml-devel libffi-devel readline-devel zlib-devel openssl-devel': ............ Requirements installation successful. ruby-1.9.3-p547 - #configure ruby-1.9.3-p547 - #download % Total % Received % Xferd Average Speed Time Time Time Current Dload Upload Total Spent Left Speed 100 10.2M 100 10.2M 0 0 218k 0 0:00:48 0:00:48 --:--:-- 229k ruby-1.9.3-p547 - #validate archive ruby-1.9.3-p547 - #extract ruby-1.9.3-p547 - #validate binary ruby-1.9.3-p547 - #setup ruby-1.9.3-p547 - #gemset created /home/takatoh/.rvm/gems/ruby-1.9.3-p547@global ruby-1.9.3-p547 - #importing gemset /home/takatoh/.rvm/gemsets/global.gems.................................... ruby-1.9.3-p547 - #generating global wrappers........ ruby-1.9.3-p547 - #gemset created /home/takatoh/.rvm/gems/ruby-1.9.3-p547 ruby-1.9.3-p547 - #importing gemsetfile /home/takatoh/.rvm/gemsets/default.gems evaluated to empty gem list ruby-1.9.3-p547 - #generating default wrappers........ [takatoh@www2465uo ~]$ ruby -v ruby 1.9.3p547 (2014-05-14 revision 45962) [x86_64-linux]
普通に yum コマンドでインストールできた。
[takatoh@www2465uo ~]$ sudo yum install nodejs [sudo] password for takatoh: Loaded plugins: fastestmirror, security Loading mirror speeds from cached hostfile epel/metalink | 5.6 kB 00:01 * base: ftp.tsukuba.wide.ad.jp * epel: ftp.riken.jp * extras: ftp.tsukuba.wide.ad.jp * updates: ftp.tsukuba.wide.ad.jp base | 3.7 kB 00:00 epel | 4.4 kB 00:00 extras | 3.4 kB 00:00 updates | 3.4 kB 00:00 updates/primary_db | 4.7 MB 00:21 Setting up Install Process Resolving Dependencies --> Running transaction check ---> Package nodejs.x86_64 0:0.10.29-1.el6 will be installed --> Processing Dependency: v8(x86-64) < 1:3.15 for package: nodejs-0.10.29-1.el6.x86_64 --> Processing Dependency: v8(x86-64) >= 1:3.14.5.7 for package: nodejs-0.10.29-1.el6.x86_64 --> Processing Dependency: libv8.so.3()(64bit) for package: nodejs-0.10.29-1.el6.x86_64 --> Processing Dependency: libuv.so.0.10()(64bit) for package: nodejs-0.10.29-1.el6.x86_64 --> Processing Dependency: libhttp_parser.so.2()(64bit) for package: nodejs-0.10.29-1.el6.x86_64 --> Processing Dependency: libcares19.so.2()(64bit) for package: nodejs-0.10.29-1.el6.x86_64 --> Running transaction check ---> Package c-ares19.x86_64 0:1.9.1-5.el6.3 will be installed ---> Package http-parser.x86_64 0:2.0-4.20121128gitcd01361.el6 will be installed ---> Package libuv.x86_64 1:0.10.27-1.el6 will be installed ---> Package v8.x86_64 1:3.14.5.10-9.el6 will be installed --> Processing Dependency: libicuuc.so.42()(64bit) for package: 1:v8-3.14.5.10-9.el6.x86_64 --> Processing Dependency: libicui18n.so.42()(64bit) for package: 1:v8-3.14.5.10-9.el6.x86_64 --> Processing Dependency: libicudata.so.42()(64bit) for package: 1:v8-3.14.5.10-9.el6.x86_64 --> Running transaction check ---> Package libicu.x86_64 0:4.2.1-9.1.el6_2 will be installed --> Finished Dependency Resolution Dependencies Resolved ================================================================================ Package Arch Version Repository Size ================================================================================ Installing: nodejs x86_64 0.10.29-1.el6 epel 498 k Installing for dependencies: c-ares19 x86_64 1.9.1-5.el6.3 epel 73 k http-parser x86_64 2.0-4.20121128gitcd01361.el6 epel 22 k libicu x86_64 4.2.1-9.1.el6_2 base 4.9 M libuv x86_64 1:0.10.27-1.el6 epel 55 k v8 x86_64 1:3.14.5.10-9.el6 epel 3.0 M Transaction Summary ================================================================================ Install 6 Package(s) Total download size: 8.6 M Installed size: 31 M Is this ok [y/N]: y Downloading Packages: (1/6): c-ares19-1.9.1-5.el6.3.x86_64.rpm | 73 kB 00:00 (2/6): http-parser-2.0-4.20121128gitcd01361.el6.x86_64.r | 22 kB 00:00 (3/6): libicu-4.2.1-9.1.el6_2.x86_64.rpm | 4.9 MB 00:22 (4/6): libuv-0.10.27-1.el6.x86_64.rpm | 55 kB 00:00 (5/6): nodejs-0.10.29-1.el6.x86_64.rpm | 498 kB 00:02 (6/6): v8-3.14.5.10-9.el6.x86_64.rpm | 3.0 MB 00:13 -------------------------------------------------------------------------------- Total 206 kB/s | 8.6 MB 00:42 Running rpm_check_debug Running Transaction Test Transaction Test Succeeded Running Transaction Installing : http-parser-2.0-4.20121128gitcd01361.el6.x86_64 1/6 Installing : c-ares19-1.9.1-5.el6.3.x86_64 2/6 Installing : libicu-4.2.1-9.1.el6_2.x86_64 3/6 Installing : 1:v8-3.14.5.10-9.el6.x86_64 4/6 Installing : 1:libuv-0.10.27-1.el6.x86_64 5/6 Installing : nodejs-0.10.29-1.el6.x86_64 6/6 Verifying : 1:v8-3.14.5.10-9.el6.x86_64 1/6 Verifying : 1:libuv-0.10.27-1.el6.x86_64 2/6 Verifying : libicu-4.2.1-9.1.el6_2.x86_64 3/6 Verifying : c-ares19-1.9.1-5.el6.3.x86_64 4/6 Verifying : http-parser-2.0-4.20121128gitcd01361.el6.x86_64 5/6 Verifying : nodejs-0.10.29-1.el6.x86_64 6/6 Installed: nodejs.x86_64 0:0.10.29-1.el6 Dependency Installed: c-ares19.x86_64 0:1.9.1-5.el6.3 http-parser.x86_64 0:2.0-4.20121128gitcd01361.el6 libicu.x86_64 0:4.2.1-9.1.el6_2 libuv.x86_64 1:0.10.27-1.el6 v8.x86_64 1:3.14.5.10-9.el6 Complete! [takatoh@www2465uo ~]$ node -v v0.10.29