さくらVPS:Nginx+PHPでWordPressを動かす(一応解決編)

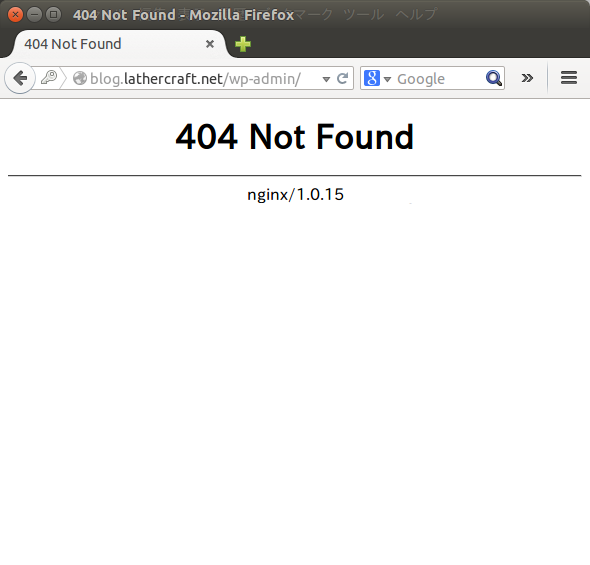
前回は、インストールには成功したはずが、アクセスすると Not Found になってしまったところで終わった。一応解決したので、メモしておく。

参考になったページは次のとおり。

 cf. nginx – 404 not found page for permalinks [closed] – stackoverflow
 cf. nginxの設定ではまった事 – のぶろぐ

まずは1つ目の stackoverflow のページにあるとおり、Nginx の設定ファイル(/etc/nginx/conf.d/blog.lathercraft.net.conf)に、try_files 〜 という行を追加した。
これで、無事ページが表示されるようになったんだけど、スタイルが読み込まれていない、ただの html だけのような表示になってしまった。

で、2つ目のページにしたがって、静的なファイル(画像やCSS)を読み込む設定をしたら、うまくいった。

最終的に、設定ファイルはこうなった。

server {
    # port
    listen 80;

    # server name
    server_name blog.lathercraft.net;

    # document root
    root /ver/www/wordpress;

    # index
    index index.php;

    # log files
    access_log /var/log/nginx/blog.lathercraft.net/access.log main;
    error_log /var/log/nginx/blog.lathercraft.net/error.log warn;

    if (!-e $request_filename) {
        rewrite ^/(.+)# /index.php?q=$1 last;
        break;
    }

    try_files $uri $uri/ /index.php?q=$uri&$args;

    # php-fpm
    location ~\.php$ {
        root /var/www/wordpress;
        fastcgi_pass 127.0.0.1:9000;
        fastcgi_index index.php;
        fastcgi_param SCRIPT_FILENAME $document_root$fastcgi_script_name;
        include fastcgi_params;
    }

    location ~* ^.+.(jpg|jpeg|gif|css|png|js|ico)$ {
        root /var/www/wordpress;
        access_log off;
        expires 30d;
    }

}

なんだかよくわからないけど、動いているので良しとする。

さくらVPS:Nginx+PHPでWordPressを動かす

blog.lathercraft.net

WordPress は blog.lathercraft.net で動かすつもりなので、まずは昨日作った、www.lathercraft.net 用の設定ファイルをコピー。

[root@www2465uo takatoh]# cp /etc/nginx/conf.d/www.lathercraft.net.conf /etc/nginx/conf.d/blog.lathercraft.net.conf

コピーした blog.lathercraft.net.conf を編集して、サーバー名に当たるところを blog.lathercraft.net に、root を /var/www/wordpress に書き換える。
でもって Nginx を再起動。

[root@www2465uo takatoh]# service nginx restart
nginx: [warn] conflicting server name "www.lathercraft.net" on 0.0.0.0:80, ignored
nginx を停止中:                                            [  OK  ]
nginx を起動中: nginx: [warn] conflicting server name "www.lathercraft.net" on 0.0.0.0:80, ignored
                                                           [  OK  ]

これで、blog.lathercraft.net にアクセスできるようになった。

WordPressをダウンロード

/var/www/wordpress にインストールすることにしたので、まずはディレクトリを作って移動する。

[root@www2465uo takatoh]# cd /var/www
[root@www2465uo www]# ls
cgi-bin  error  html  icons
[root@www2465uo www]# mkdir wordpress
[root@www2465uo www]# ls
cgi-bin  error  html  icons  wordpress
[root@www2465uo www]# cd wordpress
[root@www2465uo wordpress]# pwd
/var/www/wordpress

日本語版の公式サイトから最新版をダウンロード。

[root@www2465uo wordpress]# wget http://ja.wordpress.org/wordpress-3.9.2-ja.zip
--2014-08-10 12:07:50--  http://ja.wordpress.org/wordpress-3.9.2-ja.zip
ja.wordpress.org をDNSに問いあわせています... 66.155.40.249, 66.155.40.250
ja.wordpress.org|66.155.40.249|:80 に接続しています... 接続しました。
HTTP による接続要求を送信しました、応答を待っています... 200 OK
長さ: 6802737 (6.5M) [application/zip]
`wordpress-3.9.2-ja.zip' に保存中

100%[======================================>] 6,802,737    231K/s 時間 29s     

2014-08-10 12:08:19 (231 KB/s) - `wordpress-3.9.2-ja.zip' へ保存完了 [6802737/6802737]

ダウンロードしたファイルを解凍。

[root@www2465uo wordpress]# ls
wordpress-3.9.2-ja.zip
[root@www2465uo wordpress]# unzip -qq wordpress-3.9.2-ja.zip
[root@www2465uo wordpress]# ls
wordpress  wordpress-3.9.2-ja.zip

あれ、wordpress ディレクトリができちゃった。というわけで、一つ上のディレクトリに移動してもう一度。

[root@www2465uo wordpress]# ls
wordpress  wordpress-3.9.2-ja.zip
[root@www2465uo wordpress]# rm -f -r wordpress
[root@www2465uo wordpress]# mv wordpress-3.9.2-ja.zip ..
[root@www2465uo wordpress]# ls
[root@www2465uo wordpress]# cd ..
[root@www2465uo www]# rmdir wordpress
[root@www2465uo www]# unzip -qq wordpress-3.9.2-ja.zip
[root@www2465uo www]# ls
cgi-bin  error  html  icons  wordpress  wordpress-3.9.2-ja.zip

MySQLにデータベースを作る

WordPress 用の空のデータベースを作る。ユーザは wordpress にする。

[root@www2465uo www]# mysql -u root -p
Enter password: 
Welcome to the MySQL monitor.  Commands end with ; or \g.
Your MySQL connection id is 12
Server version: 5.1.73 Source distribution

Copyright (c) 2000, 2013, Oracle and/or its affiliates. All rights reserved.

Oracle is a registered trademark of Oracle Corporation and/or its
affiliates. Other names may be trademarks of their respective
owners.

Type 'help;' or '\h' for help. Type '\c' to clear the current input statement.

mysql> USE mysql
Reading table information for completion of table and column names
You can turn off this feature to get a quicker startup with -A

Database changed
mysql> SHOW TABLES;
+---------------------------+
| Tables_in_mysql           |
+---------------------------+
| columns_priv              |
| db                        |
| event                     |
| func                      |
| general_log               |
| help_category             |
| help_keyword              |
| help_relation             |
| help_topic                |
| host                      |
| ndb_binlog_index          |
| plugin                    |
| proc                      |
| procs_priv                |
| servers                   |
| slow_log                  |
| tables_priv               |
| time_zone                 |
| time_zone_leap_second     |
| time_zone_name            |
| time_zone_transition      |
| time_zone_transition_type |
| user                      |
+---------------------------+
23 rows in set (0.00 sec)

mysql> INSERT INTO user SET user="wordpress", password=password("wordpress"), host="localhost";
Query OK, 1 row affected, 3 warnings (0.00 sec)

mysql> exit
Bye
[root@www2465uo www]# mysql -u root -p
Enter password: 
Welcome to the MySQL monitor.  Commands end with ; or \g.
Your MySQL connection id is 13
Server version: 5.1.73 Source distribution

Copyright (c) 2000, 2013, Oracle and/or its affiliates. All rights reserved.

Oracle is a registered trademark of Oracle Corporation and/or its
affiliates. Other names may be trademarks of their respective
owners.

Type 'help;' or '\h' for help. Type '\c' to clear the current input statement.

mysql> CREATE DATABASE wpdb;
Query OK, 1 row affected (0.00 sec)

mysql> GRANT ALL ON wpdb.* TO wordpress;
Query OK, 0 rows affected (0.00 sec)
mysql> exit
Bye

これでいいかな。

WordPressのインストール

blog.lathercraft.net/index.php にアクセスして WordPress をインストール。データベース名などを指定して続行すると、wp-config.php が書き込めないとでた。パーミッションの関係なんだろうけど、手動でコピペしてもいいらしいので、そのとおりに /var/www/wordpress/wp-config.php を作った。
改めて続行すると、あっという間にインストールは終わった。前にやった時もそうだけど楽でいいな。
さあ、ログインしてみよう。

wordpress-not-found

なんでだーーーーーー!
……ああ、力尽きた……

さくらVPSにMySQLをインストール

MySQLのインストール

yum コマンドでインストール。

[root@www2465uo takatoh]# yum install mysql-server
Loaded plugins: fastestmirror, security
Loading mirror speeds from cached hostfile
epel/metalink                                            | 5.9 kB     00:00     
 * base: ftp.tsukuba.wide.ad.jp
 * epel: ftp.kddilabs.jp
 * extras: ftp.tsukuba.wide.ad.jp
 * updates: ftp.tsukuba.wide.ad.jp
base                                                     | 3.7 kB     00:00     
extras                                                   | 3.4 kB     00:00     
updates                                                  | 3.4 kB     00:00     
Setting up Install Process
Resolving Dependencies
--> Running transaction check
---> Package mysql-server.x86_64 0:5.1.73-3.el6_5 will be installed
--> Processing Dependency: mysql = 5.1.73-3.el6_5 for package: mysql-server-5.1.73-3.el6_5.x86_64
--> Processing Dependency: perl-DBI for package: mysql-server-5.1.73-3.el6_5.x86_64
--> Processing Dependency: perl-DBD-MySQL for package: mysql-server-5.1.73-3.el6_5.x86_64
--> Processing Dependency: perl(DBI) for package: mysql-server-5.1.73-3.el6_5.x86_64
--> Running transaction check
---> Package mysql.x86_64 0:5.1.73-3.el6_5 will be installed
---> Package perl-DBD-MySQL.x86_64 0:4.013-3.el6 will be installed
---> Package perl-DBI.x86_64 0:1.609-4.el6 will be installed
--> Finished Dependency Resolution

Dependencies Resolved

================================================================================
 Package               Arch          Version               Repository      Size
================================================================================
Installing:
 mysql-server          x86_64        5.1.73-3.el6_5        updates        8.6 M
Installing for dependencies:
 mysql                 x86_64        5.1.73-3.el6_5        updates        894 k
 perl-DBD-MySQL        x86_64        4.013-3.el6           base           134 k
 perl-DBI              x86_64        1.609-4.el6           base           705 k

Transaction Summary
================================================================================
Install       4 Package(s)

Total download size: 10 M
Installed size: 29 M
Is this ok [y/N]: y
Downloading Packages:
(1/4): mysql-5.1.73-3.el6_5.x86_64.rpm                   | 894 kB     00:03     
(2/4): mysql-server-5.1.73-3.el6_5.x86_64.rpm            | 8.6 MB     00:38     
(3/4): perl-DBD-MySQL-4.013-3.el6.x86_64.rpm             | 134 kB     00:00     
(4/4): perl-DBI-1.609-4.el6.x86_64.rpm                   | 705 kB     00:03     
--------------------------------------------------------------------------------
Total                                           226 kB/s |  10 MB     00:46     
Running rpm_check_debug
Running Transaction Test
Transaction Test Succeeded
Running Transaction
  Installing : perl-DBI-1.609-4.el6.x86_64                                  1/4 
  Installing : perl-DBD-MySQL-4.013-3.el6.x86_64                            2/4 
  Installing : mysql-5.1.73-3.el6_5.x86_64                                  3/4 
  Installing : mysql-server-5.1.73-3.el6_5.x86_64                           4/4 
  Verifying  : perl-DBD-MySQL-4.013-3.el6.x86_64                            1/4 
  Verifying  : mysql-server-5.1.73-3.el6_5.x86_64                           2/4 
  Verifying  : mysql-5.1.73-3.el6_5.x86_64                                  3/4 
  Verifying  : perl-DBI-1.609-4.el6.x86_64                                  4/4 

Installed:
  mysql-server.x86_64 0:5.1.73-3.el6_5                                          

Dependency Installed:
  mysql.x86_64 0:5.1.73-3.el6_5       perl-DBD-MySQL.x86_64 0:4.013-3.el6      
  perl-DBI.x86_64 0:1.609-4.el6      

Complete!

MySQLの設定

設定ファイルは /etc/my.cnf。バックアップをとってから編集する。

[root@www2465uo takatoh]# cp /etc/my.cnf /etc/my.cnf.orig
[root@www2465uo takatoh]# vim /etc/my.cnf

/etc/my.cnf は次のようにした。色を付けた行が追加したところ。

[mysqld]
datadir=/var/lib/mysql
socket=/var/lib/mysql/mysql.sock
user=mysql
# Disabling symbolic-links is recommended to prevent assorted security risks
symbolic-links=0

character_set_server=utf8
default-storage-engine=InnoDB
innodb_file_per_table

[mysql]
default-character-set=utf8

[mysqldump]
default-character-set=utf8

[mysqld_safe]
log-error=/var/log/mysqld.log
pid-file=/var/run/mysqld/mysqld.pid

MySQLの起動

これで起動してみよう。

[root@www2465uo takatoh]# service mysqld start
MySQL Daemon failed to start.
mysqld を起動中:                                           [失敗]

あれ、失敗した。何がおかしいのかな。
設定ファイルを見なおしても、おかしいところが見つからない。
じゃ、試しにデフォルトの設定ファイルに戻して試してみよう。

[root@www2465uo takatoh]# cp /etc/my.cnf.orig /etc/my.cnf
cp: `/etc/my.cnf' を上書きしてもよろしいですか(yes/no)? y
[root@www2465uo takatoh]# service mysqld stop
mysqld を停止中:                                           [  OK  ]
[root@www2465uo takatoh]# service mysqld start
MySQL Daemon failed to start.
mysqld を起動中:                                           [失敗]

ダメじゃん。デフォルトの設定ファイルで動かないってどういうことさ。

いろいろ試した結果、次のようにしたら起動に成功した。

  1. yum remove mysql-server でアンインストール
  2. /var/llib/mysql ディレクトリを削除
  3. 再度 mysql-server をインストール

実は、最初に設定ファイルを書き換えたとき、innodb とするべきところを inoodb と typo していたのだ。気がついて直したんだけど、すでに一度 MySQL を起動した後だとダメだったらしい。で、/var/lib/mysql を削除したら OK になった、と。

[root@www2465uo ~]# service mysqld start
mysqld を起動中:                                           [  OK  ]

MySQLの設定(つづき)

mysql_secure_installation を実行する。

[root@www2465uo ~]# mysql_secure_installation

途中で、root のパスワードを設定するか、と訊かれるので、Y と答えてパスワードを設定する。それ以外は単にエンターキーを叩けば OK。

参考にしたサイト

 cf. さくらのVPS入門 #16 MySQLの設定をしよう – ドットインストール

さくらVPS:Nginxの設定

ドメインとった。
なので、Nginx のバーチャルホストの設定をする。ホスト名が www.lathercraft.net なので、etc/nginx/conf.d/www.lathercraft.net.conf というファイルを新規に作る。

[root@www2465uo takatoh]# vim /etc/nginx/conf.d/www.lathercraft.net.conf

参考サイトを見ながら次のようにした。

server {
    # port
    listen 80;

    # server name
    server_name www.lathercraft.net;

    # document root
    root /ver/www/html;

    # index
    index index.php index.html index.htm;

    # log files
    access_log /var/log/nginx/www.lathercraft.net/access.log main;
    error_log /var/log/nginx/www.lathercraft.net/error.log warn;

    # php-fpm
    location ~\.php$ {
        fastcgi_pass 127.0.0.1:9000;
        fastcgi_index index.php;
        fastcgi_param SCRIPT_FILENAME $document_root$fastcgi_script_name;
        include fastcgi_params;
    }
}

ログファイル用のディレクトリを作る。

[root@www2465uo takatoh]# mkdir /var/log/nginx/www.lathercraft.net
[root@www2465uo takatoh]# chown nginx /var/log/nginx/www.lathercraft.net

Nginx を再起動。

[root@www2465uo takatoh]# /etc/init.d/nginx restart
nginx を停止中:                                            [  OK  ]
nginx を起動中:                                            [  OK  ]

さて、これで Nginx の設定は終了。

最後に PHP がうまく動くかテストしてみる。

[root@www2465uo takatoh]# cd /var/www/html
[root@www2465uo html]# echo '<?php echo phpinfo(); ?>' > info.php

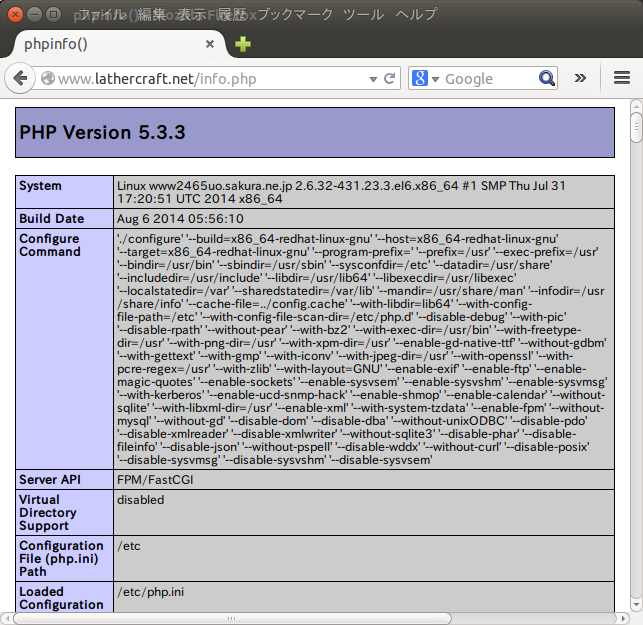
これで、http://www.lathercraft.net/info.php にアクセスすると、PHP のインフォメーションが出るはず。

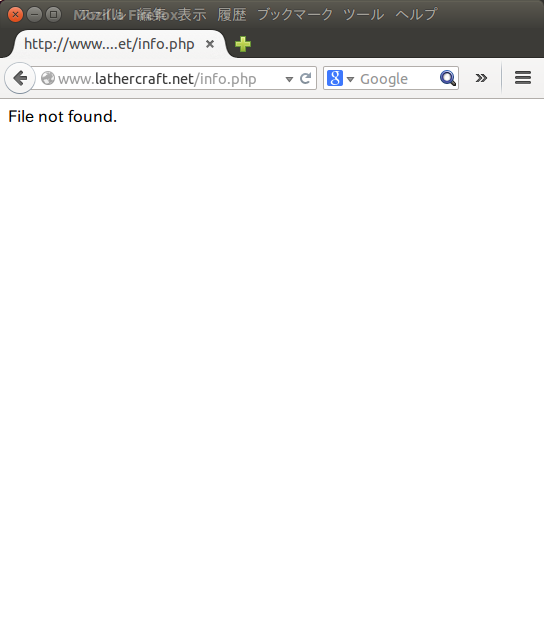
php-file-not-found

あれ、ダメだ。なんでだろう?

ググって調べた結果、↓このサイトの通りに変更したらうまくいった。

 cf. nginx + php-fpm で設定したが index.php にアクセスするとNOT FOUND(404)になってしまう – saba nano – へっぽこ管理者のサーバ管理日誌(LV.2)

具体的には、/etc/nginx/conf.d/www.lathercraft.net.conf に1行追加した。

server {
    # port
    listen 80;

    # server name
    server_name www.lathercraft.net;

    # document root
    root /ver/www/html;

    # index
    index index.php index.html index.htm;

    # log files
    access_log /var/log/nginx/www.lathercraft.net/access.log main;
    error_log /var/log/nginx/www.lathercraft.net/error.log warn;

    # php-fpm
    location ~\.php$ {
        root /var/www/html;
        fastcgi_pass 127.0.0.1:9000;
        fastcgi_index index.php;
        fastcgi_param SCRIPT_FILENAME $document_root$fastcgi_script_name;
        include fastcgi_params;
    }
}

これで再度アクセスしてみると:

php-success

OK。今度はうまくいった。

さくらVPSにPHPをインストールする

PHPをインストール

これも yum コマンドでインストールできる。

[takatoh@www2465uo ~]$ sudo -s
[sudo] password for takatoh: 
[root@www2465uo takatoh]# yum install php-cli php-mysql php-common php php-cgi php-fpm php-gd php-mbstring
Loaded plugins: fastestmirror, security
Loading mirror speeds from cached hostfile
 * base: ftp.tsukuba.wide.ad.jp
 * epel: ftp.kddilabs.jp
 * extras: ftp.tsukuba.wide.ad.jp
 * updates: ftp.tsukuba.wide.ad.jp
Setting up Install Process
Resolving Dependencies
--> Running transaction check
---> Package php.x86_64 0:5.3.3-27.el6_5.1 will be installed
--> Processing Dependency: httpd-mmn = 20051115 for package: php-5.3.3-27.el6_5.1.x86_64
--> Processing Dependency: httpd for package: php-5.3.3-27.el6_5.1.x86_64
---> Package php-cli.x86_64 0:5.3.3-27.el6_5.1 will be installed
---> Package php-common.x86_64 0:5.3.3-27.el6_5.1 will be installed
---> Package php-fpm.x86_64 0:5.3.3-27.el6_5.1 will be installed
---> Package php-gd.x86_64 0:5.3.3-27.el6_5.1 will be installed
---> Package php-mbstring.x86_64 0:5.3.3-27.el6_5.1 will be installed
---> Package php-mysql.x86_64 0:5.3.3-27.el6_5.1 will be installed
--> Processing Dependency: php-pdo(x86-64) for package: php-mysql-5.3.3-27.el6_5.1.x86_64
--> Running transaction check
---> Package httpd.x86_64 0:2.2.15-31.el6.centos will be installed
--> Processing Dependency: httpd-tools = 2.2.15-31.el6.centos for package: httpd-2.2.15-31.el6.centos.x86_64
--> Processing Dependency: apr-util-ldap for package: httpd-2.2.15-31.el6.centos.x86_64
---> Package php-pdo.x86_64 0:5.3.3-27.el6_5.1 will be installed
--> Running transaction check
---> Package apr-util-ldap.x86_64 0:1.3.9-3.el6_0.1 will be installed
---> Package httpd-tools.x86_64 0:2.2.15-31.el6.centos will be installed
--> Finished Dependency Resolution

Dependencies Resolved

================================================================================
 Package            Arch        Version                      Repository    Size
================================================================================
Installing:
 php                x86_64      5.3.3-27.el6_5.1             updates      1.1 M
 php-cli            x86_64      5.3.3-27.el6_5.1             updates      2.2 M
 php-common         x86_64      5.3.3-27.el6_5.1             updates      526 k
 php-fpm            x86_64      5.3.3-27.el6_5.1             updates      1.1 M
 php-gd             x86_64      5.3.3-27.el6_5.1             updates      107 k
 php-mbstring       x86_64      5.3.3-27.el6_5.1             updates      456 k
 php-mysql          x86_64      5.3.3-27.el6_5.1             updates       82 k
Installing for dependencies:
 apr-util-ldap      x86_64      1.3.9-3.el6_0.1              base          15 k
 httpd              x86_64      2.2.15-31.el6.centos         updates      824 k
 httpd-tools        x86_64      2.2.15-31.el6.centos         updates       73 k
 php-pdo            x86_64      5.3.3-27.el6_5.1             updates       76 k

Transaction Summary
================================================================================
Install      11 Package(s)

Total download size: 6.6 M
Installed size: 22 M
Is this ok [y/N]: y
Downloading Packages:
(1/11): apr-util-ldap-1.3.9-3.el6_0.1.x86_64.rpm         |  15 kB     00:00     
(2/11): httpd-2.2.15-31.el6.centos.x86_64.rpm            | 824 kB     00:03     
(3/11): httpd-tools-2.2.15-31.el6.centos.x86_64.rpm      |  73 kB     00:00     
(4/11): php-5.3.3-27.el6_5.1.x86_64.rpm                  | 1.1 MB     00:05     
(5/11): php-cli-5.3.3-27.el6_5.1.x86_64.rpm              | 2.2 MB     00:09     
(6/11): php-common-5.3.3-27.el6_5.1.x86_64.rpm           | 526 kB     00:02     
(7/11): php-fpm-5.3.3-27.el6_5.1.x86_64.rpm              | 1.1 MB     00:05     
(8/11): php-gd-5.3.3-27.el6_5.1.x86_64.rpm               | 107 kB     00:00     
(9/11): php-mbstring-5.3.3-27.el6_5.1.x86_64.rpm         | 456 kB     00:01     
(10/11): php-mysql-5.3.3-27.el6_5.1.x86_64.rpm           |  82 kB     00:00     
(11/11): php-pdo-5.3.3-27.el6_5.1.x86_64.rpm             |  76 kB     00:00     
--------------------------------------------------------------------------------
Total                                           193 kB/s | 6.6 MB     00:34     
Running rpm_check_debug
Running Transaction Test
Transaction Test Succeeded
Running Transaction
  Installing : php-common-5.3.3-27.el6_5.1.x86_64                          1/11 
  Installing : php-cli-5.3.3-27.el6_5.1.x86_64                             2/11 
  Installing : php-pdo-5.3.3-27.el6_5.1.x86_64                             3/11 
  Installing : httpd-tools-2.2.15-31.el6.centos.x86_64                     4/11 
  Installing : apr-util-ldap-1.3.9-3.el6_0.1.x86_64                        5/11 
  Installing : httpd-2.2.15-31.el6.centos.x86_64                           6/11 
  Installing : php-5.3.3-27.el6_5.1.x86_64                                 7/11 
  Installing : php-mysql-5.3.3-27.el6_5.1.x86_64                           8/11 
  Installing : php-mbstring-5.3.3-27.el6_5.1.x86_64                        9/11 
  Installing : php-gd-5.3.3-27.el6_5.1.x86_64                             10/11 
  Installing : php-fpm-5.3.3-27.el6_5.1.x86_64                            11/11 
  Verifying  : php-mbstring-5.3.3-27.el6_5.1.x86_64                        1/11 
  Verifying  : php-cli-5.3.3-27.el6_5.1.x86_64                             2/11 
  Verifying  : httpd-2.2.15-31.el6.centos.x86_64                           3/11 
  Verifying  : php-gd-5.3.3-27.el6_5.1.x86_64                              4/11 
  Verifying  : php-5.3.3-27.el6_5.1.x86_64                                 5/11 
  Verifying  : apr-util-ldap-1.3.9-3.el6_0.1.x86_64                        6/11 
  Verifying  : php-pdo-5.3.3-27.el6_5.1.x86_64                             7/11 
  Verifying  : httpd-tools-2.2.15-31.el6.centos.x86_64                     8/11 
  Verifying  : php-mysql-5.3.3-27.el6_5.1.x86_64                           9/11 
  Verifying  : php-fpm-5.3.3-27.el6_5.1.x86_64                            10/11 
  Verifying  : php-common-5.3.3-27.el6_5.1.x86_64                         11/11 

Installed:
  php.x86_64 0:5.3.3-27.el6_5.1         php-cli.x86_64 0:5.3.3-27.el6_5.1      
  php-common.x86_64 0:5.3.3-27.el6_5.1  php-fpm.x86_64 0:5.3.3-27.el6_5.1      
  php-gd.x86_64 0:5.3.3-27.el6_5.1      php-mbstring.x86_64 0:5.3.3-27.el6_5.1 
  php-mysql.x86_64 0:5.3.3-27.el6_5.1  

Dependency Installed:
  apr-util-ldap.x86_64 0:1.3.9-3.el6_0.1    httpd.x86_64 0:2.2.15-31.el6.centos
  httpd-tools.x86_64 0:2.2.15-31.el6.centos php-pdo.x86_64 0:5.3.3-27.el6_5.1  

Complete!

ちゃんとインストールできたかテスト。

[root@www2465uo takatoh]# php -v
PHP 5.3.3 (cli) (built: Aug  6 2014 05:54:27) 
Copyright (c) 1997-2010 The PHP Group
Zend Engine v2.3.0, Copyright (c) 1998-2010 Zend Technologies

5.3.3 がインストールされているのがわかる。

PHPの設定

/etc/php.ini ファイルを編集する。

[root@www2465uo takatoh]# cp /etc/php.ini /etc/php.ini.orig
[root@www2465uo takatoh]# vim /etc/php.ini

編集するのは次の箇所。まずはエラーログの場所を変更。

error_log = /var/log/php_errors.log

日本語の設定。

mbstring.language = Japanese

(中略)

mbstring.internal_encoding = UTF-8

http_input。

mbstring.http_input = auto

detect_order。

mbstring.detect_order = auto

expose_php を Off に。

expose_php = Off

最後にタイムゾーン。

date.timezone = Asia/Tokyo

これで PHP の設定は終了。Nginx を再起動する。

[root@www2465uo takatoh]# service nginx restart
nginx を停止中:                                            [  OK  ]
nginx を起動中:                                            [  OK  ]

php-fpmの設定

php-fpm てのは、PHP を Fast-CGI で動かすものらしい。設定ファイルは /etc/php-fpm.d/www.conf。

使用するポート。これはデフォルトのまま。

listen = 127.0.0.1:9000

許可するクライアントの IP アドレス。これも localhost だけなのでデフォルト。

listen.allowed_clients = 127.0.0.1

php-fpm サービスの実行ユーザとグループ。ここでは nginx としたので、あとで作る。

; RPM: apache Choosed to be able to access some dir as httpd
user = nginx
; RPM: Keep a group allowed to write in log dir.
group = nginx

php-fpm のプロセス数を定量にする。

;pm = dynamic
pm = static

最大子プロセス数の設定。

;pm.max_children = 50
pm.max_children = 3

php-fpm が受け付ける最大要求数の設定。これを超えると子プロセスが再起動する。

pm.max_requests = 500

これで、編集は終了。

さて、実行ユーザを nginx としたので、それを作る。

[root@www2465uo takatoh]# useradd nginx
useradd: ユーザ 'nginx' は既に存在します

あれ、そうなの。Nginx をインストールした時に作られたのかな。
じゃあこのまま php-fpm を起動。ついでに自動起動するようにしておく。

[root@www2465uo takatoh]# /etc/init.d/php-fpm start
php-fpm を起動中:                                          [  OK  ]
[root@www2465uo takatoh]# chkconfig php-fpm on

Nginxの設定

今度は Nginx の設定だ。編集するファイルは /etc/nginx/nginx.conf。といっても変えたのは1行だけ。あとはデフォルトのまま。

user nginx nginx;

つぎは、Fast-CGI のための設定。ファイルは /etc/nginx/fastcgi_params だけど、このデフォルトのファイルをそのまま使うので編集はなし。

さて、あとはバーチャルホストの設定なんだけど、まだドメインを取っていないので、ここでいったん終了。

参考サイト

 cf. さくらのVPS入門 – ドットインストール
 cf. CentOS,ScientificLinuxでLAMP(Nginx+MySQL+PHP)インストールからWordPressを動かすまで(Nginx編)

さくらVPSにNginxをインストールする

yum コマンドでインストールできる。

[takatoh@www2465uo ~]$ sudo -s
[sudo] password for takatoh: 
[root@www2465uo takatoh]# yum install nginx
Loaded plugins: fastestmirror, security
Loading mirror speeds from cached hostfile
epel/metalink                                            | 6.8 kB     00:00     
 * base: ftp.tsukuba.wide.ad.jp
 * epel: ftp.kddilabs.jp
 * extras: ftp.tsukuba.wide.ad.jp
 * updates: ftp.tsukuba.wide.ad.jp
base                                                     | 3.7 kB     00:00     
epel                                                     | 4.4 kB     00:00     
http://ftp.kddilabs.jp/Linux/packages/fedora/epel/6/x86_64/repodata/repomd.xml: [Errno -1] repomd.xml does not match metalink for epel
Trying other mirror.
epel                                                     | 4.4 kB     00:00     
epel/primary_db                                          | 6.3 MB     00:28     
extras                                                   | 3.4 kB     00:00     
updates                                                  | 3.4 kB     00:00     
Setting up Install Process
Resolving Dependencies
--> Running transaction check
---> Package nginx.x86_64 0:1.0.15-5.el6 will be installed
--> Processing Dependency: libxslt.so.1(LIBXML2_1.0.18)(64bit) for package: nginx-1.0.15-5.el6.x86_64
--> Processing Dependency: libxslt.so.1(LIBXML2_1.0.11)(64bit) for package: nginx-1.0.15-5.el6.x86_64
--> Processing Dependency: gd for package: nginx-1.0.15-5.el6.x86_64
--> Processing Dependency: GeoIP for package: nginx-1.0.15-5.el6.x86_64
--> Processing Dependency: libxslt.so.1()(64bit) for package: nginx-1.0.15-5.el6.x86_64
--> Processing Dependency: libgd.so.2()(64bit) for package: nginx-1.0.15-5.el6.x86_64
--> Processing Dependency: libexslt.so.0()(64bit) for package: nginx-1.0.15-5.el6.x86_64
--> Processing Dependency: libGeoIP.so.1()(64bit) for package: nginx-1.0.15-5.el6.x86_64
--> Running transaction check
---> Package GeoIP.x86_64 0:1.5.1-5.el6 will be installed
---> Package gd.x86_64 0:2.0.35-11.el6 will be installed
--> Processing Dependency: libXpm.so.4()(64bit) for package: gd-2.0.35-11.el6.x86_64
---> Package libxslt.x86_64 0:1.1.26-2.el6_3.1 will be installed
--> Running transaction check
---> Package libXpm.x86_64 0:3.5.10-2.el6 will be installed
--> Finished Dependency Resolution

Dependencies Resolved

================================================================================
 Package          Arch            Version                   Repository     Size
================================================================================
Installing:
 nginx            x86_64          1.0.15-5.el6              epel          397 k
Installing for dependencies:
 GeoIP            x86_64          1.5.1-5.el6               epel           21 M
 gd               x86_64          2.0.35-11.el6             base          142 k
 libXpm           x86_64          3.5.10-2.el6              base           51 k
 libxslt          x86_64          1.1.26-2.el6_3.1          base          452 k

Transaction Summary
================================================================================
Install       5 Package(s)

Total download size: 22 M
Installed size: 46 M
Is this ok [y/N]: y
Downloading Packages:
http://ftp.tsukuba.wide.ad.jp/Linux/fedora/epel/6/x86_64/GeoIP-1.5.1-5.el6.x86_64.rpm: [Errno 14] PYCURL ERROR 18 - "transfer closed with 16094685 bytes remaining to read"
Trying other mirror.
(1/5): GeoIP-1.5.1-5.el6.x86_64.rpm                      |  21 MB     01:09     
(2/5): gd-2.0.35-11.el6.x86_64.rpm                       | 142 kB     00:00     
(3/5): libXpm-3.5.10-2.el6.x86_64.rpm                    |  51 kB     00:00     
(4/5): libxslt-1.1.26-2.el6_3.1.x86_64.rpm               | 452 kB     00:02     
(5/5): nginx-1.0.15-5.el6.x86_64.rpm                     | 397 kB     00:01     
--------------------------------------------------------------------------------
Total                                           224 kB/s |  22 MB     01:39     
warning: rpmts_HdrFromFdno: Header V3 RSA/SHA256 Signature, key ID 0608b895: NOKEY
Retrieving key from file:///etc/pki/rpm-gpg/RPM-GPG-KEY-EPEL-6
Importing GPG key 0x0608B895:
 Userid : EPEL (6) 
 Package: epel-release-6-8.noarch (@epel/6.5)
 From   : /etc/pki/rpm-gpg/RPM-GPG-KEY-EPEL-6
Is this ok [y/N]: y
Running rpm_check_debug
Running Transaction Test
Transaction Test Succeeded
Running Transaction
  Installing : GeoIP-1.5.1-5.el6.x86_64                                     1/5 
  Installing : libXpm-3.5.10-2.el6.x86_64                                   2/5 
  Installing : gd-2.0.35-11.el6.x86_64                                      3/5 
  Installing : libxslt-1.1.26-2.el6_3.1.x86_64                              4/5 
  Installing : nginx-1.0.15-5.el6.x86_64                                    5/5 
  Verifying  : libxslt-1.1.26-2.el6_3.1.x86_64                              1/5 
  Verifying  : libXpm-3.5.10-2.el6.x86_64                                   2/5 
  Verifying  : GeoIP-1.5.1-5.el6.x86_64                                     3/5 
  Verifying  : nginx-1.0.15-5.el6.x86_64                                    4/5 
  Verifying  : gd-2.0.35-11.el6.x86_64                                      5/5 

Installed:
  nginx.x86_64 0:1.0.15-5.el6                                                   

Dependency Installed:
  GeoIP.x86_64 0:1.5.1-5.el6           gd.x86_64 0:2.0.35-11.el6                
  libXpm.x86_64 0:3.5.10-2.el6         libxslt.x86_64 0:1.1.26-2.el6_3.1        

Complete!

インストールができたら起動。ついでに、サーバ起動時に自動的に起動するように設定。

[root@www2465uo takatoh]# service nginx start
nginx を起動中:                                            [  OK  ]
[root@www2465uo takatoh]# chkconfig nginx on
[root@www2465uo takatoh]# chkconfig --list nginx
nginx          	0:off	1:off	2:on	3:on	4:on	5:on	6:off

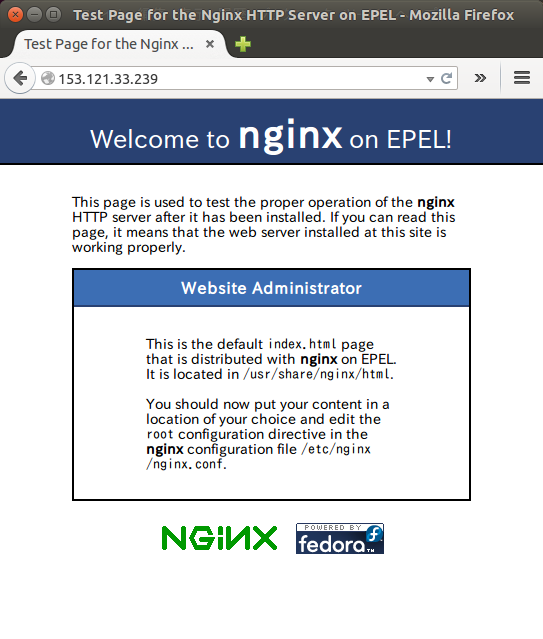
ブラウザでアクセスして確かめてみる。

welcome-to-nginx

OK。

さくらのVPSを使ってみた

さくらインターネットのVPSに仮登録してみたので、作業メモ。

仮登録すると、メールが2通届く。2通目のメール(少し時間がかかる)に、VPS のIPアドレスと root の初期パスワードが書いてある。
VPS の起動は VPSコントロールパネルから簡単にできるので割愛。
ここでは、その後の初期設定作業をメモしておく。

まずは、ssh で VPS に接続。

takatoh@nightschool $ ssh [email protected]
ssh: connect to host 153.121.33.239 port 22: Connection refused

えー? Cnnection refused って接続が拒否されたってこと?
あやしいのはルータだ。というわけで、ルータに LAN->WAN 方向のポート22での通信を許可するように設定した。
さて、もう一度やってみる。

takatoh@nightschool $ ssh [email protected]
The authenticity of host '153.121.33.239 (153.121.33.239)' can't be established.
RSA key fingerprint is 57:de:08:97:07:32:f8:f2:b8:7e:39:5c:e7:61:e8:23.
Are you sure you want to continue connecting (yes/no)? yes
Warning: Permanently added '153.121.33.239' (RSA) to the list of known hosts.
[email protected]'s password: 

SAKURA Internet [Virtual Private Server SERVICE]

[root@www2465uo ~]# 

今度はうまくいった。
最初は yum update

[root@www2465uo ~]# yum update
Loaded plugins: fastestmirror, security
Loading mirror speeds from cached hostfile
 * base: ftp.tsukuba.wide.ad.jp
 * epel: ftp.kddilabs.jp
 * extras: ftp.tsukuba.wide.ad.jp
 * updates: ftp.tsukuba.wide.ad.jp
Setting up Update Process
No Packages marked for Update

日本語化。/etc/sysconfig/i18n を編集する。

[root@www2465uo ~]# vim /etc/sysconfig/i18n
LANG="ja_JP.UTF-8"

作業用のユーザーを作って、wheel グループに追加。

[root@www2465uo ~]# useradd takatoh
[root@www2465uo ~]# passwd takatoh
ユーザー takatoh のパスワードを変更。
新しいパスワード:
新しいパスワードを再入力してください:
passwd: 全ての認証トークンが正しく更新できました。
[root@www2465uo ~]# usermod -G wheel takatoh

wheel グループに sudo する権限をつける。visudo コマンドで開いたファイルの次の行をアンコメントする。

%wheel ALL=(ALL) ALL

ここでいったんログアウトして、新しく作ったユーザーで改めて接続する。

takatoh@nightschool $ ssh [email protected]
[email protected]'s password: 
Last login: Sat Aug  9 10:20:31 2014 from fntsitm001026.sitm.fnt.ngn.ppp.infoweb.ne.jp

SAKURA Internet [Virtual Private Server SERVICE]

パスワード認証をやめて、公開鍵での認証に切り替える。

[takatoh@www2465uo ~]$ pwd
/home/takatoh
[takatoh@www2465uo ~]$ mkdir .ssh
[takatoh@www2465uo ~]$ chmod 700 .ssh
[takatoh@www2465uo ~]$ cd .ssh
[takatoh@www2465uo .ssh]$ wget -O authorized_keys https://github.com/takatoh.keys
--2014-08-09 10:38:57--  https://github.com/takatoh.keys
github.com をDNSに問いあわせています... 192.30.252.131
github.com|192.30.252.131|:443 に接続しています... 接続しました。
HTTP による接続要求を送信しました、応答を待っています... 200 OK
長さ: 761 [text/plain]
`authorized_keys' に保存中

100%[======================================>] 761         --.-K/s 時間 0s      

2014-08-09 10:39:03 (9.26 MB/s) - `authorized_keys' へ保存完了 [761/761]

[takatoh@www2465uo .ssh]$ ls -al
合計 12
drwx------ 2 takatoh takatoh 4096  8月  9 10:38 2014 .
drwx------ 3 takatoh takatoh 4096  8月  9 10:25 2014 ..
-rw-rw-r-- 1 takatoh takatoh  761  8月  9 10:39 2014 authorized_keys
[takatoh@www2465uo .ssh]$ chmod 600 authorized_keys

公開鍵は GitHub で公開されているものを wget で取ってきた。
ここでまたいったんログアウトして、鍵認証でログインできるか試してみる。

[takatoh@www2465uo .ssh]$ exit
logout
Connection to 153.121.33.239 closed.
takatoh@nightschool $ ssh [email protected]
Last login: Sat Aug  9 10:42:23 2014 from fntsitm001026.sitm.fnt.ngn.ppp.infoweb.ne.jp

SAKURA Internet [Virtual Private Server SERVICE]

[takatoh@www2465uo ~]$ 

今度はパスワードを訊かれずにログインできた。うまくいったようだ。

つぎ、ssh の設定。設定ファイルは /etc/ssh/sshd_config。とりあえずオリジナルファイルのバックアップをとってから編集する。

[takatoh@www2465uo ~]$ sudo -s

We trust you have received the usual lecture from the local System
Administrator. It usually boils down to these three things:

    #1) Respect the privacy of others.
    #2) Think before you type.
    #3) With great power comes great responsibility.

[sudo] password for takatoh: 
[root@www2465uo takatoh]# cp /etc/ssh/sshd_config /etc/ssh/sshd_config.orig
[root@www2465uo takatoh]# vim /etc/ssh/sshd_config

編集するのは3ヶ所。ポートをデフォルトの 22 から他の番号に変更(1024〜65535)。

Port 60124

パスワード認証を禁止。

PasswordAuthentication no

root でのログインを禁止。

PermitRootLogin no

これを反映するために sshd を再起動。

[root@www2465uo takatoh]# service sshd restart
sshd を停止中:                                             [  OK  ]
sshd を起動中:                                             [  OK  ]

ファイアフォールの設定。/etc/sysconfig/iptables を作って、次のようにする。

*filter
:INPUT DROP [0:0]
:FORWARD DROP [0:0]
:OUTPUT ACCEPT [0:0]
:SERVICES - [0:0]
-A INPUT -i lo -j ACCEPT
-A INPUT -p icmp --icmp-type echo-request -m limit --limit 1/s --limit-burst 4 -j ACCEPT
-A INPUT -p tcp -m state --state ESTABLISHED,RELATED -j ACCEPT
-A INPUT -p tcp -m state --state NEW -j SERVICES
-A INPUT -p udp --sport 53 -j ACCEPT
-A INPUT -p udp --sport 123 --dport 123 -j ACCEPT
-A SERVICES -p tcp --dport 60124 -j ACCEPT
-A SERVICES -p tcp --dport 80 -j ACCEPT
-A SERVICES -p tcp --dport 443 -j ACCEPT
COMMIT

保存したら iptables を起動。

[root@www2465uo takatoh]# service iptables start
iptables: ファイアウォールルールを適用中: iptables-restore v1.4.7: Couldn't load target `SERVICES':/lib64/xtables/libipt_SERVICES.so: cannot open shared object file: No such file or directory

Error occurred at line: 9
Try `iptables-restore -h' or 'iptables-restore --help' for more information.
                                                           [失敗]

あれ、失敗した。なんでだ。どうも SERVICES がいけないらしい。ググって調べた結果、SERVICES を RH-Firewall-1-INPUT に変えたらうまく行った。

*filter
:INPUT DROP [0:0]
:FORWARD DROP [0:0]
:OUTPUT ACCEPT [0:0]
:RH-Firewall-1-INPUT - [0:0]
-A INPUT -i lo -j ACCEPT
-A INPUT -p icmp --icmp-type echo-request -m limit --limit 1/s --limit-burst 4 -j ACCEPT
-A INPUT -p tcp -m state --state ESTABLISHED,RELATED -j ACCEPT
-A INPUT -p tcp -m state --state NEW -j RH-Firewall-1-INPUT
-A INPUT -p udp --sport 53 -j ACCEPT
-A INPUT -p udp --sport 123 --dport 123 -j ACCEPT
-A RH-Firewall-1-INPUT -p tcp --dport 60124 -j ACCEPT
-A RH-Firewall-1-INPUT -p tcp --dport 80 -j ACCEPT
-A RH-Firewall-1-INPUT -p tcp --dport 443 -j ACCEPT
COMMIT
[root@www2465uo takatoh]# service iptables start
iptables: ファイアウォールルールを適用中:                  [  OK  ]

さて、今回はここまで。

追記

参考にしたサイトを書くのを忘れてた。

 cf. さくらのVPS入門 – ドットインストール
 cf. さくら VPS のサーバーに iptables の設定をしてみた – ある SE のつぶやき

Rails+Deviseでユーザー名でサインインできるようにする

タイトルのように成功したのでメモ。

まずは users テーブルに name 列を追加。

takatoh@nightschool $ rails g migration add_name_to_users name

できたマイグレーションファイルを編集。name 列にインデックスをつけてユニークにする。

add_index :users, :name, unique: true

でもってマイグレート。

takatoh@nightschool $ rake db:migrate

これでデータベースの準備は完了。

次に Devise の設定。config/initializers/devise.rb の32行目をアンコメントして :email を :name に変更。

config.authentication_keys = [ :name ]

これで、Devise はユーザー認証にメールアドレスじゃなくユーザー名を使うようになる。

Devise がユーザー名を受け付けるように configure_pergitted_parameters をオーバーライド。これは app/controllers/application_controller.rb で行う。

def configure_permitted_parameters
  devise_parameter_sanitizer.for(:sign_up) {|u| u.permit(:name, :email, :password, :password_confirmation, :admin)}
  devise_parameter_sanitizer.for(:sign_in) {|u| u.permit(:name, :password)}
  devise_parameter_sanitizer.for(:account_update) {|u| u.permit(:name, :email, :password, :password_confirmation, :admin)}
end

あとはビューの変更だ。app/views/users/registrations/new.html.erb にユーザー名の欄を追加し、app/views/users/sessions/new.html.erb には email の欄の代わりにユーザー名の欄を作る。前者はサインアップ、後者はサインインの時に使われるテンプレート。

# 行を追加
<div><%= f.label :name %><%= f.text_field :name, autofocus: true %></div>
# :email から :name に変更
<div><%= f.label :name %><%= f.text_field :name, autofocus: true %></div>

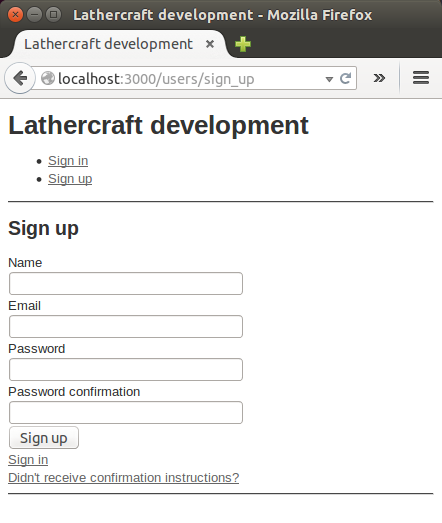
これでひと通り終了。試してみよう。

sign-up-with-name

うまくいった!

Amazon S3にファイルをバックアップする

先週、Amazon S3 が使えるようになったので、ファイルのバックアップに使ってみることにした。環境は Windows7。
もともと、バッチファイルで外付け HDD にバックアップをとっていたから、S3 にも同じようにできないかと探してみたら、DragonDisk に付属している dgsync というのがいいらしい、ということがわかった。参考にしたページはここ。

 cf. WindowsコマンドでAmazon S3上にバックアップする – Hack Your Design!

DragonDisk はここからダウンロードできる。

 cf. http://www.dragondisk.com/download-amazon-s3-client-google-cloud-storage-client.html

なんかパッケージの写真が載ってて有料のソフトみたいに見えるけど、無料らしい。ここから DragonDisk v1.05 for Windows をダウンロードした。
インストールは簡単で、特に書くほどのことはない。

で、バックアップ用のバッチファイルだけど、上の参考にしたサイトに載っているのでほぼそのまま使わせてもらった。

SET DGTOOLS_ACCESS_KEY=XXXXXXXXXXXXXXXXXXXX
SET DGTOOLS_SECRET_KEY=XXXXXXXXXXXXXXXXXXXXXXXXXXXXXXXXXXXXXXXX

"C:\Program Files (x86)\Almageste\DragonDisk\dgsync" -v --ssl --dont-delete --endpoint "s3-ap-northeast-1.amazonaws.com" "T:\backup\takatoh" "s3://panicblanket/backup/valarie/takatoh"

バックアップ元で削除したファイルを S3 からも削除するには –dont-delete オプションをはずす。

さて、これを実行してバックアップをとったわけだけど、スゲー時間がかかったよ。寝てる間にバックアップするのがいいかもね。

WordPressのデータをAmazon S3にバックアップする

このブログもバックアップをとっておきたいと思っていたところ。S3 を使えるようにしたことだし、S3にバックアップできるツールがないかと咲かしてみたら、Automatic WordPress Backup というプラグインを見つけた。
参考にしたのはこのページ。
 cf. Automatic WordPress Backupを使って、Amazon S3にWordPressのバックアップを取る – non-standard world, Inc.

インストールは簡単、ほかのプラグインのように、検索すれば一発で出てくる。
インストールすると、ダッシュボードの左側に Volcanic というメニューが追加されている。ここから Automatic Backup を選んでクリックすると、設定画面になる。この画面で Amazon S3 の Access Key ID と Secret Access key、バックアップ先のバケット名を指定する。バケットは先に作っておいてもいいし、ここで新しいバケット名を指定すればプラグインが作ってくれる。今回は blog-panicblanket というバケットを新しく作ることにした。
さて、あとは Backup schedule の欄で Daily を選んで、Save Changes And Backup Now をクリックすれば完了。
Amazon S3 のほうでも blog-panicblanket バケットの中に、awd/blog.panicblanket.com/2014-06-14-1359.zip として保存されているのが確認できた。