Windows7(64bit)でRailsがうまく動いてくれない

今日は Rails だ。試しに簡単な Web アプリを作ってみるよ。蔵書を管理するアプリにしよう。名前は Librarian だ。
と、意気込んだところだけど、結果から言うをうまくいかなかった。以下その顛末。

まずは Rails のプロジェクトを作る。

^o^ > rails new Librarian

このコマンドでずら~っとファイル一式が生成される。とりあえずはこれで git のリポジトリを作って最初のコミット。

^o^ > cd Librarian

^o^ > git init
Initialized empty Git repository in C:/Users/hiro/Documents/w/Librarian/.git/

^o^ > git add .
warning: LF will be replaced by CRLF in .gitignore.
The file will have its original line endings in your working directory.
(以下略)

^o^ > git commit -m "First commit."
[master (root-commit) 167a985] First commit.
warning: LF will be replaced by CRLF in .gitignore.
The file will have its original line endings in your working directory.
(以下略)

で、次は scaffold。

^o^ > ruby bin/rails generate scaffold book title volume author
DL is deprecated, please use Fiddle
C:/Ruby200-x64/lib/ruby/gems/2.0.0/gems/tzinfo-1.2.1/lib/tzinfo/data_source.rb:1
82:in `rescue in create_default_data_source': No source of timezone data could b
e found. (TZInfo::DataSourceNotFound)
Please refer to http://tzinfo.github.io/datasourcenotfound for help resolving th
is error.
        from C:/Ruby200-x64/lib/ruby/gems/2.0.0/gems/tzinfo-1.2.1/lib/tzinfo/dat
a_source.rb:179:in `create_default_data_source'
        from C:/Ruby200-x64/lib/ruby/gems/2.0.0/gems/tzinfo-1.2.1/lib/tzinfo/dat
a_source.rb:40:in `block in get'
        from C:/Ruby200-x64/lib/ruby/gems/2.0.0/gems/tzinfo-1.2.1/lib/tzinfo/dat
a_source.rb:39:in `synchronize'
        from C:/Ruby200-x64/lib/ruby/gems/2.0.0/gems/tzinfo-1.2.1/lib/tzinfo/dat
a_source.rb:39:in `get'
        from C:/Ruby200-x64/lib/ruby/gems/2.0.0/gems/tzinfo-1.2.1/lib/tzinfo/tim
ezone.rb:629:in `data_source'
        from C:/Ruby200-x64/lib/ruby/gems/2.0.0/gems/tzinfo-1.2.1/lib/tzinfo/tim
ezone.rb:92:in `get'
        from C:/Ruby200-x64/lib/ruby/gems/2.0.0/gems/tzinfo-1.2.1/lib/tzinfo/tim
ezone_proxy.rb:67:in `real_timezone'
        from C:/Ruby200-x64/lib/ruby/gems/2.0.0/gems/tzinfo-1.2.1/lib/tzinfo/tim
ezone_proxy.rb:30:in `period_for_utc'
        from C:/Ruby200-x64/lib/ruby/gems/2.0.0/gems/tzinfo-1.2.1/lib/tzinfo/tim
ezone.rb:549:in `current_period'
        from C:/Ruby200-x64/lib/ruby/gems/2.0.0/gems/activesupport-4.1.1/lib/act
ive_support/core_ext/object/try.rb:45:in `public_send'
        from C:/Ruby200-x64/lib/ruby/gems/2.0.0/gems/activesupport-4.1.1/lib/act
ive_support/core_ext/object/try.rb:45:in `try'
        from C:/Ruby200-x64/lib/ruby/gems/2.0.0/gems/activesupport-4.1.1/lib/act
ive_support/values/time_zone.rb:223:in `utc_offset'
        from C:/Ruby200-x64/lib/ruby/gems/2.0.0/gems/activesupport-4.1.1/lib/act
ive_support/values/time_zone.rb:396:in `block in []'
        from C:/Ruby200-x64/lib/ruby/gems/2.0.0/gems/activesupport-4.1.1/lib/act
ive_support/values/time_zone.rb:396:in `tap'
        from C:/Ruby200-x64/lib/ruby/gems/2.0.0/gems/activesupport-4.1.1/lib/act
ive_support/values/time_zone.rb:396:in `[]'
        from C:/Ruby200-x64/lib/ruby/gems/2.0.0/gems/activesupport-4.1.1/lib/act
ive_support/core_ext/time/zones.rb:60:in `find_zone!'
        from C:/Ruby200-x64/lib/ruby/gems/2.0.0/gems/activesupport-4.1.1/lib/act
ive_support/railtie.rb:20:in `block in '
        from C:/Ruby200-x64/lib/ruby/gems/2.0.0/gems/railties-4.1.1/lib/rails/in
itializable.rb:30:in `instance_exec'
        from C:/Ruby200-x64/lib/ruby/gems/2.0.0/gems/railties-4.1.1/lib/rails/in
itializable.rb:30:in `run'
        from C:/Ruby200-x64/lib/ruby/gems/2.0.0/gems/railties-4.1.1/lib/rails/in
itializable.rb:55:in `block in run_initializers'
        from C:/Ruby200-x64/lib/ruby/2.0.0/tsort.rb:150:in `block in tsort_each'

        from C:/Ruby200-x64/lib/ruby/2.0.0/tsort.rb:183:in `block (2 levels) in
each_strongly_connected_component'
        from C:/Ruby200-x64/lib/ruby/2.0.0/tsort.rb:219:in `each_strongly_connec
ted_component_from'
        from C:/Ruby200-x64/lib/ruby/2.0.0/tsort.rb:182:in `block in each_strong
ly_connected_component'
        from C:/Ruby200-x64/lib/ruby/2.0.0/tsort.rb:180:in `each'
        from C:/Ruby200-x64/lib/ruby/2.0.0/tsort.rb:180:in `each_strongly_connec
ted_component'
        from C:/Ruby200-x64/lib/ruby/2.0.0/tsort.rb:148:in `tsort_each'
        from C:/Ruby200-x64/lib/ruby/gems/2.0.0/gems/railties-4.1.1/lib/rails/in
itializable.rb:54:in `run_initializers'
        from C:/Ruby200-x64/lib/ruby/gems/2.0.0/gems/railties-4.1.1/lib/rails/ap
plication.rb:288:in `initialize!'
        from C:/Users/hiro/Documents/w/Librarian/config/environment.rb:5:in `'
        from C:/Ruby200-x64/lib/ruby/gems/2.0.0/gems/railties-4.1.1/lib/rails/ap
plication.rb:264:in `require'
        from C:/Ruby200-x64/lib/ruby/gems/2.0.0/gems/railties-4.1.1/lib/rails/ap
plication.rb:264:in `require_environment!'
        from C:/Ruby200-x64/lib/ruby/gems/2.0.0/gems/railties-4.1.1/lib/rails/co
mmands/commands_tasks.rb:147:in `require_application_and_environment!'
        from C:/Ruby200-x64/lib/ruby/gems/2.0.0/gems/railties-4.1.1/lib/rails/co
mmands/commands_tasks.rb:133:in `generate_or_destroy'
        from C:/Ruby200-x64/lib/ruby/gems/2.0.0/gems/railties-4.1.1/lib/rails/co
mmands/commands_tasks.rb:51:in `generate'
        from C:/Ruby200-x64/lib/ruby/gems/2.0.0/gems/railties-4.1.1/lib/rails/co
mmands/commands_tasks.rb:40:in `run_command!'
        from C:/Ruby200-x64/lib/ruby/gems/2.0.0/gems/railties-4.1.1/lib/rails/co
mmands.rb:17:in `'
        from bin/rails:4:in `require'
        from bin/rails:4:in `
'

なんかエラーが出た。どうやら timezone のデータが見つからない、といっているらしい。ついでに(親切にも)http://tzinfo.github.io/datasourcenotfound を見ればいいよ、とも。
早速ページにアクセスしてみる。すると、あった、Gemfile にちょっと記述を追加すればいいらしい。

If you are using a 64-bit version of Ruby on Windows, then add :x64_mingw to the list of platforms as follows:

gem 'tzinfo-data', platforms: [:mingw, :mswin, :x64_mingw]

指示通り、Gemfile に :x64_mingw を追記して、buldle install を実行。

^o^ > ruby bin/bundle install
DL is deprecated, please use Fiddle
Using rake 10.3.2
Using i18n 0.6.9
Using json 1.8.1
Using minitest 5.3.5
Using thread_safe 0.3.4
Using tzinfo 1.2.1
Using activesupport 4.1.1
Using builder 3.2.2
Using erubis 2.7.0
Using actionview 4.1.1
Using rack 1.5.2
Using rack-test 0.6.2
Using actionpack 4.1.1
Using mime-types 1.25.1
Using polyglot 0.3.5
Using treetop 1.4.15
Using mail 2.5.4
Using actionmailer 4.1.1
Using activemodel 4.1.1
Using arel 5.0.1.20140414130214
Using activerecord 4.1.1
Using coffee-script-source 1.7.0
Using execjs 2.2.1
Using coffee-script 2.2.0
Using thor 0.19.1
Using railties 4.1.1
Using coffee-rails 4.0.1
Using hike 1.2.3
Using multi_json 1.10.1
Using jbuilder 2.1.1
Using jquery-rails 3.1.1
Using bundler 1.6.3
Using tilt 1.4.1
Using sprockets 2.11.0
Using sprockets-rails 2.1.3
Using rails 4.1.1
Using rdoc 4.1.1
Using sass 3.2.19
Using sass-rails 4.0.3
Using sdoc 0.4.0
Using sqlite3 1.3.9
Using turbolinks 2.2.2
Using uglifier 2.5.1
Your bundle is complete!
Use `bundle show [gemname]` to see where a bundled gem is installed.

だけどなんだかちゃんとインストールされたような気配がない。試しにもう一度 scaffold をやってみる。

^o^ > ruby bin/rails generate scaffold book title volume author
DL is deprecated, please use Fiddle
C:/Ruby200-x64/lib/ruby/gems/2.0.0/gems/tzinfo-1.2.1/lib/tzinfo/data_source.rb:1
82:in `rescue in create_default_data_source': No source of timezone data could b
e found. (TZInfo::DataSourceNotFound)
Please refer to http://tzinfo.github.io/datasourcenotfound for help resolving th
is error.
        from C:/Ruby200-x64/lib/ruby/gems/2.0.0/gems/tzinfo-1.2.1/lib/tzinfo/dat
a_source.rb:179:in `create_default_data_source'
        from C:/Ruby200-x64/lib/ruby/gems/2.0.0/gems/tzinfo-1.2.1/lib/tzinfo/dat
a_source.rb:40:in `block in get'
        from C:/Ruby200-x64/lib/ruby/gems/2.0.0/gems/tzinfo-1.2.1/lib/tzinfo/dat
a_source.rb:39:in `synchronize'
        from C:/Ruby200-x64/lib/ruby/gems/2.0.0/gems/tzinfo-1.2.1/lib/tzinfo/dat
a_source.rb:39:in `get'
        from C:/Ruby200-x64/lib/ruby/gems/2.0.0/gems/tzinfo-1.2.1/lib/tzinfo/tim
ezone.rb:629:in `data_source'
        from C:/Ruby200-x64/lib/ruby/gems/2.0.0/gems/tzinfo-1.2.1/lib/tzinfo/tim
ezone.rb:92:in `get'
        from C:/Ruby200-x64/lib/ruby/gems/2.0.0/gems/tzinfo-1.2.1/lib/tzinfo/tim
ezone_proxy.rb:67:in `real_timezone'
        from C:/Ruby200-x64/lib/ruby/gems/2.0.0/gems/tzinfo-1.2.1/lib/tzinfo/tim
ezone_proxy.rb:30:in `period_for_utc'
        from C:/Ruby200-x64/lib/ruby/gems/2.0.0/gems/tzinfo-1.2.1/lib/tzinfo/tim
ezone.rb:549:in `current_period'
        from C:/Ruby200-x64/lib/ruby/gems/2.0.0/gems/activesupport-4.1.1/lib/act
ive_support/core_ext/object/try.rb:45:in `public_send'
        from C:/Ruby200-x64/lib/ruby/gems/2.0.0/gems/activesupport-4.1.1/lib/act
ive_support/core_ext/object/try.rb:45:in `try'
        from C:/Ruby200-x64/lib/ruby/gems/2.0.0/gems/activesupport-4.1.1/lib/act
ive_support/values/time_zone.rb:223:in `utc_offset'
        from C:/Ruby200-x64/lib/ruby/gems/2.0.0/gems/activesupport-4.1.1/lib/act
ive_support/values/time_zone.rb:396:in `block in []'
        from C:/Ruby200-x64/lib/ruby/gems/2.0.0/gems/activesupport-4.1.1/lib/act
ive_support/values/time_zone.rb:396:in `tap'
        from C:/Ruby200-x64/lib/ruby/gems/2.0.0/gems/activesupport-4.1.1/lib/act
ive_support/values/time_zone.rb:396:in `[]'
        from C:/Ruby200-x64/lib/ruby/gems/2.0.0/gems/activesupport-4.1.1/lib/act
ive_support/core_ext/time/zones.rb:60:in `find_zone!'
        from C:/Ruby200-x64/lib/ruby/gems/2.0.0/gems/activesupport-4.1.1/lib/act
ive_support/railtie.rb:20:in `block in '
        from C:/Ruby200-x64/lib/ruby/gems/2.0.0/gems/railties-4.1.1/lib/rails/in
itializable.rb:30:in `instance_exec'
        from C:/Ruby200-x64/lib/ruby/gems/2.0.0/gems/railties-4.1.1/lib/rails/in
itializable.rb:30:in `run'
        from C:/Ruby200-x64/lib/ruby/gems/2.0.0/gems/railties-4.1.1/lib/rails/in
itializable.rb:55:in `block in run_initializers'
        from C:/Ruby200-x64/lib/ruby/2.0.0/tsort.rb:150:in `block in tsort_each'

        from C:/Ruby200-x64/lib/ruby/2.0.0/tsort.rb:183:in `block (2 levels) in
each_strongly_connected_component'
        from C:/Ruby200-x64/lib/ruby/2.0.0/tsort.rb:219:in `each_strongly_connec
ted_component_from'
        from C:/Ruby200-x64/lib/ruby/2.0.0/tsort.rb:182:in `block in each_strong
ly_connected_component'
        from C:/Ruby200-x64/lib/ruby/2.0.0/tsort.rb:180:in `each'
        from C:/Ruby200-x64/lib/ruby/2.0.0/tsort.rb:180:in `each_strongly_connec
ted_component'
        from C:/Ruby200-x64/lib/ruby/2.0.0/tsort.rb:148:in `tsort_each'
        from C:/Ruby200-x64/lib/ruby/gems/2.0.0/gems/railties-4.1.1/lib/rails/in
itializable.rb:54:in `run_initializers'
        from C:/Ruby200-x64/lib/ruby/gems/2.0.0/gems/railties-4.1.1/lib/rails/ap
plication.rb:288:in `initialize!'
        from C:/Users/hiro/Documents/w/Librarian/config/environment.rb:5:in `'
        from C:/Ruby200-x64/lib/ruby/gems/2.0.0/gems/railties-4.1.1/lib/rails/ap
plication.rb:264:in `require'
        from C:/Ruby200-x64/lib/ruby/gems/2.0.0/gems/railties-4.1.1/lib/rails/ap
plication.rb:264:in `require_environment!'
        from C:/Ruby200-x64/lib/ruby/gems/2.0.0/gems/railties-4.1.1/lib/rails/co
mmands/commands_tasks.rb:147:in `require_application_and_environment!'
        from C:/Ruby200-x64/lib/ruby/gems/2.0.0/gems/railties-4.1.1/lib/rails/co
mmands/commands_tasks.rb:133:in `generate_or_destroy'
        from C:/Ruby200-x64/lib/ruby/gems/2.0.0/gems/railties-4.1.1/lib/rails/co
mmands/commands_tasks.rb:51:in `generate'
        from C:/Ruby200-x64/lib/ruby/gems/2.0.0/gems/railties-4.1.1/lib/rails/co
mmands/commands_tasks.rb:40:in `run_command!'
        from C:/Ruby200-x64/lib/ruby/gems/2.0.0/gems/railties-4.1.1/lib/rails/co
mmands.rb:17:in `'
        from bin/rails:4:in `require'
        from bin/rails:4:in `
'

やっぱり同じじゃないか。
仕方がないから、tzinfo-data っていう gem を直接インストールする。

^o^ > gem install tzinfo-data
Fetching: tzinfo-data-1.2014.5.gem (100%)
Successfully installed tzinfo-data-1.2014.5
Parsing documentation for tzinfo-data-1.2014.5
Installing ri documentation for tzinfo-data-1.2014.5
Done installing documentation for tzinfo-data after 3 seconds
1 gem installed

よし、インストールできた。これで大丈夫だろう。

^o^ > ruby bin/rails generate scaffold book title volume author
DL is deprecated, please use Fiddle
C:/Ruby200-x64/lib/ruby/gems/2.0.0/gems/tzinfo-1.2.1/lib/tzinfo/data_source.rb:1
82:in `rescue in create_default_data_source': No source of timezone data could b
e found. (TZInfo::DataSourceNotFound)
Please refer to http://tzinfo.github.io/datasourcenotfound for help resolving th
is error.
(以下略)

だめだ~!ちゃんと tzinfo-data はインストールできてるのに何で見つからないんだ。

もしかして Ruby 2.0.0 と Rails 4.1.1 って相性が悪いのか?

追記(2014/07/01)

昨日ダメだった Rails だけど、今日会社の PC (Windows7 32bit、Ruby 2.0.0 32bit)でこっそりやってみたらあっさりとうまくいってしまった。64bit版がダメだってこと?
Ubuntuにさわってみた

昨日、Amazon で見つけて思わずポチった「UbuntuではじめるLinus入門キット」ていう本が届いたので、早速触ってみた。なんか最近 Heroku やったり Node.js やったり忙しいな。今年は Scheme の年じゃなかったのかよ。
本には最新版の LTS(長期サポート版)の 14.04 のディスクがついていて、すぐにでも始められる、と。最初はディスクから起動しようとしたけどダメだった。なんか知らないけど、BIOS の画面に移行するスキも与えずに Windows が起動してしまう。DELL の PC ってこういうもんなの?

それで VirtualBox にインストールしてみることにした(ディスクには VirtualBox 用のイメージが入っている。ついでに VirtualBox もアップデートした)。
VirtualBox マネージャーから新しい VM を作って、途中で「すでにある仮想ハードドライブファイルを使用する」にチェック、本のディスクからコピーして解凍したイメージファイルを指定すれば OK。
VM を起動すると、おお、なんかかっこいい。

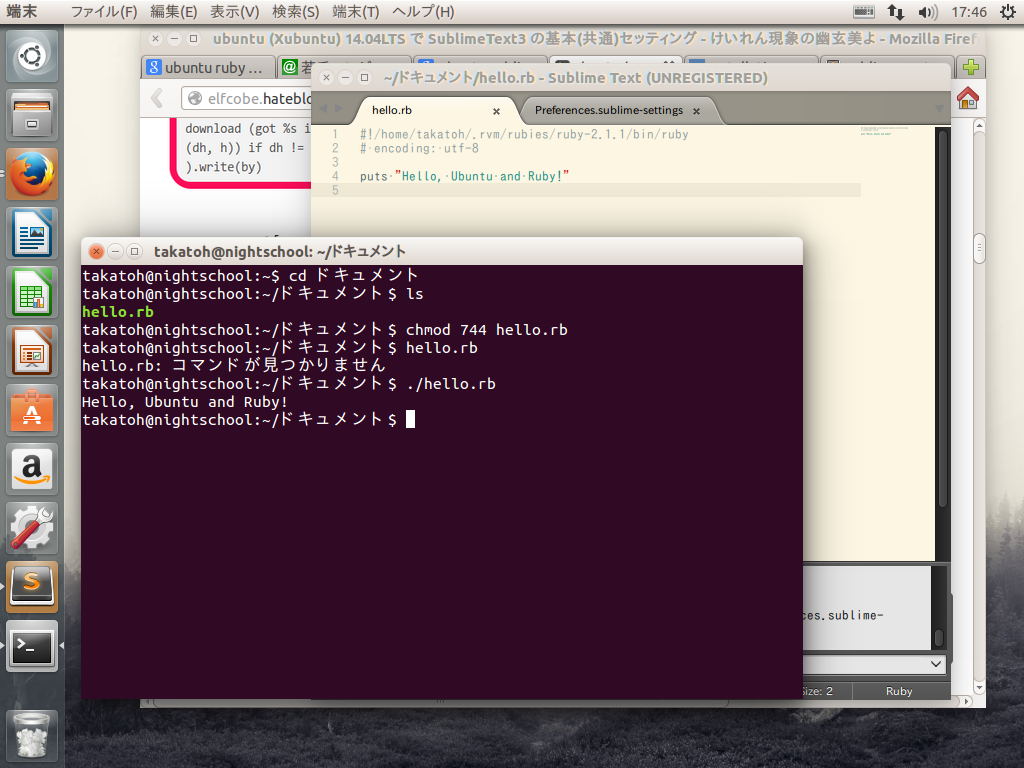
あとはとりあえず、Ruby(2.1.1)と Sublime Text をインストールして、挨拶代わりに Ruby スクリプトを書いてみた。

ruby-on-Ubuntu

参考にしたのは以下のページ。
 cf. Rubyプログラミングを始めるための基礎知識とインストール (2/3) – @IT
 cf. ubuntu (Xubuntu) 14.04LTS で SublimeText3 の基本(共通)セッティング – けいれん現象の幽玄美よ

[amazonjs asin=”4798041343″ locale=”JP” title=”Ubuntuではじめる! Linux入門キット 14.04対応”]

追記

Ruby 2.1.1 のインストールについて書いておこう。といっても上の @IT のページの通りにやっただけだけど。
まずは curl のインストール。

takatoh@nightschool:~$ sudo apt-get install curl

つづいて RVM のインストール。

takatoh@nightschool:~$ \curl -sSL https://get.rvm.io | bash -s stable
takatoh@nightschool:~$ source ~/.bash_profile

そんでもって Ruby 2.1.1 のインストール。

takatoh@nightschool:~$ rvm install ruby-2.1.1 --default
takatoh@nightschool:~$ source ~/.bash_profile

これで OK。

Node.jsをさわってみた

この間は Rails をやろう、みたいな事を書いたくせに、ふと気になって JavaScript の本を読んでいる。目的は jQuery なんだけど Node.js が面白そうだったのでさわってみることにした。

まずはダウンロードとインストールから。nodejs.orgにアクセスすると、ページの真ん中に INSTALL ボタンがあるので、クリックしてインストーラをダウンロード。バージョンは v0.10.29。ダウンロードされた node-0.10.29-x64.msi をダブルクリックしてインストールする。特に迷うこともなくインストールは終了。
試しにバージョンを表示してみる。

^o^ > node -v
v0.10.29

うまくインストールできてるようだ。

さて、Node.js には npm というパッケージマネージャが付属している。これでパッケージの管理ができるんだけど、プロジェクトを作るときにも使うらしい。
とりあえずは、単純にリクエストされたファイル(画像)を返すだけのサーバを作ってみることにした。
まずは、プロジェクトのフォルダを作ってその中に移動し、npm init で初期化する。

^o^ > mkdir image_server

^o^ > cd image_server

^o^ > npm init
This utility will walk you through creating a package.json file.
It only covers the most common items, and tries to guess sane defaults.

See `npm help json` for definitive documentation on these fields
and exactly what they do.

Use `npm install  --save` afterwards to install a package and
save it as a dependency in the package.json file.

Press ^C at any time to quit.
name: (image_server)
version: (0.0.0) 0.0.1
description:
entry point: (index.js) server.js
test command:
git repository:
keywords:
author: takatoh
license: (ISC)
About to write to C:\Users\hiro\Documents\w\image_server\package.json:

{
  "name": "image_server",
  "version": "0.0.1",
  "description": "",
  "main": "server.js",
  "scripts": {
    "test": "echo \"Error: no test specified\" && exit 1"
  },
  "author": "takatoh",
  "license": "ISC"
}


Is this ok? (yes) yes

いくつか質問に答えると、プロジェクトの雛形が完成。この時点でフォルダの構成はこうなっている。

^o^ > tree /F
フォルダー パスの一覧:  ボリューム OS
ボリューム シリアル番号は FE2A-F7C6 です
C:.
    package.json

サブフォルダーは存在しません

package.json というファイルがあるだけだね。
次は依存するパッケージのインストール。今回はリクエストに応じて送信するファイルの MIME TYPE を調べるために、mime というパッケージを利用する。これを package.json に追加する。

{
    "name": "image_server",
    "version": "0.0.1",
    "description": "",
    "main": "server.js",
    "scripts": {
        "test": "echo \"Error: no test specified\" && exit 1"
    },
    "dependencies": {
        "mime": "*"
    },
    "author": "takatoh",
    "license": "ISC"
}

色をつけたところが追記したところ。"*" は最新のバージョンをインストールすることを示している。ここに特定のバージョンを書けばバージョン指定もできるようだ。
追記が終わったら mime パッケージのインストール。npm install コマンドを使う。

^o^ > npm install
npm WARN package.json [email protected] No description
npm WARN package.json [email protected] No repository field.
npm WARN package.json [email protected] No README data
[email protected] node_modules\mime

npm install は package.json を参照して、まだインストールされていないパッケージをインストールしてくれる。パッケージはプロジェクトフォルダの中の node_modules フォルダにインストールされる。この時点でフォルダ構成はこうなっている。

^o^ > tree /F
フォルダー パスの一覧:  ボリューム OS
ボリューム シリアル番号は FE2A-F7C6 です
C:.
│  package.json
│
└─node_modules
    └─mime
        │  LICENSE
        │  mime.js
        │  package.json
        │  README.md
        │  test.js
        │
        └─types
                mime.types
                node.types

node_modules の下に mime がインストールされているのがわかる。

さあ、今度はサーバ本体だ。いろいろ調べながら出来上がったのがこれ。

var http = require("http");
var fs = require("fs");
var url = require("url");
var mime = require("mime");

server = http.createServer(function(request, response) {
  var path = url.parse(request.url).pathname;
  console.log(path);
  var mimetype = mime.lookup(path);
  var filepath = "./images" + path;
  fs.readFile(filepath, function (err, data) {
    if (err) {
      response.writeHead(404, {"Content-Type" : "text/plain"});
      response.write("File not found.");
      response.end();
    } else {
      response.writeHead(200, {"Content-Type" : mimetype});
      response.write(data);
      response.end();
    }
  });
});

console.log("Start server on port 8888.");
server.listen(8888);

require 関数でパッケージを読み込んで変数に代入している。mime 以外は Node.js に付属しているパッケージで、http はその名のとおり HTTP サーバ/クライアント。fs はローカルのファイルシステムにアクセスするため、url はリクエストの URL を解析するために読み込んでいる。
HTTP サーバは、http.createServer で作れる。引数にはリクエストに応答する関数を指定している。この関数には request と response のオブジェクトが引数として渡されるので、request を解析して response に書き込めばいい。今回は、要求されたファイルを ./images 以下から読み込んで送信している。もしエラーが発生したら、404 File not found を返している。
それじゃ、images フォルダにサンプルの画像を配置しよう。

^o^ > tree /F images
フォルダー パスの一覧:  ボリューム OS
ボリューム シリアル番号は FE2A-F7C6 です
C:\USERS\TAKATOH\DOCUMENTS\W\IMAGE_SERVER\IMAGES
│  Penguins.jpg
│
└─data
        Desert.jpg

これで準備は完了。サーバを起動しよう。次のようにする。

^o^ > node server.js
Start server on port 8888.
nodejs-penguins

これでポート 8888 で待ち受けている状態になった。ブラウザからアクセスしてみよう。

うまくいった!

参考にしたページ:
 cf. http://nodejs.jp/nodejs.org_ja/docs/v0.4/api/http.html#request.url
 cf. http://nodejs.jp/nodejs.org_ja/docs/v0.4/api/fs.html#fs.readFile
 cf. http://stackoverflow.com/questions/5316324/automatic-mimetypes-in-javascript-node-js

PythonでRubyのArray#each_sliceみたいなもの

Ruby の配列(Array)には each_slice というメソッドがある。配列のスライスを順に返してくれるイテレータだ。こんなふう。

irb(main):001:0> [0,1,2,3,4,5].each_slice(2){|x| p x}
[0, 1]
[2, 3]
[4, 5]
=> nil

昨日、CodeEval の問題を解くのに、この Array#each_slice が使えると思っていつもの Python じゃなくて Ruby で解いたんだけど、Python には Ruby の Array#each_slice に相当するものがないみたい。

で、今日になってジェネレータを使えばいいんじゃないかと気が付いたので、書いてみた。

def each_slice(lis, n):
    s = 0
    while s < len(lis):
        yield lis[s:s+n]
        s += n

for x in each_slice([0,1,2,3,4,5], 2):
    print x
^o^ >python each_slice.py
[0, 1]
[2, 3]
[4, 5]

上の例では、要素数がちょうど割り切れる数だったけど、半端が出る場合はどうだろう。Ruby だとこうなる。

irb(main):002:0> [0,1,2,3,4,5,6].each_slice(2){|x| p x}
[0, 1]
[2, 3]
[4, 5]
[6]
=> nil

Python で書いたスクリプトだと:

^o^ > python each_slice.py
[0, 1]
[2, 3]
[4, 5]
[6]

IndexError になるかと思ったけど、期待通りに動いた。

HerokuとRailsの本を読んだ

こないだ Heroku を使ってみて成功したので、今度は Rails でやってみようかと、「HerokuではじめるRailsプログラミング入門」という本を読んだ。
「Herokuではじめる」とは書いてあるけど、Heroku についてはほんのちょっとしか書いてなくて、基本的に Ruby on Rails の入門書。それも Rails3 準拠のようで、最新の Rails を使うにはもうちょっと足りない、という感じ。
とはいえ、Rails は何年も前(たしかバージョンが 2.0.2 だったかな)に使ったきりほとんど忘れていたので、どんな感じかを思い出すのにはちょうどよかった。
もう少し Rails4 の本を読んで、この2年ほど動いていない Rails アプリを作り直そう。

Amazon S3にファイルをバックアップする

先週、Amazon S3 が使えるようになったので、ファイルのバックアップに使ってみることにした。環境は Windows7。
もともと、バッチファイルで外付け HDD にバックアップをとっていたから、S3 にも同じようにできないかと探してみたら、DragonDisk に付属している dgsync というのがいいらしい、ということがわかった。参考にしたページはここ。

 cf. WindowsコマンドでAmazon S3上にバックアップする – Hack Your Design!

DragonDisk はここからダウンロードできる。

 cf. http://www.dragondisk.com/download-amazon-s3-client-google-cloud-storage-client.html

なんかパッケージの写真が載ってて有料のソフトみたいに見えるけど、無料らしい。ここから DragonDisk v1.05 for Windows をダウンロードした。
インストールは簡単で、特に書くほどのことはない。

で、バックアップ用のバッチファイルだけど、上の参考にしたサイトに載っているのでほぼそのまま使わせてもらった。

SET DGTOOLS_ACCESS_KEY=XXXXXXXXXXXXXXXXXXXX
SET DGTOOLS_SECRET_KEY=XXXXXXXXXXXXXXXXXXXXXXXXXXXXXXXXXXXXXXXX

"C:\Program Files (x86)\Almageste\DragonDisk\dgsync" -v --ssl --dont-delete --endpoint "s3-ap-northeast-1.amazonaws.com" "T:\backup\takatoh" "s3://panicblanket/backup/valarie/takatoh"

バックアップ元で削除したファイルを S3 からも削除するには –dont-delete オプションをはずす。

さて、これを実行してバックアップをとったわけだけど、スゲー時間がかかったよ。寝てる間にバックアップするのがいいかもね。

Herokuに簡単なSinatraアプリをデプロイしてみた

参考にしたのはこのページ。

 cf. herokuでsinatraアプリをデプロイしてみた

順を追ってやってみる。

ログインと公開鍵の登録

Heroku Toolbelt のインストールは終わっているので、キーの登録から。

^o^ > heroku login
Enter your Heroku credentials.
Email: [email protected]
Password (typing will be hidden):
Could not find an existing public key.
Would you like to generate one? [Yn] Y
Generating new SSH public key.
Uploading SSH public key C:/Users/hiro/.ssh/id_rsa.pub... done
Authentication successful.

ログインしようとすると public key がない、作るか?といわれるので、Y と答える。これでキーができたはず。
もう一回ログイン。

^o^ > heroku login
Enter your Heroku credentials.
Email: [email protected]
Password (typing will be hidden):
Authentication successful.

今度はログインできた。じゃ次、public key(公開鍵)の登録。

^o^ > heroku keys:add
Found existing public key: C:/Users/takatoh/.ssh/id_rsa.pub
Uploading SSH public key C:/Users/takatoh/.ssh/id_rsa.pub... done

よし、OK。

簡単なSinatraアプリを作る

チョー簡単な、Hello, Heroku と表示するだけのアプリ。

Gemfile:

source "https://rubygems.org"

gem "sinatra"

Procfile:

web: bundle exec rackup config.ru -p $PORT

sample.rb:

require 'bundler/setup'
require 'sinatra/base'

class Sample < Sinatra::Base
  get "/" do
    "Hello, Heroku."
  end
end

config.ru:

$:.unshift(File.dirname(__FILE__))
require 'sample'

run Sample 

.gitignore:

.bundle

まずはこれだけを Git のリポジトリに commit する。

^o^ > git init
Initialized empty Git repository in C:/Users/takatoh/Documents/w/takatoh-sample/
.git/

^o^ > git add .

^o^ > git commit -m "First commit."
[master (root-commit) fa02bb8] First commit.
 5 files changed, 19 insertions(+)
 create mode 100644 .gitignore
 create mode 100644 Gemfile
 create mode 100644 Procfile
 create mode 100644 config.ru
 create mode 100644 sample.rb

ローカルで試してみる

^o^ > foreman start
'foreman' は、内部コマンドまたは外部コマンド、
操作可能なプログラムまたはバッチ ファイルとして認識されていません。

あれ、ダメじゃん。foreman とやらはインストールされてないのかな。まあいいや。

デプロイしてみる

^o^ > heroku create
Creating limitless-sea-3233... done, stack is cedar
http://limitless-sea-3233.herokuapp.com/ | [email protected]:limitless-sea-3233.git

Git remote heroku added

^o^ > git remote -v
heroku  [email protected]:limitless-sea-3233.git (fetch)
heroku  [email protected]:limitless-sea-3233.git (push)

heroku create にアプリ名を与えないと適当な名前がつくらしい。上では limitless-sea-3233 ってのがそう。git のリモートリポジトリに heroku が追加されてるのがわかる。
それじゃ、Heroku にデプロイしてみよう。

^o^ > git push -u heroku master
Permission denied (publickey).
fatal: Could not read from remote repository.

Please make sure you have the correct access rights
and the repository exists.

あれ、だめだ。なんでだ。
しばらく考えて、ログを見て気がついた。さっき登録したキーは C:/Users/takatoh/.ssh/ に保存されている。けど、普段 git でつかっているキーは C:\Users\takatoh\Documents\.ssh にある。これじゃないかと思って、(バックアップを作ったうえで)上書きしてみた。今度はどうかな。

^o^ > git push -u heroku master
Initializing repository, done.
Counting objects: 7, done.
Delta compression using up to 2 threads.
Compressing objects: 100% (4/4), done.
Writing objects: 100% (7/7), 629 bytes | 0 bytes/s, done.
Total 7 (delta 0), reused 0 (delta 0)

-----> Ruby app detected
-----> Compiling Ruby/NoLockfile
 !
 !     Gemfile.lock required. Please check it in.
 !

 !     Push rejected, failed to compile Ruby app

To [email protected]:limitless-sea-3233.git
 ! [remote rejected] master -> master (pre-receive hook declined)
error: failed to push some refs to '[email protected]:limitless-sea-3233.git'

まだだめだ。今度はなんだ。どうやら Gemfile.lock が必要で、チェックインしろといっている。

^o^ > git status
On branch master
Untracked files:
  (use "git add ..." to include in what will be committed)

        Gemfile.lock

nothing added to commit but untracked files present (use "git add" to track)

^o^ > git add Gemfile.lock
warning: LF will be replaced by CRLF in Gemfile.lock.
The file will have its original line endings in your working directory.

^o^ > git commit -m "Gemfile.lock: Add."
[master f84a54a] Gemfile.lock: Add.
warning: LF will be replaced by CRLF in Gemfile.lock.
The file will have its original line endings in your working directory.
 1 file changed, 17 insertions(+)
 create mode 100644 Gemfile.lock

さあ、今度はどうだ。

^o^ > git push -u heroku master
Initializing repository, done.
Counting objects: 10, done.
Delta compression using up to 2 threads.
Compressing objects: 100% (7/7), done.
Writing objects: 100% (10/10), 1009 bytes | 0 bytes/s, done.
Total 10 (delta 1), reused 0 (delta 0)

-----> Ruby app detected
-----> Compiling Ruby/Rack
-----> Using Ruby version: ruby-2.0.0
-----> Warning:
       Removing `Gemfile.lock` because it was generated on Windows.
       Bundler will do a full resolve so native gems are handled properly.
       This may result in unexpected gem versions being used in your app.
       In rare occasions Bundler may not be able to resolve your dependencies at
 all.
       https://devcenter.heroku.com/articles/bundler-windows-gemfile
-----> Installing dependencies using 1.5.2
       Running: bundle install --without development:test --path vendor/bundle -
-binstubs vendor/bundle/bin -j4
       Fetching gem metadata from https://rubygems.org/...........
       Fetching additional metadata from https://rubygems.org/..
       Resolving dependencies...
       Using bundler (1.5.2)
       Installing rack (1.5.2)
       Installing tilt (1.4.1)
       Installing rack-protection (1.5.3)
       Installing sinatra (1.4.5)
       Your bundle is complete!
       Gems in the groups development and test were not installed.
       It was installed into ./vendor/bundle
       Bundle completed (8.62s)
       Cleaning up the bundler cache.
-----> WARNINGS:
       You have not declared a Ruby version in your Gemfile.
       To set your Ruby version add this line to your Gemfile:
       ruby '2.0.0'
       # See https://devcenter.heroku.com/articles/ruby-versions for more inform
ation.

       Removing `Gemfile.lock` because it was generated on Windows.
       Bundler will do a full resolve so native gems are handled properly.
       This may result in unexpected gem versions being used in your app.
       In rare occasions Bundler may not be able to resolve your dependencies at
 all.
       https://devcenter.heroku.com/articles/bundler-windows-gemfile
-----> Discovering process types
       Procfile declares types -> web
       Default types for Ruby  -> console, rake

-----> Compressing... done, 12.1MB
-----> Launching... done, v4
       http://limitless-sea-3233.herokuapp.com/ deployed to Heroku

To [email protected]:limitless-sea-3233.git
 * [new branch]      master -> master
Branch master set up to track remote branch master from heroku.

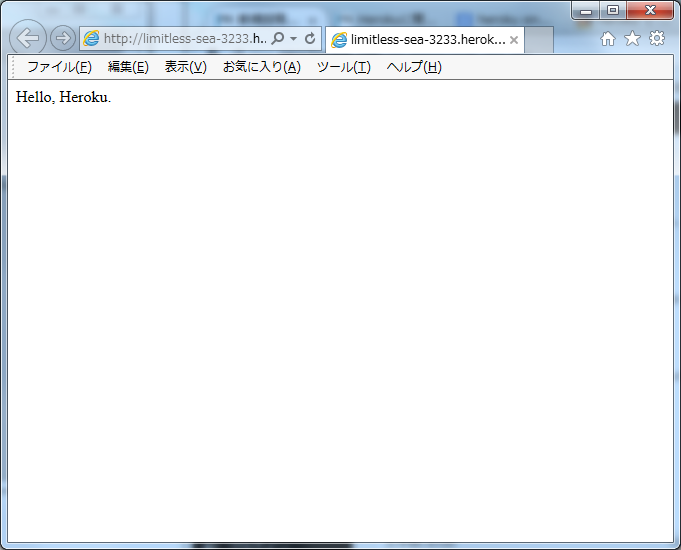
うまくいったかな。

^o^ > heroku open
Opening limitless-sea-3233... done
hello-heruku

うまくいった!

Herokuに登録してみた

とりあえずはサインアップしただけ。

 https://www.heroku.com/

右上の Sign up をクリックするとメールアドレスを入力する画面になるので、入力して Sign up ボタンをクリック。すると、確認のメールを送ったとなるので、メールにあるリンクを開くと今度はメールアドレスとパスワードを入力する画面になる。ここで再度メールアドレスと、パスワードを入力すれば、無事にサインアップは完了。
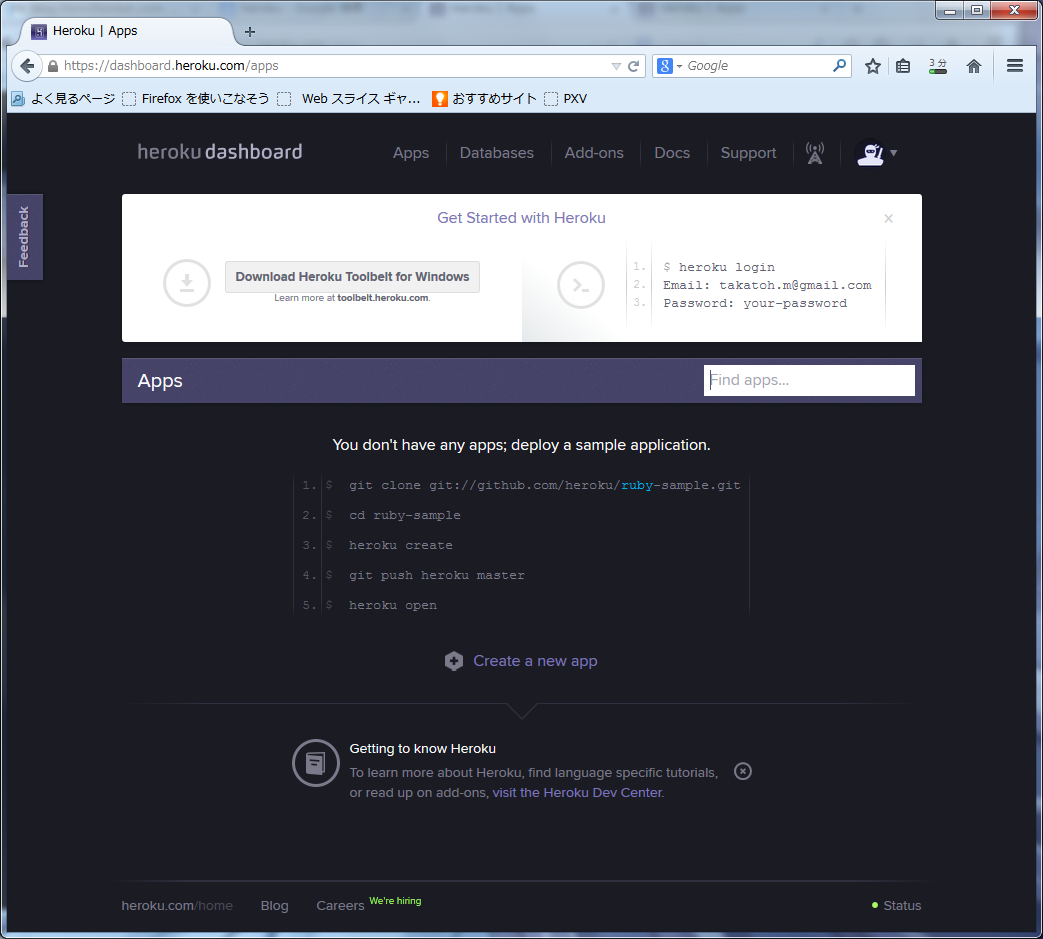
下がサインアップが完了したあとの画面。
heroku-dashboad

Download Heroku Toolbelt for Windows とあるので、ダウンロードしてインストールした。
これで Heroku を使う準備はできたかな。

WordPressのデータをAmazon S3にバックアップする

このブログもバックアップをとっておきたいと思っていたところ。S3 を使えるようにしたことだし、S3にバックアップできるツールがないかと咲かしてみたら、Automatic WordPress Backup というプラグインを見つけた。
参考にしたのはこのページ。
 cf. Automatic WordPress Backupを使って、Amazon S3にWordPressのバックアップを取る – non-standard world, Inc.

インストールは簡単、ほかのプラグインのように、検索すれば一発で出てくる。
インストールすると、ダッシュボードの左側に Volcanic というメニューが追加されている。ここから Automatic Backup を選んでクリックすると、設定画面になる。この画面で Amazon S3 の Access Key ID と Secret Access key、バックアップ先のバケット名を指定する。バケットは先に作っておいてもいいし、ここで新しいバケット名を指定すればプラグインが作ってくれる。今回は blog-panicblanket というバケットを新しく作ることにした。
さて、あとは Backup schedule の欄で Daily を選んで、Save Changes And Backup Now をクリックすれば完了。
Amazon S3 のほうでも blog-panicblanket バケットの中に、awd/blog.panicblanket.com/2014-06-14-1359.zip として保存されているのが確認できた。

aws-sdkを使ってAmazon S3を操作する

ちょっと間が開いたけど、インストールした aws-sdk を使ってみた。

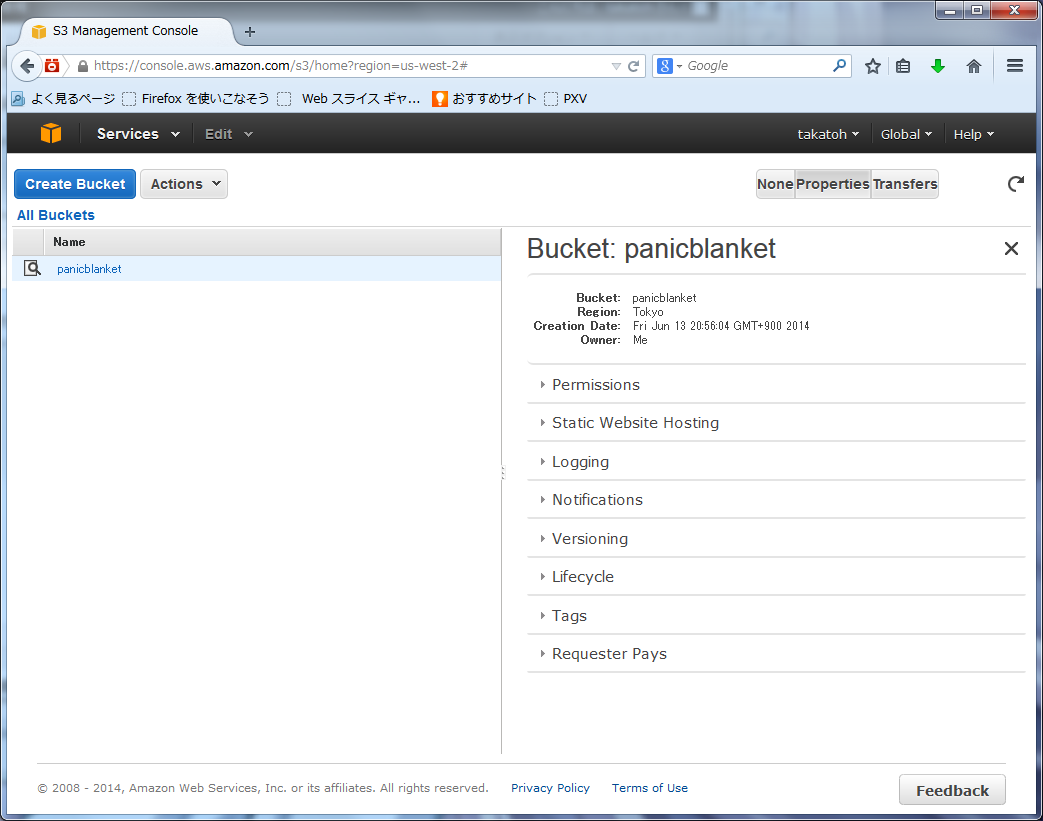
created-bucket

まずはバケットを作る。aws-sdk を使ってもできるけど、ブラウザからやった。これがバケットを作ったところ。見難い(てか見えない)けど panicblanet ていうバケットができている。

次に、API にアクセスするための Access Key ID と Secret Access Key を取得する。これは右上の自分の名前が書いてあるところをクリックすると現れるプルダウンメニューから Security Credentials を選ぶと、キーを作れるページに移動するのでそこで作る。詳しくは書かないけど難しくはない。

さて、これで準備が整った。それじゃ最初はファイルをアップロードするスクリプトから行こう。

require 'aws'
require 'yaml'

config = YAML.load_file("aws-config.yaml")

file = ARGV.shift
key = ARGV.shift
content = File.open(file, "rb"){|f| f.read}

s3 = AWS::S3.new(
  :access_key_id     => config["ACCESS_KEY_ID"],
  :secret_access_key => config["SECRET_ACCESS_KEY"])

bucket = s3.buckets["panicblanket"]
obj = bucket.objects[key]
if obj.exists?
  puts "Error: Object already exists: #{key}."
  exit
end
obj.write(content, :acl => :public_read)

キーをハードコードするのはアレなので aws-config.yaml ファイルから読み込むようにした。早速試してみよう。

^o^ > ruby s3_upload_file.rb Penguins.jpg Penguins.jpg
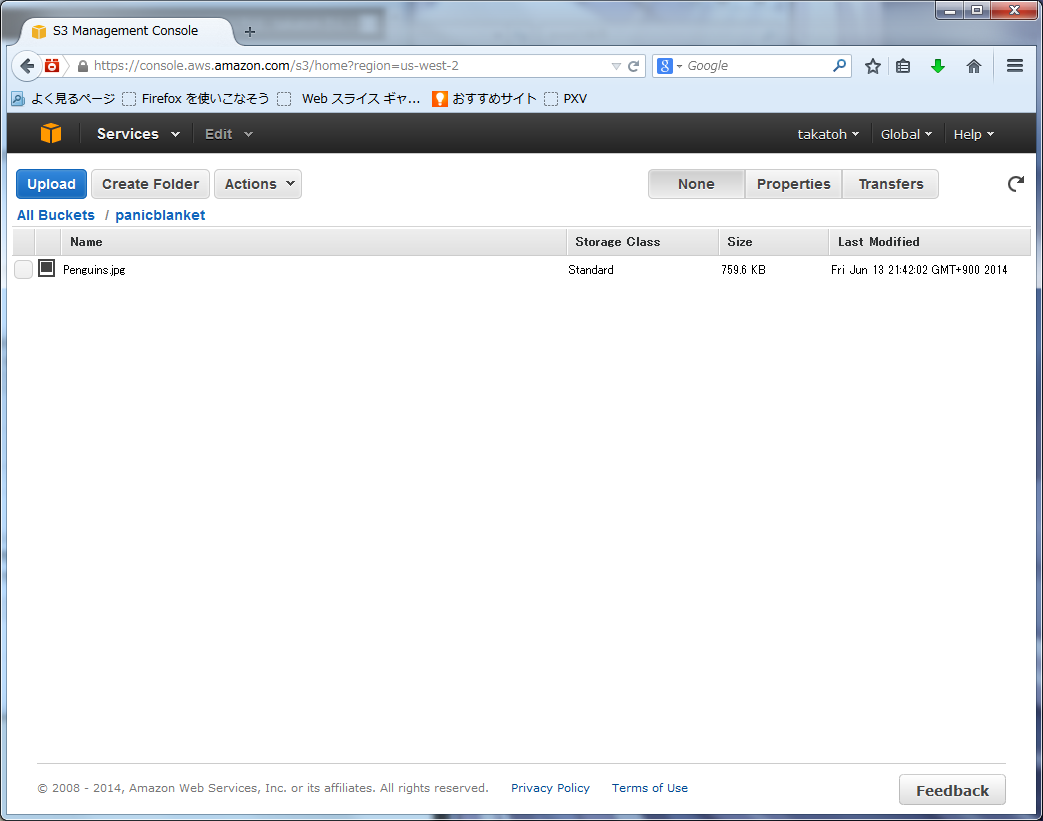
uploaded_object

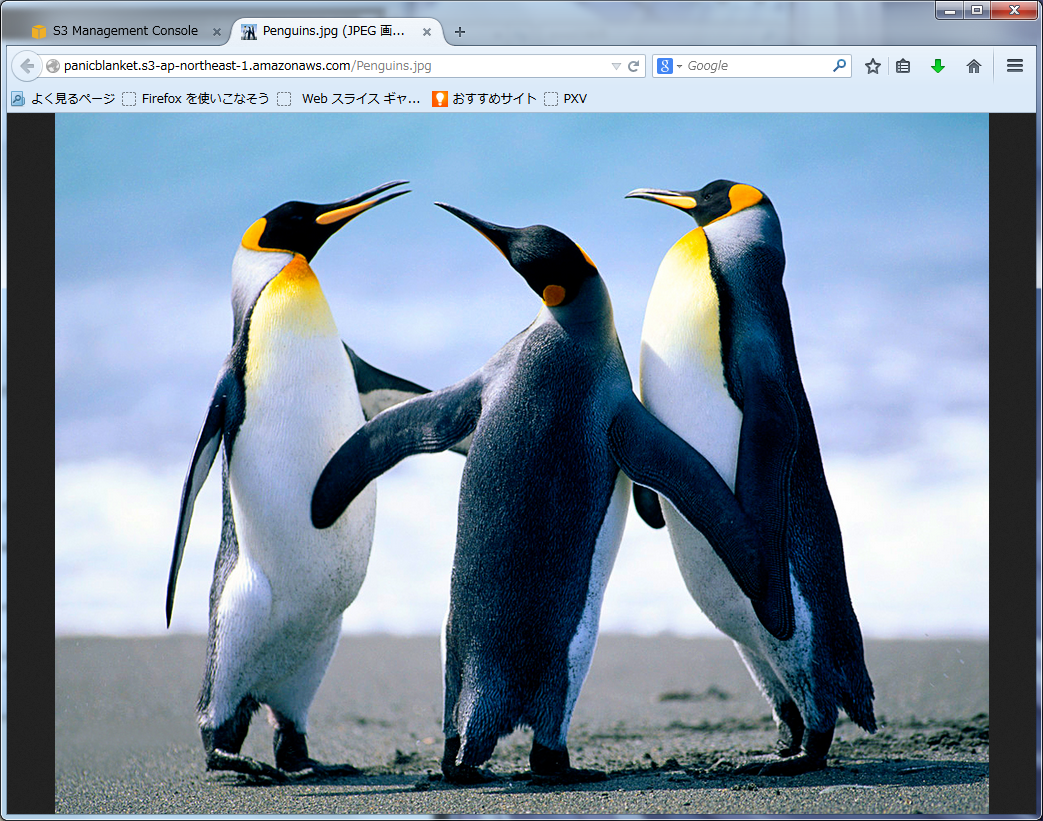
何も出力されないのはうまくいったからのはずだ。ブラウザで確認してみると、ちゃんとアップロードされているのがわかる。

penguins

アクセスコントロールに :public_read を指定しているので、誰でもブラウザで見られるはずだ。URL は http://panicblanket.s3.amazonaws.com/Penguins.png。

うん、うまくいってる。

バケットの中のオブジェクトを指定するキーはディレクトリ風にもできる。こんなふうに。

^o^ > ruby s3_upload_file.rb Penguins.jpg data/Penguins.jpg

それじゃ次はバケットに保存されているオブジェクトのリストを取得してみる。

require 'aws'
require 'yaml'

config = YAML.load_file("aws-config.yaml")

s3 = AWS::S3.new(
  :access_key_id     => config["ACCESS_KEY_ID"],
  :secret_access_key => config["SECRET_ACCESS_KEY"])

bucket = s3.buckets["panicblanket"]
bucket.objects.each do |obj|
  puts obj.key
end
^o^ > ruby s3_list_objects.rb
Penguins.jpg
data/Penguins.jpg

上でアップロードした2つのオブジェクトが表示された。

つぎ、ダウンロード。

require 'aws'
require 'fileutils'
require 'yaml'

config = YAML.load_file("aws-config.yaml")

key = ARGV.shift

s3 = AWS::S3.new(
  :access_key_id =&gt; config["ACCESS_KEY_ID"],
  :secret_access_key =&gt; config["SECRET_ACCESS_KEY"])

file = key
if File.dirname(file) != "."
  FileUtils.mkdir_p(File.dirname(file))
end

bucket = s3.buckets["panicblanket"]
obj = bucket.objects[key]

unless obj.exists?
  puts "Error: No such object: #{key}"
  exit
end

File.open(file, "wb") do |f|
  obj.read do |chunk|
    f.write(chunk)
  end
end
^o^ > ruby s3_download_object.rb data/Penguins.jpg

^o^ > ls data
Penguins.jpg

これもうまくいってる。よしよし。

それじゃ最後に、オブジェクトの消去。

require 'aws'
require 'yaml'

config = YAML.load_file("aws-config.yaml")

s3 = AWS::S3.new(
  :access_key_id     => config["ACCESS_KEY_ID"],
  :secret_access_key => config["SECRET_ACCESS_KEY"])
bucket = s3.buckets["panicblanket"]

key = ARGV.shift
obj = bucket.objects[key]
unless obj.exists?
  puts "No such object: #{key}"
  exit
end
obj.delete
^o^ > ruby s3_delete_object.rb data/Penguins.jpg

^o^ > ruby s3_list_objects.rb
Penguins.jpg

ちゃんと消えたようだ。