Deja Dup はファイル/ディレクトリのバックアップアプリ(本来は e と a の上に記号がつくんだけど入力できないので省略する)。Ubuntu の画面の左上のボタンを押して、Deja Dup で検索すると「バックアップ」ていうアプリが見つかる。これがどうも Deja Dup …なのか?
でもこのままだとバックアップ先の候補に Amazon S3 が出てこないので、Ubuntu ソフトウェアセンターで deja dup で検索して、Amazon S3 support
for Deja Dup をインストールする。そうすると S3 をバックアップ先に選べるようになる。
改めて「バックアップ」を立ち上げよう。バックアップするフォルダー(ホーム(takatoh))と無視するフォルダー(ゴミ箱と ~/Downloads)はデフォルトのまま。保存場所に Amazon S3 を選ぶと、S3 Access Key ID とフォルダーを入力するように画面が変化する。Access Key ID は AWS で取得したやつだとして、フォルダーの指定の仕方がよくわからないな。とりあえず、バケット名/フォルダ名(panicblanket/backup/nightschool)としてみた。スケジュールはどういうわけか保存期間しか入力できない。これもデフォルトのまま「期限なし」(ほかに「最低6か月」と「最低1年」が選べる)。
さて、これで「概要」の戻って「今すぐバックアップ」をクリックする。すると今度は「Amazon S3に接続」というタイトルで、Secret access key を入力する画面になった。キーを入力して「続行する」をクリック。結果、「バックアップに失敗しました」となった。なんでだ。
takatoh@nightschool:~$ ls /media
takatoh  wiwaxia
takatoh@nightschool:~$ ls /media/wiwaxia
$RECYCLE.BIN               bsl                     sombrero-storage
RECYCLER                   softwares               wallpapers
System Volume Information  sombrero-devel-storage
takatoh@nightschool:~/w/$ cd Librarian
takatoh@nightschool:~/w/Librarian$ rails server
/home/takatoh/.rvm/gems/ruby-2.1.1/gems/execjs-2.2.1/lib/execjs/runtimes.rb:51:in autodetect': Could not find a JavaScript runtime. See https://github.com/sstephenson/execjs for a list of available runtimes. (ExecJS::RuntimeUnavailable)
	from /home/takatoh/.rvm/gems/ruby-2.1.1/gems/execjs-2.2.1/lib/execjs.rb:5:in '
	from /home/takatoh/.rvm/gems/ruby-2.1.1/gems/execjs-2.2.1/lib/execjs.rb:4:in '
	from /home/takatoh/.rvm/gems/ruby-2.1.1/gems/uglifier-2.5.1/lib/uglifier.rb:3:in require'
	from /home/takatoh/.rvm/gems/ruby-2.1.1/gems/uglifier-2.5.1/lib/uglifier.rb:3:in '
	from /home/takatoh/.rvm/gems/ruby-2.1.1@global/gems/bundler-1.6.3/lib/bundler/runtime.rb:76:in require'
	from /home/takatoh/.rvm/gems/ruby-2.1.1@global/gems/bundler-1.6.3/lib/bundler/runtime.rb:76:in block (2 levels) in require'
	from /home/takatoh/.rvm/gems/ruby-2.1.1@global/gems/bundler-1.6.3/lib/bundler/runtime.rb:72:in each'
	from /home/takatoh/.rvm/gems/ruby-2.1.1@global/gems/bundler-1.6.3/lib/bundler/runtime.rb:72:in block in require'
	from /home/takatoh/.rvm/gems/ruby-2.1.1@global/gems/bundler-1.6.3/lib/bundler/runtime.rb:61:in each'
	from /home/takatoh/.rvm/gems/ruby-2.1.1@global/gems/bundler-1.6.3/lib/bundler/runtime.rb:61:in require'
	from /home/takatoh/.rvm/gems/ruby-2.1.1@global/gems/bundler-1.6.3/lib/bundler.rb:132:in require'
	from /home/takatoh/w/Librarian/config/application.rb:7:in '
	from /home/takatoh/.rvm/gems/ruby-2.1.1/gems/railties-4.1.4/lib/rails/commands/commands_tasks.rb:79:in require'
	from /home/takatoh/.rvm/gems/ruby-2.1.1/gems/railties-4.1.4/lib/rails/commands/commands_tasks.rb:79:in vblock in server'
	from /home/takatoh/.rvm/gems/ruby-2.1.1/gems/railties-4.1.4/lib/rails/commands/commands_tasks.rb:76:in tap'
	from /home/takatoh/.rvm/gems/ruby-2.1.1/gems/railties-4.1.4/lib/rails/commands/commands_tasks.rb:76:in server'
	from /home/takatoh/.rvm/gems/ruby-2.1.1/gems/railties-4.1.4/lib/rails/commands/commands_tasks.rb:40:in run_command!'
	from /home/takatoh/.rvm/gems/ruby-2.1.1/gems/railties-4.1.4/lib/rails/commands.rb:17:in '
	from /home/takatoh/w/Librarian/bin/rails:8:in require'
	from /home/takatoh/w/Librarian/bin/rails:8:in '
	from /home/takatoh/.rvm/gems/ruby-2.1.1/gems/spring-1.1.3/lib/spring/client/rails.rb:27:in load'
	from /home/takatoh/.rvm/gems/ruby-2.1.1/gems/spring-1.1.3/lib/spring/client/rails.rb:27:in call'
	from /home/takatoh/.rvm/gems/ruby-2.1.1/gems/spring-1.1.3/lib/spring/client/command.rb:7:in call'
	from /home/takatoh/.rvm/gems/ruby-2.1.1/gems/spring-1.1.3/lib/spring/client.rb:26:in run'
	from /home/takatoh/.rvm/gems/ruby-2.1.1/gems/spring-1.1.3/bin/spring:48:in '
	from /home/takatoh/.rvm/gems/ruby-2.1.1/gems/spring-1.1.3/lib/spring/binstub.rb:11:in load'
	from /home/takatoh/.rvm/gems/ruby-2.1.1/gems/spring-1.1.3/lib/spring/binstub.rb:11:in '
	from /home/takatoh/w/Librarian/bin/spring:16:in require'
	from /home/takatoh/w/Librarian/bin/spring:16:in '
	from bin/rails:3:in load'
	from bin/rails:3:in main'
takatoh@nightschool:~/w/Librarian$ rails server
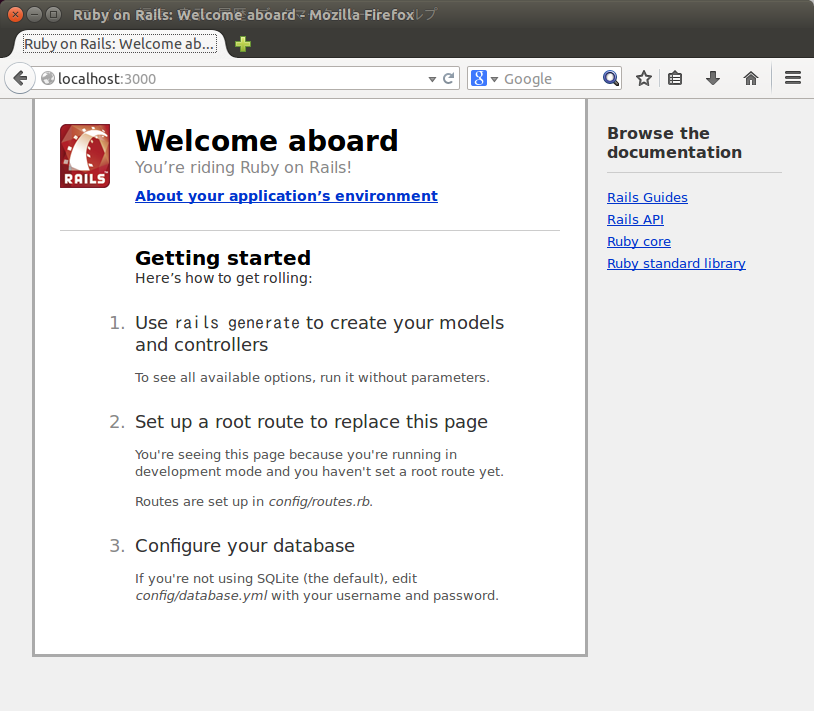
=> Booting WEBrick
=> Rails 4.1.4 application starting in development on http://0.0.0.0:3000
=> Run `rails server -h` for more startup options
=> Notice: server is listening on all interfaces (0.0.0.0). Consider using 127.0.0.1 (--binding option)
=> Ctrl-C to shutdown server
[2014-07-06 06:31:57] INFO WEBrick 1.3.1
[2014-07-06 06:31:57] INFO ruby 2.1.1 (2014-02-24) [x86_64-linux]
[2014-07-06 06:31:57] INFO WEBrick::HTTPServer#start: pid=21228 port=3000
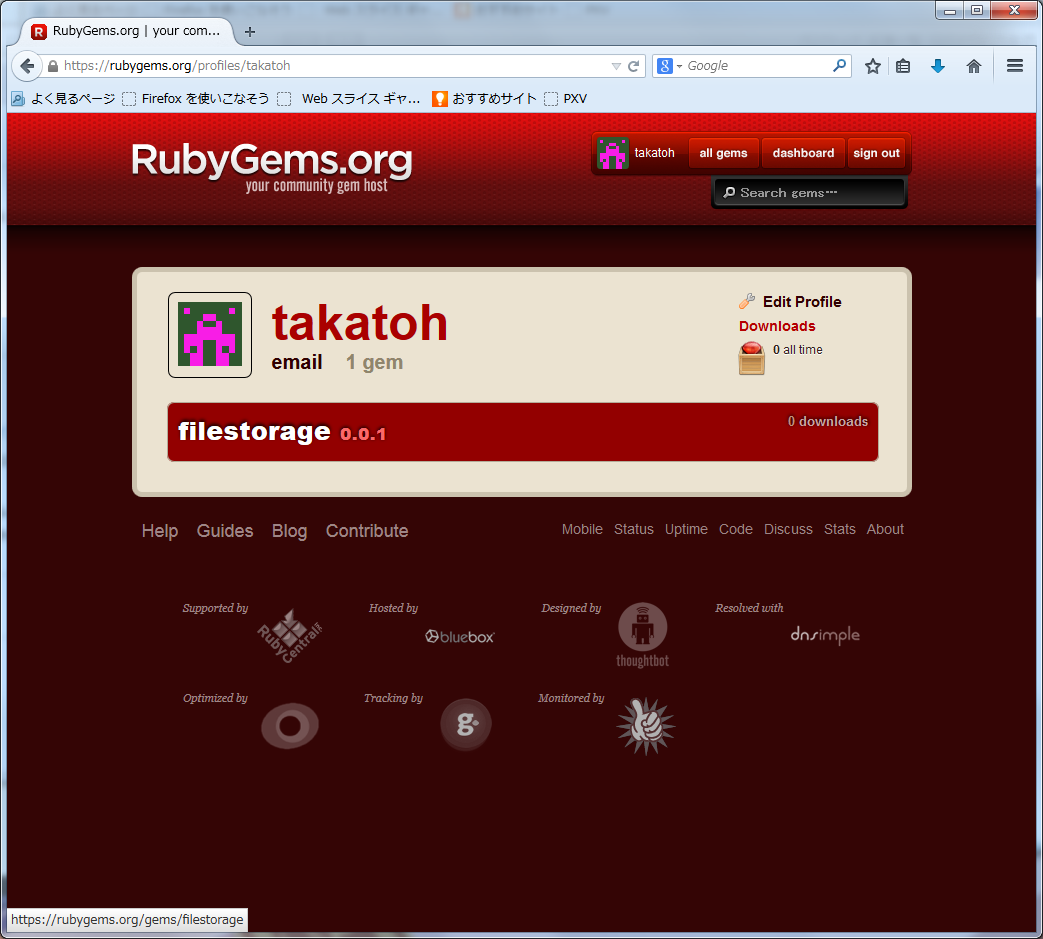
^o^ > bundle gem filestorage
DL is deprecated, please use Fiddle
      create  filestorage/Gemfile
      create  filestorage/Rakefile
      create  filestorage/LICENSE.txt
      create  filestorage/README.md
      create  filestorage/.gitignore
      create  filestorage/filestorage.gemspec
      create  filestorage/lib/filestorage.rb
      create  filestorage/lib/filestorage/version.rb
Initializing git repo in C:/Users/hiro/Documents/tmp/filestorage
warning: LF will be replaced by CRLF in .gitignore.
The file will have its original line endings in your working directory.
warning: LF will be replaced by CRLF in Gemfile.
The file will have its original line endings in your working directory.
warning: LF will be replaced by CRLF in LICENSE.txt.
The file will have its original line endings in your working directory.
warning: LF will be replaced by CRLF in README.md.
The file will have its original line endings in your working directory.
warning: LF will be replaced by CRLF in Rakefile.
The file will have its original line endings in your working directory.
warning: LF will be replaced by CRLF in filestorage.gemspec.
The file will have its original line endings in your working directory.
warning: LF will be replaced by CRLF in lib/filestorage.rb.
The file will have its original line endings in your working directory.
warning: LF will be replaced by CRLF in lib/filestorage/version.rb.
The file will have its original line endings in your working directory.
^o^ > bundle exec rake build
DL is deprecated, please use Fiddle
DL is deprecated, please use Fiddle
filestorage 0.0.1 built to pkg/filestorage-0.0.1.gem.
^o^ > bundle exec rake release
DL is deprecated, please use Fiddle
DL is deprecated, please use Fiddle
filestorage 0.0.1 built to pkg/filestorage-0.0.1.gem.
Tagged v0.0.1.
Pushed git commits and tags.
Pushed filestorage 0.0.1 to rubygems.org.
# encoding: utf-8

require 'pathname'
require 'fileutils'

module Filestorage

  class LocalFilestorage

    def initialize(base_dir)
      @base_dir = Pathname.new(base_dir)
    end

    def store(path, file)
      fullpath = @base_dir + path
      FileUtils.mkdir_p(fullpath.parent)
      if file.instance_of?(Pathname)
        FileUtils.cp(file, fullpath)
      elsif file.instance_of?(File)
        File.open(fullpath, "wb") do |f|
          f.write(file.read)
        end
      else
        File.open(fullpath, "wb") do |f|
          f.write(file)
        end
      end
      path
    end

    def get(path)
      fullpath = @base_dir + path
      File.open(fullpath, "rb")
    end

  end # of class LocalFilestorage

end # of module LocalFilestorage
^o^ > cd Librarian

^o^ > git init
Initialized empty Git repository in C:/Users/hiro/Documents/w/Librarian/.git/

^o^ > git add .
warning: LF will be replaced by CRLF in .gitignore.
The file will have its original line endings in your working directory.
(以下略)

^o^ > git commit -m "First commit."
[master (root-commit) 167a985] First commit.
warning: LF will be replaced by CRLF in .gitignore.
The file will have its original line endings in your working directory.
(以下略)
で、次は scaffold。
^o^ > ruby bin/rails generate scaffold book title volume author
DL is deprecated, please use Fiddle
C:/Ruby200-x64/lib/ruby/gems/2.0.0/gems/tzinfo-1.2.1/lib/tzinfo/data_source.rb:1
82:in `rescue in create_default_data_source': No source of timezone data could b
e found. (TZInfo::DataSourceNotFound)
Please refer to http://tzinfo.github.io/datasourcenotfound for help resolving th
is error.
        from C:/Ruby200-x64/lib/ruby/gems/2.0.0/gems/tzinfo-1.2.1/lib/tzinfo/dat
a_source.rb:179:in `create_default_data_source'
        from C:/Ruby200-x64/lib/ruby/gems/2.0.0/gems/tzinfo-1.2.1/lib/tzinfo/dat
a_source.rb:40:in `block in get'
        from C:/Ruby200-x64/lib/ruby/gems/2.0.0/gems/tzinfo-1.2.1/lib/tzinfo/dat
a_source.rb:39:in `synchronize'
        from C:/Ruby200-x64/lib/ruby/gems/2.0.0/gems/tzinfo-1.2.1/lib/tzinfo/dat
a_source.rb:39:in `get'
        from C:/Ruby200-x64/lib/ruby/gems/2.0.0/gems/tzinfo-1.2.1/lib/tzinfo/tim
ezone.rb:629:in `data_source'
        from C:/Ruby200-x64/lib/ruby/gems/2.0.0/gems/tzinfo-1.2.1/lib/tzinfo/tim
ezone.rb:92:in `get'
        from C:/Ruby200-x64/lib/ruby/gems/2.0.0/gems/tzinfo-1.2.1/lib/tzinfo/tim
ezone_proxy.rb:67:in `real_timezone'
        from C:/Ruby200-x64/lib/ruby/gems/2.0.0/gems/tzinfo-1.2.1/lib/tzinfo/tim
ezone_proxy.rb:30:in `period_for_utc'
        from C:/Ruby200-x64/lib/ruby/gems/2.0.0/gems/tzinfo-1.2.1/lib/tzinfo/tim
ezone.rb:549:in `current_period'
        from C:/Ruby200-x64/lib/ruby/gems/2.0.0/gems/activesupport-4.1.1/lib/act
ive_support/core_ext/object/try.rb:45:in `public_send'
        from C:/Ruby200-x64/lib/ruby/gems/2.0.0/gems/activesupport-4.1.1/lib/act
ive_support/core_ext/object/try.rb:45:in `try'
        from C:/Ruby200-x64/lib/ruby/gems/2.0.0/gems/activesupport-4.1.1/lib/act
ive_support/values/time_zone.rb:223:in `utc_offset'
        from C:/Ruby200-x64/lib/ruby/gems/2.0.0/gems/activesupport-4.1.1/lib/act
ive_support/values/time_zone.rb:396:in `block in []'
        from C:/Ruby200-x64/lib/ruby/gems/2.0.0/gems/activesupport-4.1.1/lib/act
ive_support/values/time_zone.rb:396:in `tap'
        from C:/Ruby200-x64/lib/ruby/gems/2.0.0/gems/activesupport-4.1.1/lib/act
ive_support/values/time_zone.rb:396:in `[]'
        from C:/Ruby200-x64/lib/ruby/gems/2.0.0/gems/activesupport-4.1.1/lib/act
ive_support/core_ext/time/zones.rb:60:in `find_zone!'
        from C:/Ruby200-x64/lib/ruby/gems/2.0.0/gems/activesupport-4.1.1/lib/act
ive_support/railtie.rb:20:in `block in '
        from C:/Ruby200-x64/lib/ruby/gems/2.0.0/gems/railties-4.1.1/lib/rails/in
itializable.rb:30:in `instance_exec'
        from C:/Ruby200-x64/lib/ruby/gems/2.0.0/gems/railties-4.1.1/lib/rails/in
itializable.rb:30:in `run'
        from C:/Ruby200-x64/lib/ruby/gems/2.0.0/gems/railties-4.1.1/lib/rails/in
itializable.rb:55:in `block in run_initializers'
        from C:/Ruby200-x64/lib/ruby/2.0.0/tsort.rb:150:in `block in tsort_each'

        from C:/Ruby200-x64/lib/ruby/2.0.0/tsort.rb:183:in `block (2 levels) in
each_strongly_connected_component'
        from C:/Ruby200-x64/lib/ruby/2.0.0/tsort.rb:219:in `each_strongly_connec
ted_component_from'
        from C:/Ruby200-x64/lib/ruby/2.0.0/tsort.rb:182:in `block in each_strong
ly_connected_component'
        from C:/Ruby200-x64/lib/ruby/2.0.0/tsort.rb:180:in `each'
        from C:/Ruby200-x64/lib/ruby/2.0.0/tsort.rb:180:in `each_strongly_connec
ted_component'
        from C:/Ruby200-x64/lib/ruby/2.0.0/tsort.rb:148:in `tsort_each'
        from C:/Ruby200-x64/lib/ruby/gems/2.0.0/gems/railties-4.1.1/lib/rails/in
itializable.rb:54:in `run_initializers'
        from C:/Ruby200-x64/lib/ruby/gems/2.0.0/gems/railties-4.1.1/lib/rails/ap
plication.rb:288:in `initialize!'
        from C:/Users/hiro/Documents/w/Librarian/config/environment.rb:5:in `'
        from C:/Ruby200-x64/lib/ruby/gems/2.0.0/gems/railties-4.1.1/lib/rails/ap
plication.rb:264:in `require'
        from C:/Ruby200-x64/lib/ruby/gems/2.0.0/gems/railties-4.1.1/lib/rails/ap
plication.rb:264:in `require_environment!'
        from C:/Ruby200-x64/lib/ruby/gems/2.0.0/gems/railties-4.1.1/lib/rails/co
mmands/commands_tasks.rb:147:in `require_application_and_environment!'
        from C:/Ruby200-x64/lib/ruby/gems/2.0.0/gems/railties-4.1.1/lib/rails/co
mmands/commands_tasks.rb:133:in `generate_or_destroy'
        from C:/Ruby200-x64/lib/ruby/gems/2.0.0/gems/railties-4.1.1/lib/rails/co
mmands/commands_tasks.rb:51:in `generate'
        from C:/Ruby200-x64/lib/ruby/gems/2.0.0/gems/railties-4.1.1/lib/rails/co
mmands/commands_tasks.rb:40:in `run_command!'
        from C:/Ruby200-x64/lib/ruby/gems/2.0.0/gems/railties-4.1.1/lib/rails/co
mmands.rb:17:in `'
        from bin/rails:4:in `require'
        from bin/rails:4:in `'
^o^ > ruby bin/bundle install
DL is deprecated, please use Fiddle
Using rake 10.3.2
Using i18n 0.6.9
Using json 1.8.1
Using minitest 5.3.5
Using thread_safe 0.3.4
Using tzinfo 1.2.1
Using activesupport 4.1.1
Using builder 3.2.2
Using erubis 2.7.0
Using actionview 4.1.1
Using rack 1.5.2
Using rack-test 0.6.2
Using actionpack 4.1.1
Using mime-types 1.25.1
Using polyglot 0.3.5
Using treetop 1.4.15
Using mail 2.5.4
Using actionmailer 4.1.1
Using activemodel 4.1.1
Using arel 5.0.1.20140414130214
Using activerecord 4.1.1
Using coffee-script-source 1.7.0
Using execjs 2.2.1
Using coffee-script 2.2.0
Using thor 0.19.1
Using railties 4.1.1
Using coffee-rails 4.0.1
Using hike 1.2.3
Using multi_json 1.10.1
Using jbuilder 2.1.1
Using jquery-rails 3.1.1
Using bundler 1.6.3
Using tilt 1.4.1
Using sprockets 2.11.0
Using sprockets-rails 2.1.3
Using rails 4.1.1
Using rdoc 4.1.1
Using sass 3.2.19
Using sass-rails 4.0.3
Using sdoc 0.4.0
Using sqlite3 1.3.9
Using turbolinks 2.2.2
Using uglifier 2.5.1
Your bundle is complete!
Use `bundle show [gemname]` to see where a bundled gem is installed.
^o^ > ruby bin/rails generate scaffold book title volume author
DL is deprecated, please use Fiddle
C:/Ruby200-x64/lib/ruby/gems/2.0.0/gems/tzinfo-1.2.1/lib/tzinfo/data_source.rb:1
82:in `rescue in create_default_data_source': No source of timezone data could b
e found. (TZInfo::DataSourceNotFound)
Please refer to http://tzinfo.github.io/datasourcenotfound for help resolving th
is error.
        from C:/Ruby200-x64/lib/ruby/gems/2.0.0/gems/tzinfo-1.2.1/lib/tzinfo/dat
a_source.rb:179:in `create_default_data_source'
        from C:/Ruby200-x64/lib/ruby/gems/2.0.0/gems/tzinfo-1.2.1/lib/tzinfo/dat
a_source.rb:40:in `block in get'
        from C:/Ruby200-x64/lib/ruby/gems/2.0.0/gems/tzinfo-1.2.1/lib/tzinfo/dat
a_source.rb:39:in `synchronize'
        from C:/Ruby200-x64/lib/ruby/gems/2.0.0/gems/tzinfo-1.2.1/lib/tzinfo/dat
a_source.rb:39:in `get'
        from C:/Ruby200-x64/lib/ruby/gems/2.0.0/gems/tzinfo-1.2.1/lib/tzinfo/tim
ezone.rb:629:in `data_source'
        from C:/Ruby200-x64/lib/ruby/gems/2.0.0/gems/tzinfo-1.2.1/lib/tzinfo/tim
ezone.rb:92:in `get'
        from C:/Ruby200-x64/lib/ruby/gems/2.0.0/gems/tzinfo-1.2.1/lib/tzinfo/tim
ezone_proxy.rb:67:in `real_timezone'
        from C:/Ruby200-x64/lib/ruby/gems/2.0.0/gems/tzinfo-1.2.1/lib/tzinfo/tim
ezone_proxy.rb:30:in `period_for_utc'
        from C:/Ruby200-x64/lib/ruby/gems/2.0.0/gems/tzinfo-1.2.1/lib/tzinfo/tim
ezone.rb:549:in `current_period'
        from C:/Ruby200-x64/lib/ruby/gems/2.0.0/gems/activesupport-4.1.1/lib/act
ive_support/core_ext/object/try.rb:45:in `public_send'
        from C:/Ruby200-x64/lib/ruby/gems/2.0.0/gems/activesupport-4.1.1/lib/act
ive_support/core_ext/object/try.rb:45:in `try'
        from C:/Ruby200-x64/lib/ruby/gems/2.0.0/gems/activesupport-4.1.1/lib/act
ive_support/values/time_zone.rb:223:in `utc_offset'
        from C:/Ruby200-x64/lib/ruby/gems/2.0.0/gems/activesupport-4.1.1/lib/act
ive_support/values/time_zone.rb:396:in `block in []'
        from C:/Ruby200-x64/lib/ruby/gems/2.0.0/gems/activesupport-4.1.1/lib/act
ive_support/values/time_zone.rb:396:in `tap'
        from C:/Ruby200-x64/lib/ruby/gems/2.0.0/gems/activesupport-4.1.1/lib/act
ive_support/values/time_zone.rb:396:in `[]'
        from C:/Ruby200-x64/lib/ruby/gems/2.0.0/gems/activesupport-4.1.1/lib/act
ive_support/core_ext/time/zones.rb:60:in `find_zone!'
        from C:/Ruby200-x64/lib/ruby/gems/2.0.0/gems/activesupport-4.1.1/lib/act
ive_support/railtie.rb:20:in `block in '
        from C:/Ruby200-x64/lib/ruby/gems/2.0.0/gems/railties-4.1.1/lib/rails/in
itializable.rb:30:in `instance_exec'
        from C:/Ruby200-x64/lib/ruby/gems/2.0.0/gems/railties-4.1.1/lib/rails/in
itializable.rb:30:in `run'
        from C:/Ruby200-x64/lib/ruby/gems/2.0.0/gems/railties-4.1.1/lib/rails/in
itializable.rb:55:in `block in run_initializers'
        from C:/Ruby200-x64/lib/ruby/2.0.0/tsort.rb:150:in `block in tsort_each'

        from C:/Ruby200-x64/lib/ruby/2.0.0/tsort.rb:183:in `block (2 levels) in
each_strongly_connected_component'
        from C:/Ruby200-x64/lib/ruby/2.0.0/tsort.rb:219:in `each_strongly_connec
ted_component_from'
        from C:/Ruby200-x64/lib/ruby/2.0.0/tsort.rb:182:in `block in each_strong
ly_connected_component'
        from C:/Ruby200-x64/lib/ruby/2.0.0/tsort.rb:180:in `each'
        from C:/Ruby200-x64/lib/ruby/2.0.0/tsort.rb:180:in `each_strongly_connec
ted_component'
        from C:/Ruby200-x64/lib/ruby/2.0.0/tsort.rb:148:in `tsort_each'
        from C:/Ruby200-x64/lib/ruby/gems/2.0.0/gems/railties-4.1.1/lib/rails/in
itializable.rb:54:in `run_initializers'
        from C:/Ruby200-x64/lib/ruby/gems/2.0.0/gems/railties-4.1.1/lib/rails/ap
plication.rb:288:in `initialize!'
        from C:/Users/hiro/Documents/w/Librarian/config/environment.rb:5:in `'
        from C:/Ruby200-x64/lib/ruby/gems/2.0.0/gems/railties-4.1.1/lib/rails/ap
plication.rb:264:in `require'
        from C:/Ruby200-x64/lib/ruby/gems/2.0.0/gems/railties-4.1.1/lib/rails/ap
plication.rb:264:in `require_environment!'
        from C:/Ruby200-x64/lib/ruby/gems/2.0.0/gems/railties-4.1.1/lib/rails/co
mmands/commands_tasks.rb:147:in `require_application_and_environment!'
        from C:/Ruby200-x64/lib/ruby/gems/2.0.0/gems/railties-4.1.1/lib/rails/co
mmands/commands_tasks.rb:133:in `generate_or_destroy'
        from C:/Ruby200-x64/lib/ruby/gems/2.0.0/gems/railties-4.1.1/lib/rails/co
mmands/commands_tasks.rb:51:in `generate'
        from C:/Ruby200-x64/lib/ruby/gems/2.0.0/gems/railties-4.1.1/lib/rails/co
mmands/commands_tasks.rb:40:in `run_command!'
        from C:/Ruby200-x64/lib/ruby/gems/2.0.0/gems/railties-4.1.1/lib/rails/co
mmands.rb:17:in `'
        from bin/rails:4:in `require'
        from bin/rails:4:in `'
^o^ > gem install tzinfo-data
Fetching: tzinfo-data-1.2014.5.gem (100%)
Successfully installed tzinfo-data-1.2014.5
Parsing documentation for tzinfo-data-1.2014.5
Installing ri documentation for tzinfo-data-1.2014.5
Done installing documentation for tzinfo-data after 3 seconds
1 gem installed
よし、インストールできた。これで大丈夫だろう。
^o^ > ruby bin/rails generate scaffold book title volume author
DL is deprecated, please use Fiddle
C:/Ruby200-x64/lib/ruby/gems/2.0.0/gems/tzinfo-1.2.1/lib/tzinfo/data_source.rb:1
82:in `rescue in create_default_data_source': No source of timezone data could b
e found. (TZInfo::DataSourceNotFound)
Please refer to http://tzinfo.github.io/datasourcenotfound for help resolving th
is error.
(以下略)
だめだ~!ちゃんと tzinfo-data はインストールできてるのに何で見つからないんだ。
もしかして Ruby 2.0.0 と Rails 4.1.1 って相性が悪いのか?
追記(2014/07/01)
昨日ダメだった Rails だけど、今日会社の PC (Windows7 32bit、Ruby 2.0.0 32bit)でこっそりやってみたらあっさりとうまくいってしまった。64bit版がダメだってこと?
^o^ > mkdir image_server

^o^ > cd image_server

^o^ > npm init
This utility will walk you through creating a package.json file.
It only covers the most common items, and tries to guess sane defaults.

See `npm help json` for definitive documentation on these fields
and exactly what they do.

Use `npm install  --save` afterwards to install a package and
save it as a dependency in the package.json file.

Press ^C at any time to quit.
name: (image_server)
version: (0.0.0) 0.0.1
description:
entry point: (index.js) server.js
test command:
git repository:
keywords:
author: takatoh
license: (ISC)
About to write to C:\Users\hiro\Documents\w\image_server\package.json:

{
  "name": "image_server",
  "version": "0.0.1",
  "description": "",
  "main": "server.js",
  "scripts": {
    "test": "echo \"Error: no test specified\" && exit 1"
  },
  "author": "takatoh",
  "license": "ISC"
}


Is this ok? (yes) yes
いくつか質問に答えると、プロジェクトの雛形が完成。この時点でフォルダの構成はこうなっている。
^o^ > tree /F
フォルダー パスの一覧:  ボリューム OS
ボリューム シリアル番号は FE2A-F7C6 です
C:.
    package.json

サブフォルダーは存在しません
package.json というファイルがあるだけだね。 次は依存するパッケージのインストール。今回はリクエストに応じて送信するファイルの MIME TYPE を調べるために、mime というパッケージを利用する。これを package.json に追加する。
var http = require("http");
var fs = require("fs");
var url = require("url");
var mime = require("mime");

server = http.createServer(function(request, response) {
  var path = url.parse(request.url).pathname;
  console.log(path);
  var mimetype = mime.lookup(path);
  var filepath = "./images" + path;
  fs.readFile(filepath, function (err, data) {
    if (err) {
      response.writeHead(404, {"Content-Type" : "text/plain"});
      response.write("File not found.");
      response.end();
    } else {
      response.writeHead(200, {"Content-Type" : mimetype});
      response.write(data);
      response.end();
    }
  });
});

console.log("Start server on port 8888.");
server.listen(8888);